Convert to PDF with PDF Creator Plus
Quickly and easily convert to PDF from any file you can print with this budget-friendly and hassle-free PDF creation software. With many extra features not found in other PDF creator software products, PDF Creator Plus is an affordable solution for converting to Adobe PDF from any Windows application that supports printing.
All the Features You Need
- Convert Word, Excel, Photoshop, and any other files to PDF documents by printing to the PDF Creator Plus 8 printer.
- Easily combine multiple files from different applications into a single PDF using the preview features in the PDF Creator Plus app.
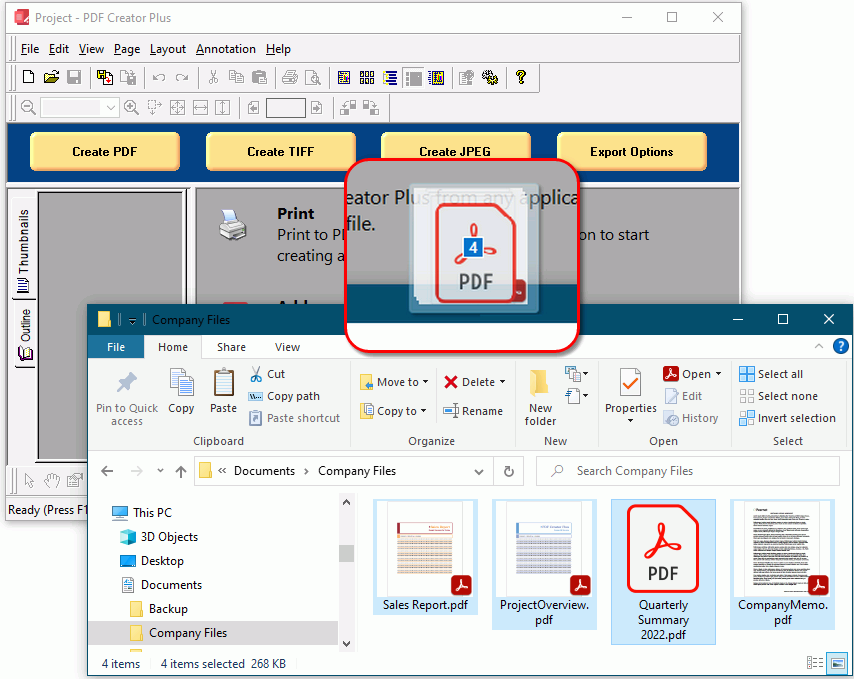
- Drag and drop PDF files to quickly add them to your new PDF file.
- Add, move, and delete unwanted pages before creating your PDF to get the exact PDF you want.
- Use the included annotation features to add notes, graphics, and hyperlinks to your PDF.
- More than just PDF, PDF Creator Plus can also create TIFF, JPEG, and BMP images.
How to Convert to PDF with PDF Creator Plus
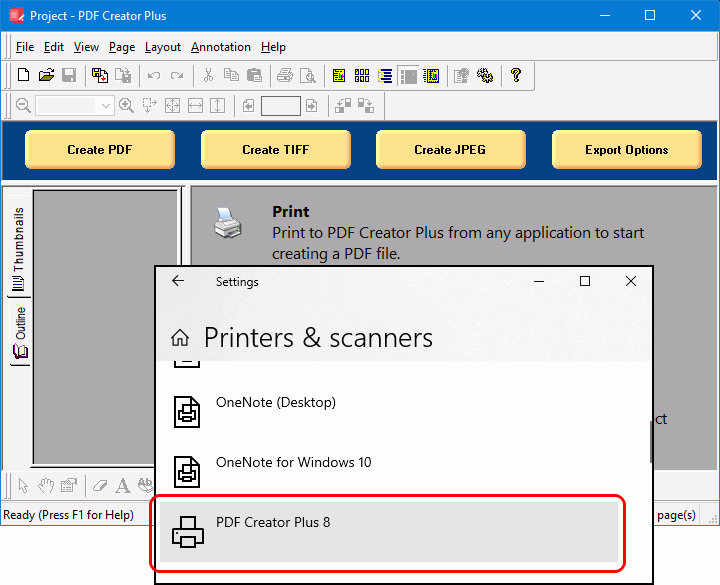
Download and install a free trial to try it out, or install and activate your purchased copy. The setup program installs the PDF Creator Plus app and PDF Creator Plus 8 virtual printer on your computer.
PDF Creator Plus converts files to PDF by printing to the PDF Creator Plus 8 virtual printer instead of your regular printer.
Combining the virtual printer with the PDF Creator Plus app allows you to convert to PDF from a single document or many different documents from different applications.
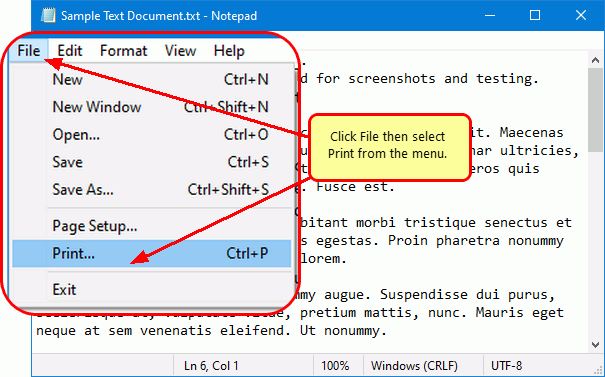
To start, open your document in its native application. For example, if it’s a text file, open it in Notepad, as shown below. You would open a Word document in Microsoft Word or an Excel spreadsheet in Microsoft Excel. In the same vein, open and print images with Windows Photos, and so on. Then, select File – Print from the application menu to start adding pages to your PDF.
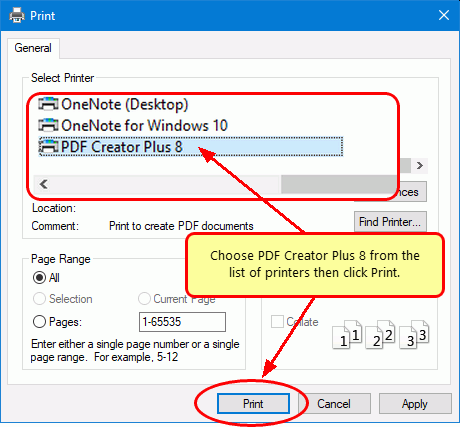
On the Print dialog, pick PDF Creator Plus 8 from the printer options and then proceed by clicking the Print button.
To add PDF files, import them directly into the PDF Creator Plus app. You can also drag and drop them onto the PDF Creator Plus app to easily add them to your new PDF file.
Working With Files in the PDF Creator Plus PDF
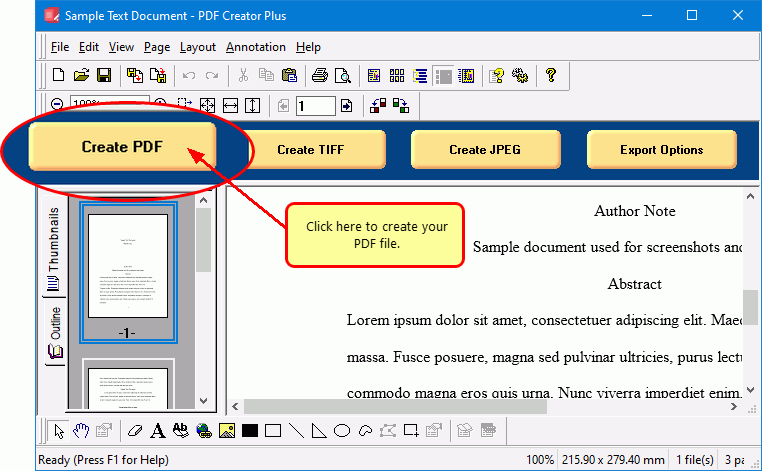
PDF Creator Plus will display the collected pages from PDF files and printed pages from your other files. Continue printing files or dropping PDF files to add more pages.
In the app, you can use the included tools to annotate the pages with text, shape, and images. You can also add, move, rotate, and delete unwanted pages before creating your PDF file.
Printed documents do not keep any outline or hyperlink information. See Creating An Outline/Bookmarks in PDF Creator to learn how to add outline information to your pages before creating your PDF. For hyperlinks, see our article How do I add a hyperlink to a PDF Creator Plus project.
When all pages have been added, click on the Create PDF button to convert to PDF.
Save to Convert to PDF
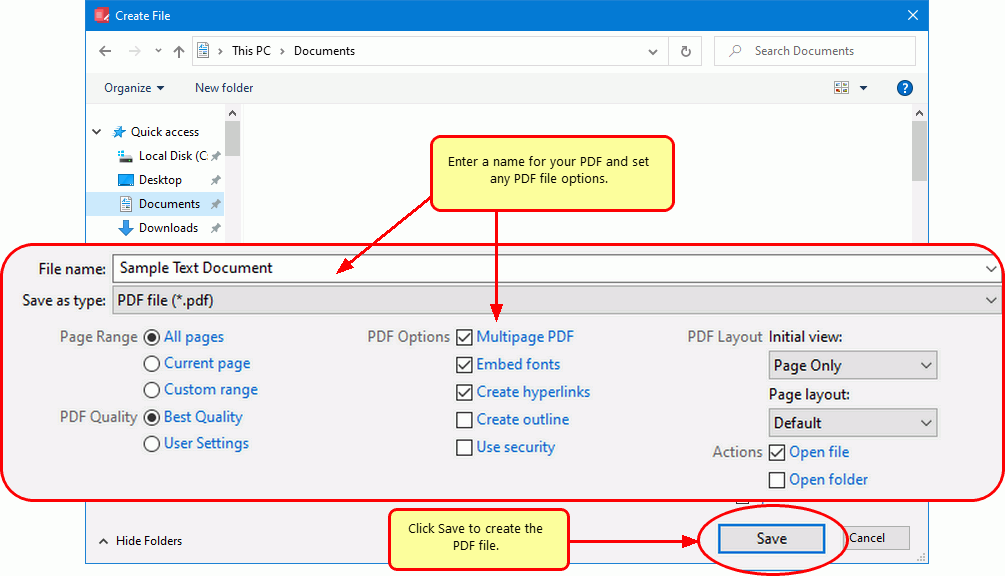
In the Create File dialog, edit the name for your new PDF file and choose where to save it. Next, choose options for your PDF file:
- Select PDF file (*.pdf) as the Save as type.
- Check the Multipaged PDF and Embed fonts options.
- If you added hyperlinks or outline information annotations by hand, check the options for Create hyperlinks, Create outlines, or both.
- Keep the Open file option enabled to open PDF automatically upon creation.
The last step is to click the Save button to convert to PDF.
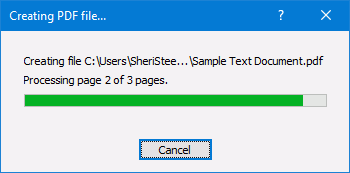
A progress dialog will appear as PDF Creator Plus converts your pages to PDF. If you need to change your PDF, use the Cancel button to stop the process, update your pages, and start again.
