
Add Bookmarks to PDF with PDF Creator Plus
Want to add bookmarks to PDF but not sure how to add them? We’ll show you how to add bookmarks to your PDF and how to use the bookmarks to create a table of contents. Bookmarks make it easier for your readers to find the information they need.
In PDF Creator Plus, you can add bookmarks and create a table of contents using the Outline and Hyperlink tools in the Annotation toolbar. As an illustration, have added a PDF file and a PowerPoint presentation to a PDF Creator Plus project. We will add bookmarks to our pages and create a table of contents with hyperlinks to the start of each document.
Gather All Your Pages
First, gather all your pages into a PDF Creator Plus project. Printing the documents in the order desired for the final PDF is the easiest option. If you need to change the order of the pages, the thumbnail view allows you to add, delete, and reorganize the pages as needed.
In our example, the first step is to open a PDF file in PDF Creator Plus. The next step is printing a PowerPoint presentation to the PDF Creator Plus 8 printer to finish gathering all our pages in a PDF Creator Plus project.

Add Bookmarks to PDF on Each Page
Now, we will add bookmarks to our PDF. We want to add a bookmark to the first page of each document. To do so, select the first page of the first document in the thumbnail view.
Click the Outline annotation tool, and with the mouse pointer, draw a rectangle around the area on the page where you want the bookmark. This selected area can be around an image, a line of text, or even some white space on the page. Here, we are drawing our rectangle around some text at the top of the page. It shows as a dotted red rectangle; this rectangle does not appear in the final output.

Press Enter to edit the selected bookmark properties. The outline tool can create headings or bookmarks in your PDF. Here, we want a bookmark that we can link to from the table of contents. To create one, set the Heading level to None and enter a name for your bookmark. The dotted rectangle will now be green for a bookmark instead of red for a heading.
Repeat this step for the first page of the second document to create the second bookmark in your PDF.

You can select and edit the properties of the bookmarks in your PDF at any time. You can also see all your bookmarks in the Outline tab within the PDF Creator Plus project. Clicking each one will take you to that bookmark for easy editing.

Creating the Table of Contents Page
For the table of contents, you have two choices. You can insert a blank page before the first page in your PDF and use the Text annotation tool to build the table of contents and link to the bookmarks. Alternatively, you can create the text in another application, print that page, and insert it at the beginning of your project.
Here, we added a blank page and used the Text annotation tool to add the table of contents. To do this, right-click on the first page and select Insert Blank Page – Before.

Use the Text annotation tool to add your table of contents text to the blank page. After the text is entered, each text block can be edited to change the font, style, color, and border. The alignment tools under the Layout menu allow for aligning and positioning the text elements on the page.

Adding PDF Bookmarks to a Table of Contents
We are ready to hook the text for our table of contents with the PDF bookmarks we created on each page.
Select the first text annotation on the page and hit Enter to show the Properties dialog. In the Properties dialog, go to the Hyperlink tab. Choose the option, Link to a location in the file, then click Browse to list the bookmarks and select your first bookmark. Click OK and then Apply to save the changes. Repeat these steps for the other lines in your table of contents.

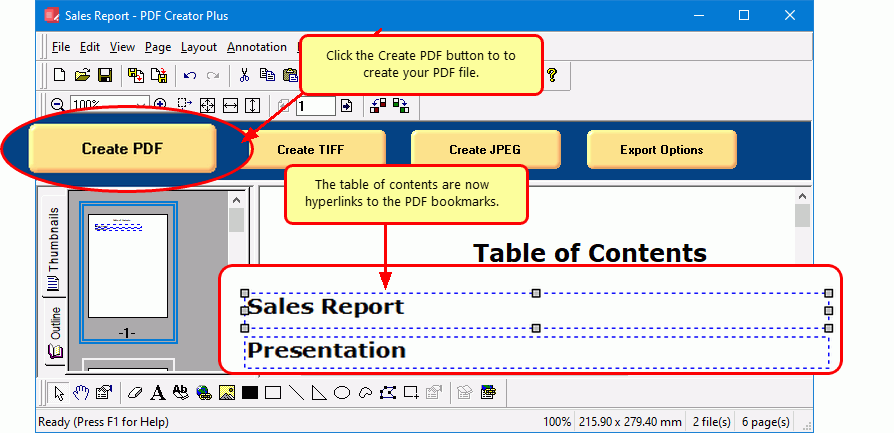
When you are finished, your table of contents lines are now shown with a blue dotted rectangle. This means they are hyperlinks. The dotted rectangle does not show in the final PDF.
You have successfully added bookmarks to your PDF and are ready to create the file. Click the Create PDF button to start.
Save to Add Bookmarks to PDF
In the Create File dialog, edit the name for your new PDF file and choose where to save it. Next, choose options for your PDF file:
- Select PDF file (*.pdf) as the Save as type.
- Check the Multipaged PDF and Embed fonts options.
- Enable the Create hyperlinks and Create outlines options to include our PDF bookmarks and table of contents in the PDF file.
- Click the Save button to create your PDF file with added bookmarks.

While PDF Creator Plus creates your PDF with bookmarks, a progress dialog with a cancel option will appear on the screen. Upon creation, your PDF file will automatically open if you have chosen the ‘Open File’ action.

