PNSrv11Lib to PNSrv12Lib: Migration Made Easy
Should I migrate my code from PNSrv11Lib to PNSrv12Lib? Jumping to a new software version can feel like a leap into the unknown. You weigh the allure of new features, updated security, and performance enhancements against the time and cost of upgrading software, changing existing code, and retesting workflows.

With this in mind, our latest TIFF Image Printer, PDF Image Printer, and Raster Image Printer, version 12.0.027, includes targeted changes to the PNSrv12Lib COM API to make it easier to update to the new version.
First, we added a new compatibility mode flag to the API. This new mode tells the printer driver to behave exactly like the previous version, version 11. The printer ignores the conversion profiles and file naming changes introduced in version 12 when in this mode. Second, we reinstated most COM API calls we initially deprecated in version 12, further reducing any code changes needed. When moving from PNSrv11Lib to PNSrv12Lib, these updates are crucial.
The rest of this article outlines the steps needed when migrating from PNSrv11Lib to PNSrv12Lib. The first step is to update your project references in your code. After that, we have two sections. The first will walk you through migrating to PNSrv12Lib using the version 11 compatibility mode. In the second, we discuss updating your code to use the conversion profiles and take advantage of the new features introduced in version 12.
What You’ll Learn:
Updating PNSrv11Lib Project References and using Statements
After installing TIFF Image Printer 12 (etc.), your first step is to replace your reference to PNSrv11Lib with PNSrv12Lib in your project or solution. You can leave both references in the project if you have both versions of the printer installed and want to compare and refer to the older code as you go, aiding in the migration from PNSrv11Lib to PNSrv12Lib.
How you delete a reference from your project will depend on your project type. Here, we show a sample project written in C# in Visual Studio. Again, skip this step to allow your program to switch between the two versions for comparison as you migrate.

To add the new PNSrv12Lib COM API to your C# project, right-click the References node and choose the Add Reference option from the context menu.
The Reference Manager lists assemblies, projects, and COM objects you can add and use in your programs. PNSrv12Lib is a COM API, so choose COM and search for and add PNSrv12 1.0 Type Library.

The last step to connect with the new COM API is adding or replacing your using or import statements to reflect the latest version.
// Update to use the new version
//using PNSrv11Lib
using PNSrv12Lib;
We are now ready to decide whether to keep our current code and use the compatibility mode or fully update PNSrv11Lib to PNSrv12Lib.
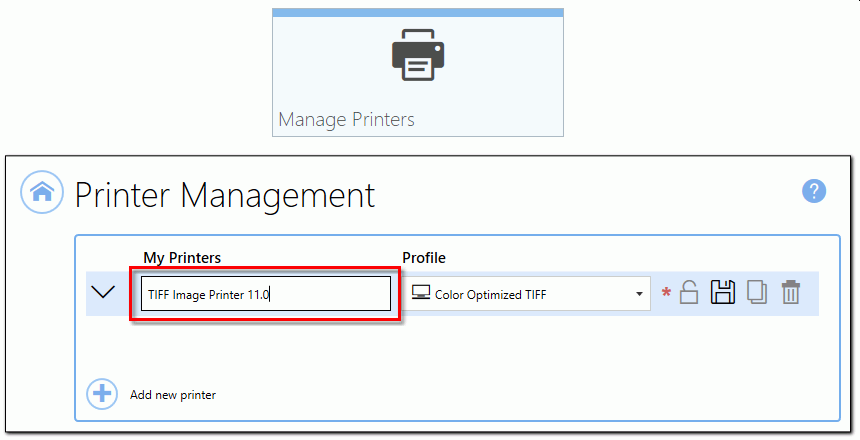
Migrating with Version 11 Compatibility
Introduced with version 12.0.027, this is the fastest migration path with the least amount of code change for users with existing code. This mode will enable you to move from PNSrv11Lib to PNSrv12Lib and supports save options, file naming, and advanced file naming formatting settings from the earlier versions of the printer.
Do I Need to Use the PNSrv11Lib Compatibility Mode?
f you were calling any of the following methods, we recommend using the compatibility mode to upgrade.
- SetFileNamingOptions
- SetSaveOptions (this is now SetV11SaveOptions)
- Setting any of the following properties using the SetProperty method:
- Save;Overwrite
- Save;Use JobID
- Any settings in the Advanced File Naming section
Update SetSessionPrinter
SetSessionPrinter has several new arguments, and it now needs to use the name of the version 12 printer instead of version 11.
The first new argument you need to pass is the process ID of your application. The PNSrv12Lib object uses this to track your running process and ensures clean up of all references to the COM objects your application creates if your process unexpectedly crashes.
The second new argument is optional. For easy recognition, you can now add a custom prefix to the GUID-named printers in your PNSrv12Lib printer pool. Pass this as an empty string to keep the same GUID-named printer pool as in PNSrv11Lib.
The last new argument is the path to a version 12 conversion profile. For this migration path, we can ignore this and pass it as an empty string.
PNSession session = new PNSession();
int pID = Process.GetCurrentProcess().Id;

// Migrating from version 11 without a profile
session.SetSessionPrinter(pID, "TIFF Image Printer 12", 2, "Converter-","");
Add SetV11CompatibilityModeEnabled
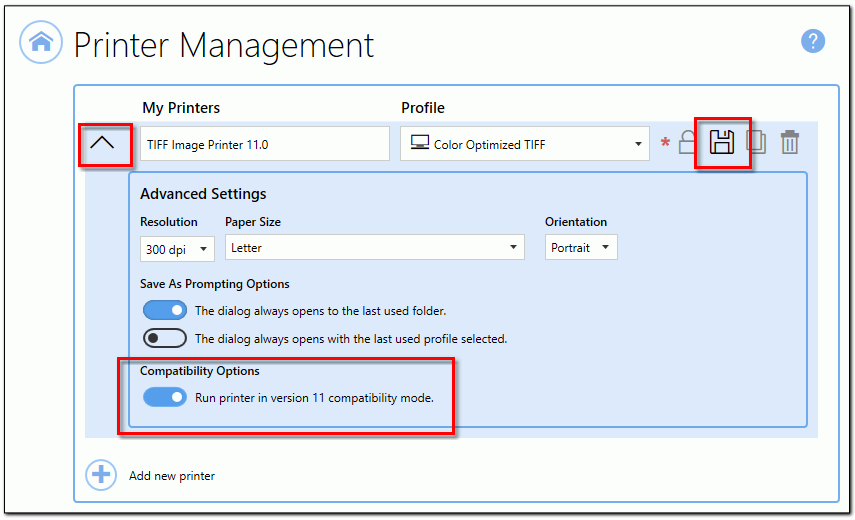
Next, we must enable compatibility mode by calling SetV11CompatibilityModeEnabled and passing true. When enabled, the printer looks for and uses the file naming defaults and settings from version 11 instead of the enhanced file naming styles introduced in PNSrv12Lib.
PNSession session = new PNSession();
int pID = Process.GetCurrentProcess().Id;

// Migrating from version 11 without a profile
session.SetSessionPrinter(pID, "TIFF Image Printer 12", 2, "Converter-","");

// Turn on compatibility mode
session.SetV11CompatibilityModeEnabled(true);
Lock the Print Job in the Print Queue
In PNSrv12Lib, the default behavior is to have the print job leave the queue as soon as possible. Previously, the print job stayed in the print queue while creating the file. If your automation coding relies on or looks for the print job to be in the print queue, use the SetPrinterWaitForJobCompletion method to switch back to the old queueing behavior.
PNSession session = new PNSession();
int pID = Process.GetCurrentProcess().Id;

// Migrating from version 11 without a profile
session.SetSessionPrinter(pID, "TIFF Image Printer 12", 2, "Converter-","");

// Turn on compatibility mode
session.SetV11CompatibilityModeEnabled(true);

// Lock print job in the print queue while creating file
session.SetPrinterWaitForJobCompletion(true);
Change SetSaveOptions to SetV11SaveOptions
The method SetSaveOptions was changed in PNSrv12Lib to use the new options for handling overwrite scenarios where a file of the same name already exists for the file you are creating. For clients using this method in PNSrv11Lib, we added SetV11SaveOptions to provide the same behavior. To update your code, it’s a simple find and replace action to change to the new name.
PNSession session = new PNSession();
int pID = Process.GetCurrentProcess().Id;

// Migrating from version 11 without a profile
session.SetSessionPrinter(pID, "TIFF Image Printer 12", 2, "Converter-","");

// Turn on compatibility mode
session.SetV11CompatibilityModeEnabled(true);

// Lock print job in the print queue while creating file
session.SetPrinterWaitForJobCompletion(true);

// set the print job properties
// Reduce to black and white, dithering set to Halftone, use G4 compression
// set name and save location, create multipage tiff and append all into
// a single file. Don't use jobid, don't prompt, always overwrite
//session.SetSaveOptions("C:\Output", "Report", pnOutputFileFormatTIFFMultipaged, true,
//                     pnColorReductionBlackAndWhite, pnDitheringHalftone, false, false,
//                     true, true, true, false);
session.SetV11SaveOptions("C:\Output", "Report", pnOutputFileFormatTIFFMultipaged, true,
                          pnColorReductionBlackAndWhite, pnDitheringHalftone, false, false,
                          true, true, true, false);
Turn Off Antialiasing
Antialiasing smooths the edges and reduces the jagged look of lines, shapes, letters, and images. This is a feature that is new for version 12, and is on by default. To create images similar to version 11, you may need to turn this feature off. Note also that antialiasing can add extra information in the output file, which can cause larger files. You can control this option by setting the property using the SetProperty method.
// Turn off font antialiasing to reproduce version 11 font rendering
session.SetProperty("Save", "AntialiasingEnabled", 0);
Update NewPrintSessionEx to NewPrintSession
This change is not specific to enabling version 11 compatibility mode, but you may see compilation errors if your code calls NewPrintSessionEx. We removed NewPrintSessionEx and replaced it with NewPrintSession with an updated argument list.
IPNPrintSession _printSession = null;

// The method has been removed.
//_printSession = _session.NewPrintSessionEx(5000, 60000, 5000, 0);

// Use NewPrintSssion instead, it has the same arguments now.
_printSession = _session.NewPrintSession(5000, 60000, 5000, 0);
Updating PNSrv11Lib to PNSrv12Lib with Conversion Profiles
New in PNSrv12Lib, a conversion profile is similar to our printer script file in that it contains all your conversion settings, from custom file names and desired output type to compression and many other options. Unlike the script file, it is not editable on the fly. A conversion profile provides a custom set of base settings.
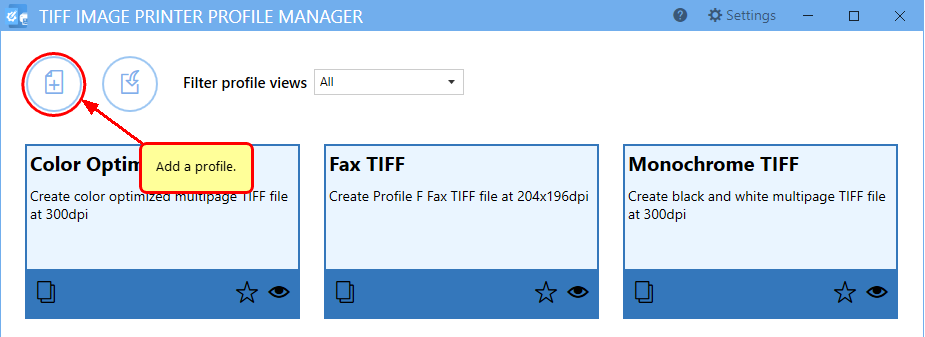
Creating a Conversion Profile
You can create custom conversion profiles using the Profile Manager and export them to use in your program. Conversion profiles include many features new for version 12, including the following:
- Filenames using unique IDs, prefix and suffix terms, page numbers, and date and time strings as part of the name.
- Stamping to add text, images, page numbering, and date and time information to your pages.
- Use our new Email and SMS notifications to alert you of successful or failed operations.
- Built in ZIP action to compress all created files into a single archive.
When your PNSrv11Lib code processes files with mostly identical settings, a conversion profile in PNSrv12Lib will simplify your code. Instead of setting all your conversion properties through calls using multiple methods, you only need to provide a conversion profile containing your base settings when you call SetSessionPrinter.
Setting the Profile with SetSessionPrinter
In addition to taking the path to a conversion profile, SetSessionPrinter has two new arguments: the process ID of your application and an optional custom prefix to use when creating the printers in the PNSrv12Lib printer pool.
The PNSrv12Lib session object requires your application process ID to track all COM object references you create and provide proper garbage collection and cleanup if your application crashes unexpectedly. This argument is not optional.
When supplied, the optional printer name prefix can make recognizing printers that are part of your application’s printer pool easier, especially when you have more than one application automating printing and converting using our PNSrv12Lib COM API. You can pass an empty string if you do not want to add a prefix to the printer names.
The last new argument is the path to your version 12 conversion profile. To use the printer’s default settings, pass an empty string.
PNSession session = new PNSession();
int pID = Process.GetCurrentProcess().Id;
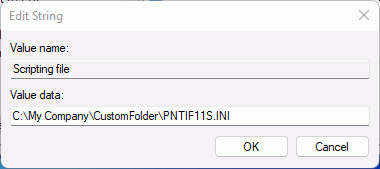
string _pathToFaxProfile = @"C:\PEERNETFiles\FaxTIFF.pntifprofile";
// V11 printer to V12 Set printer, printer pool prefix and use base conversion profile
// _session.SetSessionPrinter( PrinterName, 1, null, false ) ;
session.SetSessionPrinter(pID, "TIFF Image Printer 12", 2, "Converter-", _pathToFaxProfile );Changing Settings Using PNSrv12Lib and Profiles
You can have additional profiles, flip between them using the new SetPrinterProfile method, and update individual properties using the IPNSession property methods just as you did in PNSrv11Lib.
PNSession session = new PNSession();
int pID = Process.GetCurrentProcess().Id;
string _pathToFaxProfile = @"C:\PEERNETFiles\FaxTIFF.pntifprofile";
string _pathToColorProfile = @"C:\PEERNETFiles\ColorTIFF.pntifprofile";

// V11 printer to V12 Set printer, printer pool prefix and use base conversion profile
// _session.SetSessionPrinter( PrinterName, 1, null, false ) ;
session.SetSessionPrinter(pID, "TIFF Image Printer 12", 2, "Converter-", _pathToFaxProfile );

if ( bColorMode ) {
    session.SetPrinterProfile(_pathToColorProfile);
}
Changing the Output File Name and Location
In conversion automation, the conversion settings are often the same, with only the output folder and/or the file name changing each time you convert a file. The SetSaveOutputLocationAndOutputFileName method allows you to dynamically change the output folder and/or filename when printing and converting files.
PNSession session = new PNSession();
int pID = Process.GetCurrentProcess().Id;
string _pathToFaxProfile = @"C:\PEERNETFiles\FaxTIFF.pntifprofile";
string _pathToColorProfile = @"C:\PEERNETFiles\ColorTIFF.pntifprofile";
string _reportsDir = @"C:\PEERNETFiles\Reports";
string _scansDir = @"C:\PEERNETFiles\Scans";

// V11 printer to V12 Set printer, printer pool prefix and use base conversion profile
// _session.SetSessionPrinter( PrinterName, 1, null, false ) ;
session.SetSessionPrinter(pID, "TIFF Image Printer 12", 2, "Converter-", _pathToFaxProfile );

if ( bColorMode ) {
    session.SetPrinterProfile(_pathToColorProfile);
}

if ( bSaveToReports ) {
    session.SetSaveOptionsOutputLocationAndOutputFileName(_reportsDir, "");
}
else {
    session.SetSaveOptionsOutputLocationAndOutputFileName(_scansDir , "");
}
Further Reading
This article has covered the most common migration scenarios for our users. While these examples are a good jumping-off point, more in-depth topics are available at the links below.
- Using .NET and COM API to Automate Printing
- What’s New in PNSrv12Lib
- Getting Started With PNSrv12Lib
- Migrating to PNSrv12Lib
- PNSrv12Lib Object Reference
We also encourage you to explore the sample code included with your printer installation. These automation samples show our recommended best practices and can help you leverage the full power of the PNSrvLib COM API.
The included sample projects are in the COMSamples folder under the printer installation folder. A pre-built demo of each sample is available in a \Demo folder under each project. Happy Coding!