Create TIFF and Extract Text From Images Using OCR
You can use TIFF Image Printer and Raster Image Printer to effortlessly extract text from images by printing your images or scanned PDF documents. With just one step, you can create TIFF images and extract the text from pages into an editable text file, making it easy to modify the content as needed.
If you have a scanned PDF document and need to create searchable PDF files, see Convert PDF to Searchable PDF with OCR instead.
What is OCR?
OCR (Optical Character Recognition) searches for and recognizes text (characters) on scanned pages or images and extracts it as digital text. Outside factors such as image quality, the font used, and any image background on the pages will all affect the quality of the OCR results.
You can save the text output from the OCR process as hOCR, Text, or ALTO files. From the OCR settings, you can choose which type of extracted text file to create from the options in the OCR tab and even generate all of them at once if you want.
We’re using the TIFF Image Printer below to extract text from images, but the steps are the same for the Raster Image Printer. For Raster Image Printer, this works for all output images, TIFF, PNG, JPEG, etc.
Create the Extract Text From Images Profile
To start, open the Dashboard by double-clicking on the desktop shortcut for your printer.
The Dashboard gives you access to license information, printers, and resources, but most importantly, creating, copying, and editing profiles.
Select Edit & Create Profiles to open the Profile Manager to create a new profile.
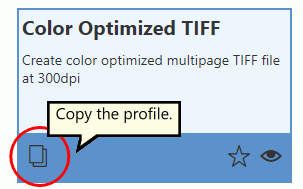
Find the system profile named Color Optimized TIFF. Create a copy of it using the copy icon in the lower left. The same steps we are doing here apply to any system profile. You can also create custom profiles through the Add a profile button.
Configure OCR For The Extract Text From Images Profile
Give your new profile a name and a description. Next, go to the OCR tab and turn on OCR (Optical Character Recognition). Running OCR on each page can be a time-consuming step. For this reason, it is disabled to start.
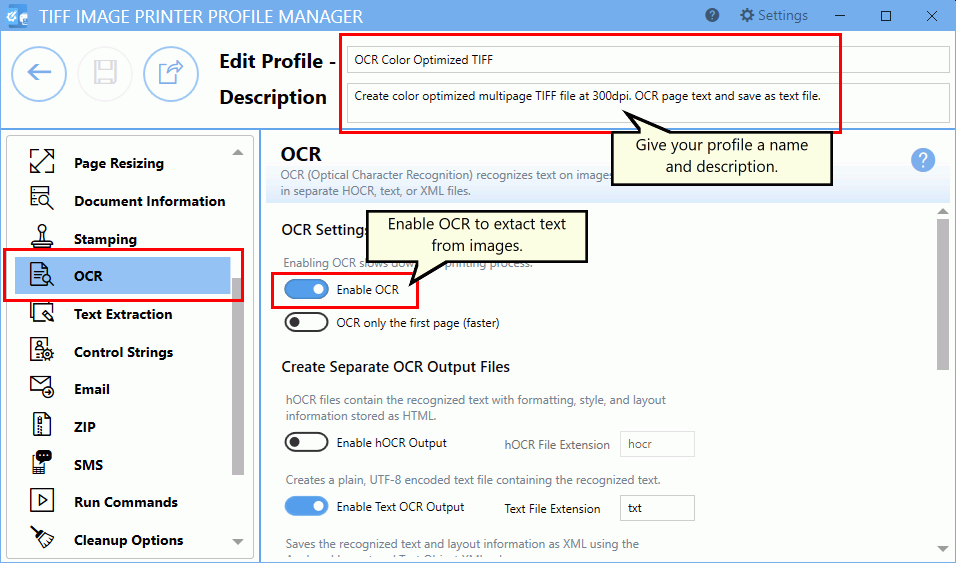
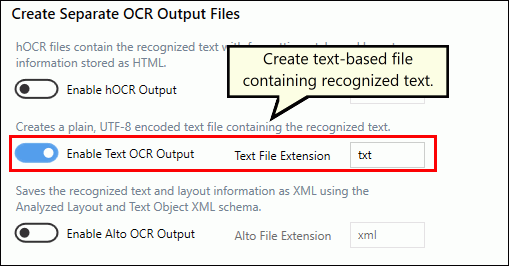
Next, choose which OCR text files to create. There are three to choose from, and you can select to create more than one type.
- hOCR is an XHTML file containing the text extracted from the page. It also stores format and layout information and a score for how confident the OCR engine is on its match.
- Text creates a UTF-8 text file containing only the extracted text.
- ALTO is similar to hOCR but stores the information as XML following the Analyzed Layout and Text Object specification
For our example, we chose Text OCR. We only want to extract the text from the page and don’t care about the layout or positioning on the page.
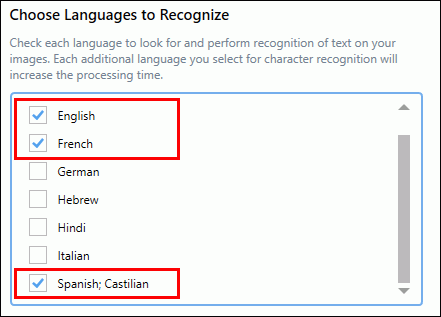
Lastly, choose which languages to look for on the page. You must select at least one language. The more languages to match against, the longer the OCR process will take. If you have documents with mixed languages, select all languages used.
PEERNET Image Printers can recognize Arabic, English, French, German, Hebrew, Hindi, Italian, and Spanish, with additional languages available to download.
Saving and Using the New Printer Profile
With your OCR settings configured, you can now Save the changes to your new profile. Click the Back arrow to return to the main screen of the Profile Manager and then close it.
We have our new profile. Let’s set it as the default profile TIFF Image Printer uses when printing. To do this, return to the TIFF Image Printer Dashboard and select Manage Printers to open Printer Management.
The Printer Management screen lists all copies of your TIFF Image Printer and which profile to use when creating files using that printer.
Next to the printer name, use the drop box to set your new OCR profile as the default profile. Here, we created the new profile OCR Color Optimized TIFF and we will select that profile. This profile creates multipaged TIFF images. We will use OCR to scan the pages and save the text as a separate text file along with the TIFF image.
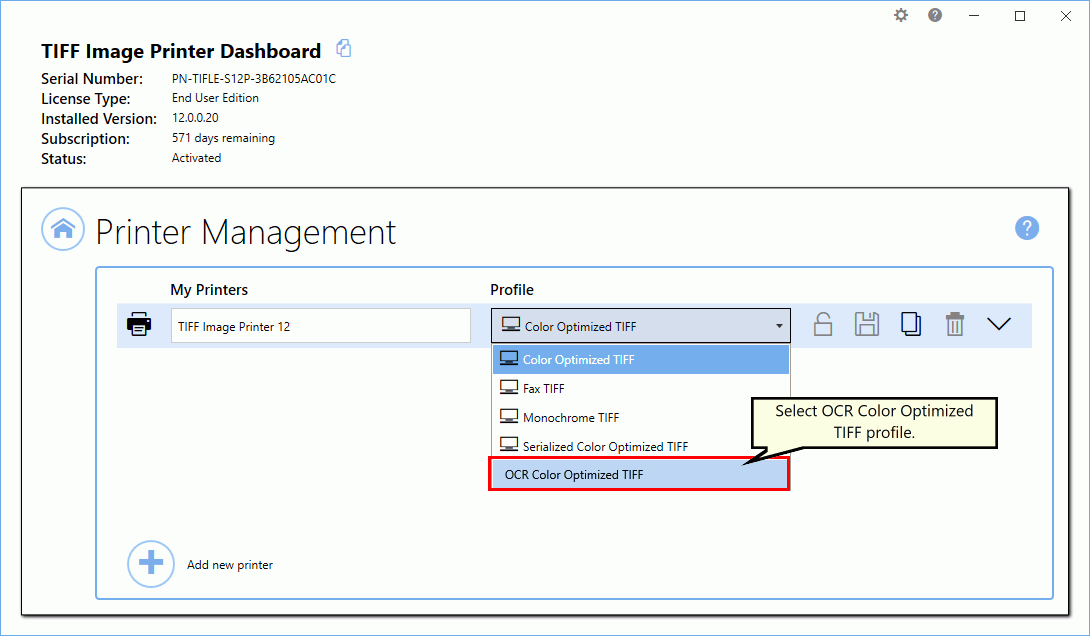
Select the Save icon to save your changes to the printer settings.

Close Printer Management and the Dashboard.

Convert Scanned PDF to TIFF and Extract Text From Images
Open the document you want to convert to TIFF and extract text from images into an editable file. Here, we opened a scanned PDF in Adobe Reader. You can do the same with TIFF, PNG, and other image files.
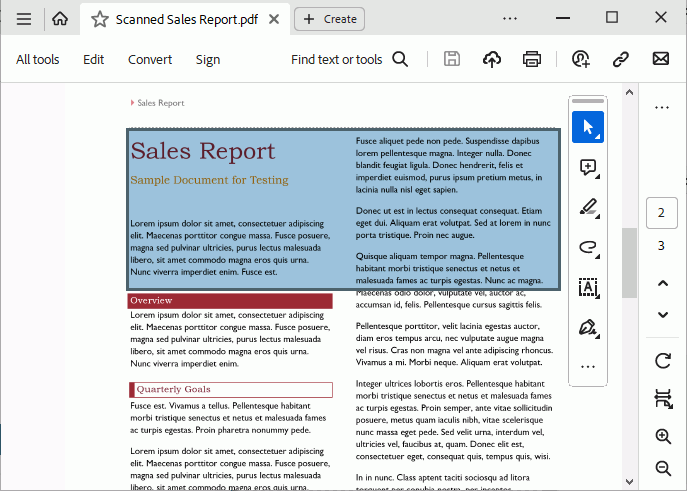
Each page in our document is an image. We want to recognize and save the text in this file as we create the TIFF images. You can tell if a page is a scanned image as you cannot select any text on the page, only an area of the page, as shown below.
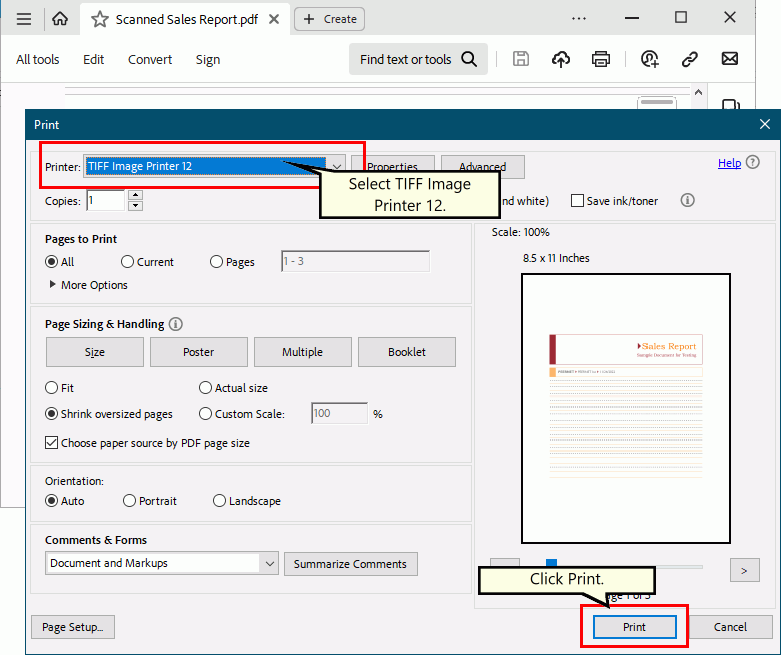
Select File – Print from your application, and select TIFF Image Printer 12 from the list of printers. Then click Print to send the document to the printer.
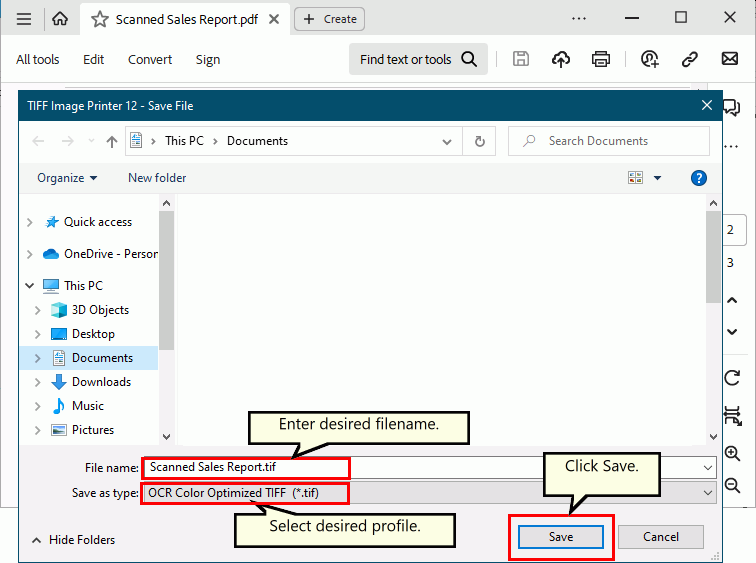
Printing your document will prompt you to choose the name and location of your new TIFF image and OCR text file. The OCR process saves the extracted text files with the same base name and location as the new image.
Leave the profile OCR Color Optimized TIFF selected in the Save as type field.
Click Save to create your TIFF image and OCR text file.
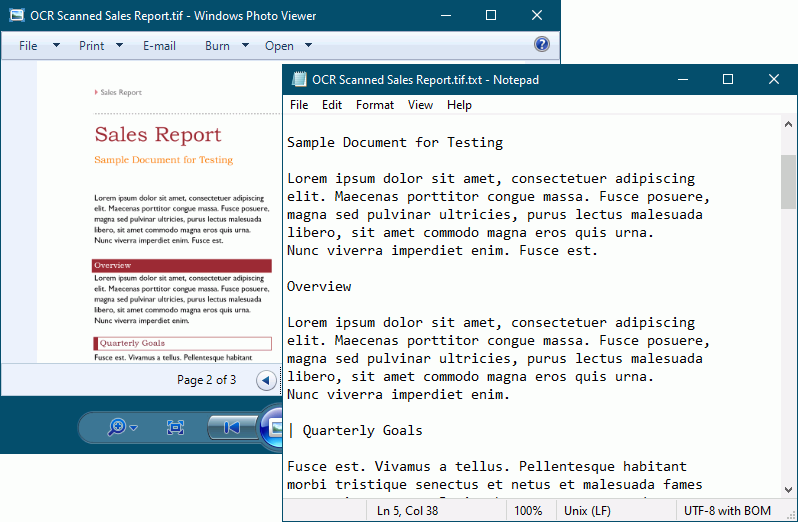
And we are done. That is all there is to extract text from images using the PEERNET Image Printers. Looking at our new TIFF image and OCR text file, we can see that the text file contains the extracted text from the image.
