Convert to TIFF with PDF Creator Plus
Create TIFF images from Word, Excel, CAD, and many other programs with this economical and easy-to-use file conversion software that works with any Windows application that can print. With many built-in features, PDF Creator Plus is a complete file converter solution that can create TIFF, JPEG, or BMP images and Adobe PDF files.
PDF Creator Plus Feature Highlights
- Visually combine documents from different applications into a single TIFF image file.
- Drag and drop PDF files to quickly convert them to TIFF images.
- TIFF is a widely adopted standard for faxing and archiving documents and is viewable almost everywhere without downloading special software.
- Includes page annotation tools for adding text, shapes, or images to your pages before creating your TIFF image.
- More than just TIFF, PDF Creator Plus can also create PDF files and JPEG and BMP images.
How to Convert to TIFF
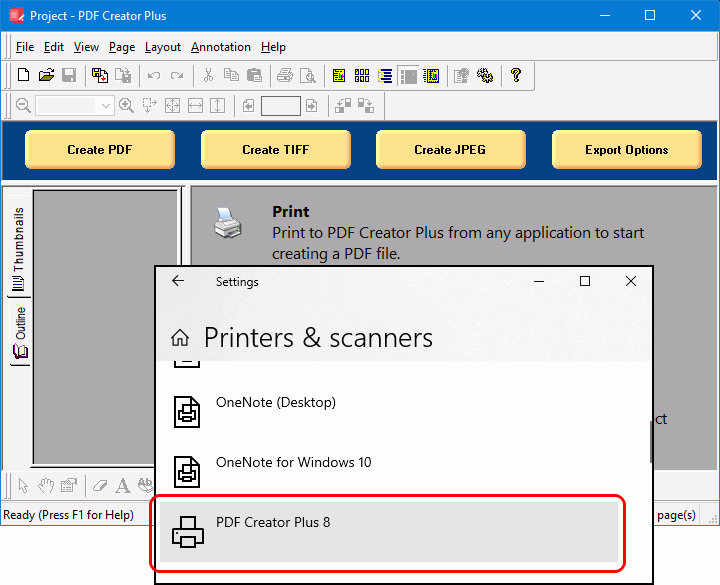
Download and install a free trial to try it out, or install and activate your purchased copy. The setup program will install the PDF Creator Plus app and PDF Creator Plus 8 virtual printer to your computer.
PDF Creator Plus can convert and merge documents to TIFF images by printing any document to the PDF Creator Plus 8 virtual printer instead of your regular printer.
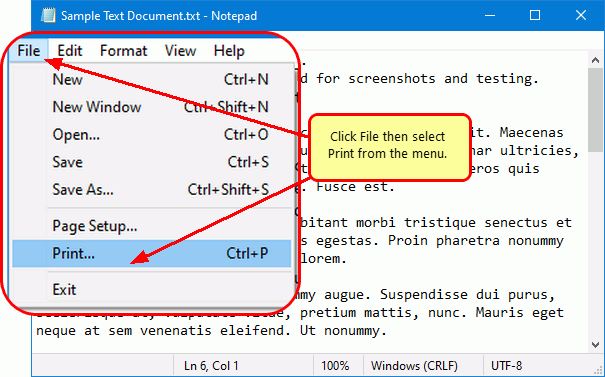
Open your document in its native application. For example, if it’s a text file, open it in Notepad, as shown below. You would open a Word document in Microsoft Word, a PDF file in Adobe Reader, and so on. Then, select File – Print from the application menu.
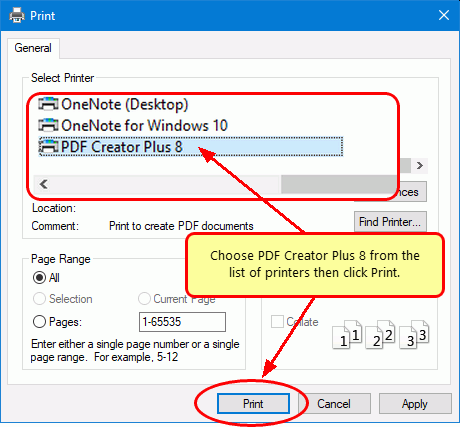
In the Print dialog, select PDF Creator Plus 8 from the list of printers and then click Print.
Collect and Edit Your Pages to Convert to TIFF
The PDF Creator Plus 8 printer sends your printed document to the PDF Creator Plus app. In the app, you can add, move, or delete pages before creating your TIFF image. There are also tools to markup the pages with text, shape, and image annotations.
You now have two options: create your TIFF or add more pages by merging PDF files and printing additional documents from Word and other apps.
After you have gathered all your pages, click the Create TIFF button to convert to TIFF now.

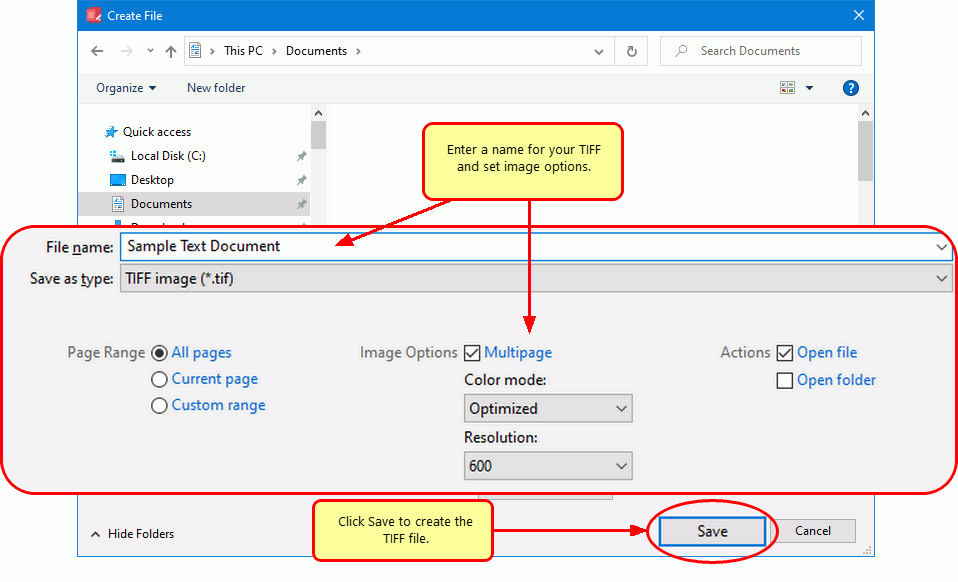
In the Create File dialog, edit the name for your new TIFF image and choose where to save it. Next, choose options for your TIFF image:
- Select TIFF Image (*.tif) as the Save as type.
- For a single TIFF file containing all pages, tick the Multipage option. When not checked, each page becomes a separate TIFF image.
- Choose a color mode for your TIFF image. Optimized creates a TIFF with the least amount of color needed. Other choices are Full Color, Greyscale, and Monochrome (Black and white).
- Next, choose the Resolution for your image. Higher resolutions create better quality images, but also larger images.
- Lastly, click the Save button to create your TIFF.
Saving the TIFF Images
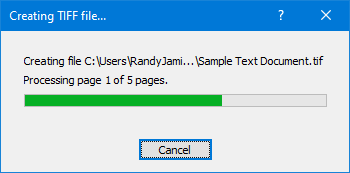
A progress dialog displays as your TIFF image, or images, are created.
If you had unchecked the multipage option, PDF Creator Plus saves a separate TIFF image for each page in your document. A sequential numbering sequence names each image by appending a suffix of _0001, _0002, etc. to each image name.
