Changing Printer Properties with Image Printers Version 12
In January 2021, PEERNET released an upgrade for TIFF Image Printer, PDF Image Printer, and Raster Image Printer – Version 12! Version 12 features a new user interface for organizing everything you need to know and do with your image printer, included editing printer properties.
Existing users of previous versions of the image printers will be accustom to editing their printer properties by either selecting Printer Properties from your printing application or by selecting TIFF Image Printer 11.0 – Properties from the start menu.
PEERNET has changed this workflow in version 12 in order to make editing your printer properties more accessible and user friendly. We’ve introduced the concept of Profiles, which are a group of settings used to create the output file you want. These profiles can be created and editing through the Profile Manger utility which is available through the Dashboard.
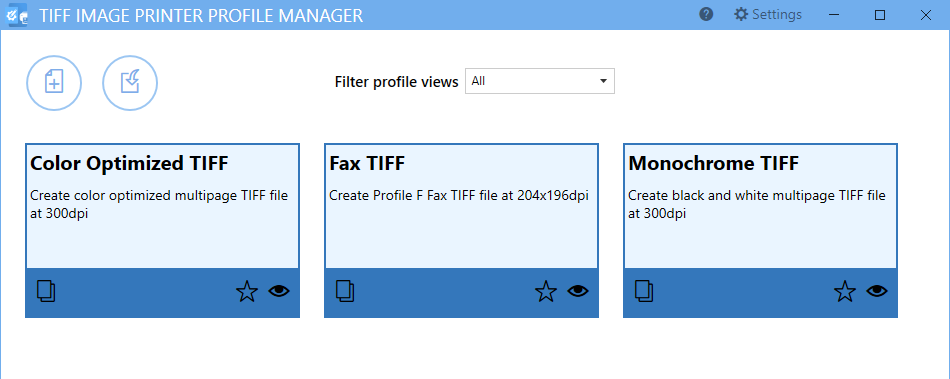
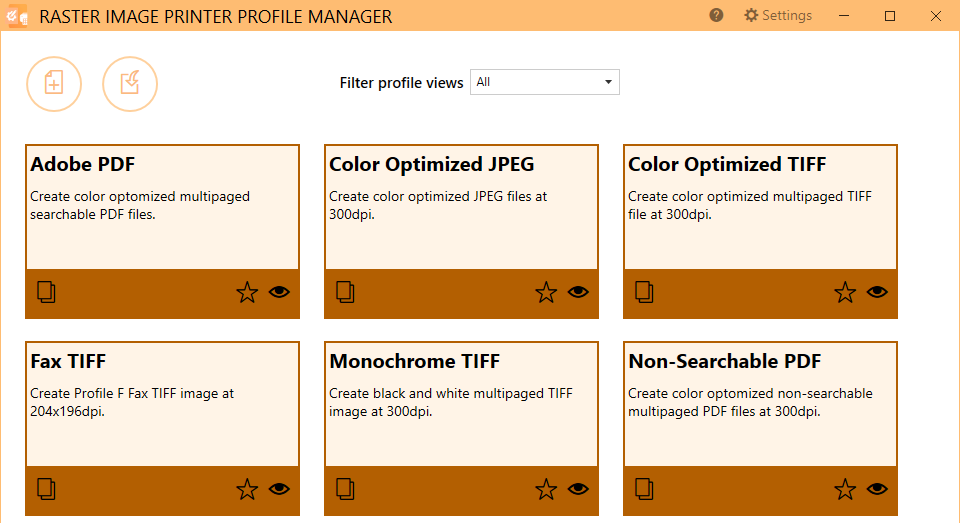
Your image printer will come with system profiles for the most common conversions, but you can also create your own personal profiles. The system profiles for TIFF Image Printer are Color Optimized TIFF, Monochrome TIFF and Fax TIFF. The system profiles for PDF Image Printer 12 are Adobe PDF and Non-Searchable PDF. The system profiles for Raster Image Printer are all those found in the other image printers plus Color Optimized JPEG.

If these system profiles do not meet your needs, you can create personal profiles through Profile Manager. The purpose of Profile Manager is to provide an interface through which users can review all available settings and features, and easily disable/enable and configure output settings as desired. This will make it easier for users to find and change your output settings, utilize more than one profile (group of settings), and share their settings with colleagues.
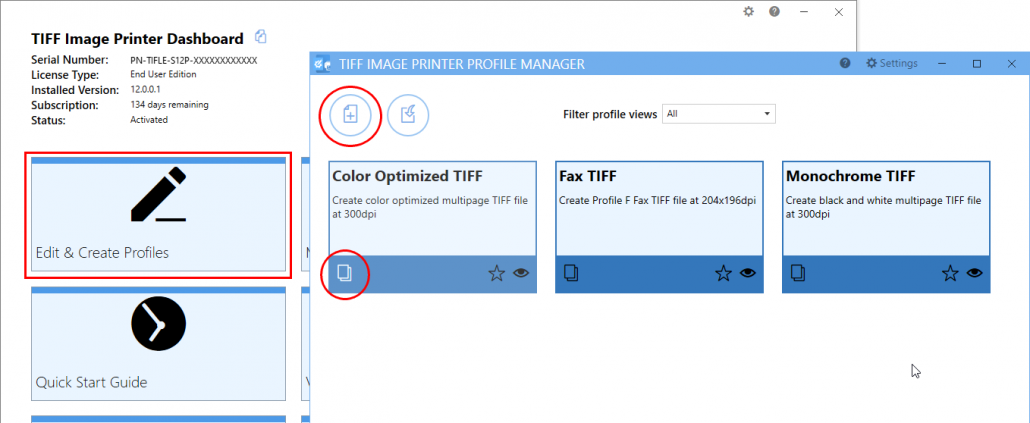
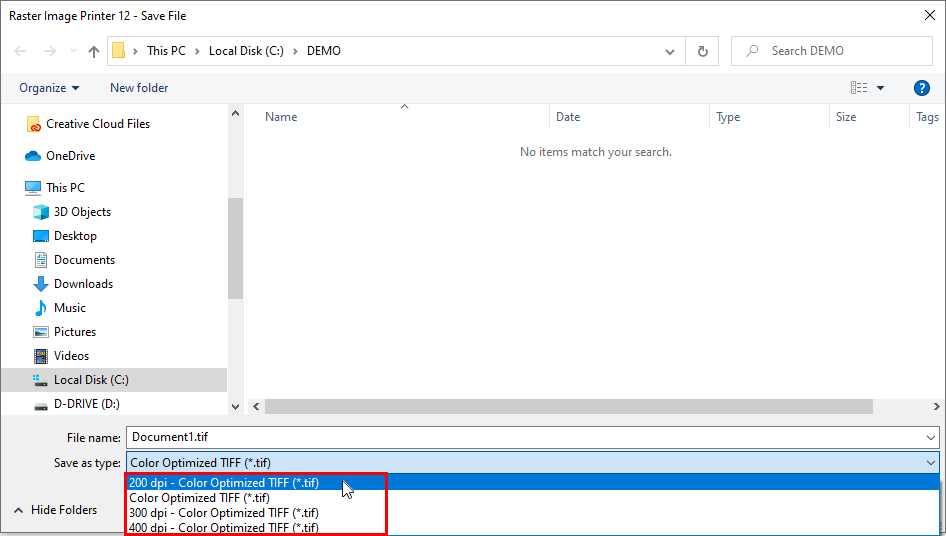
You can access Profile Manager by launching the Dashboard for your image printer and selecting Edit & Create Profiles. Then either create a copy of one of the system profiles or select Add a new profile. There is no limit to the amount of personal profiles you can create. For example, if you need the ability to switch between different DPI quickly, we would recommend creating a different personal profile for each of your common DPI options, and naming the personal profiles “200 DPI”, “300 DPI”, “400 DPI”, etc.
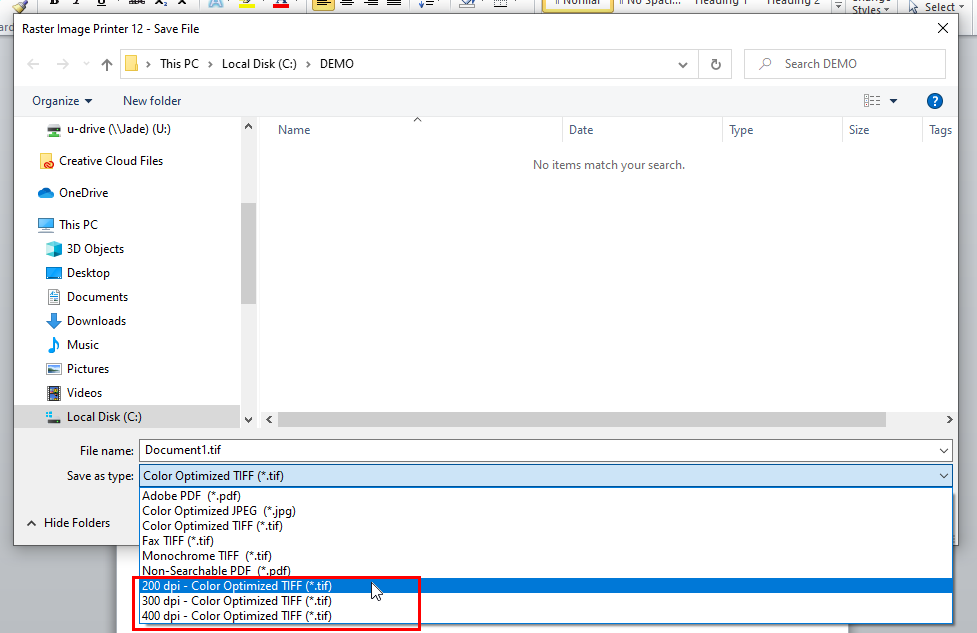
When you print to your image printer, you will be able to select your desired profile from the drop down list on the Save As dialog. Your converted file will be created according to the settings you choice in the selected profile.
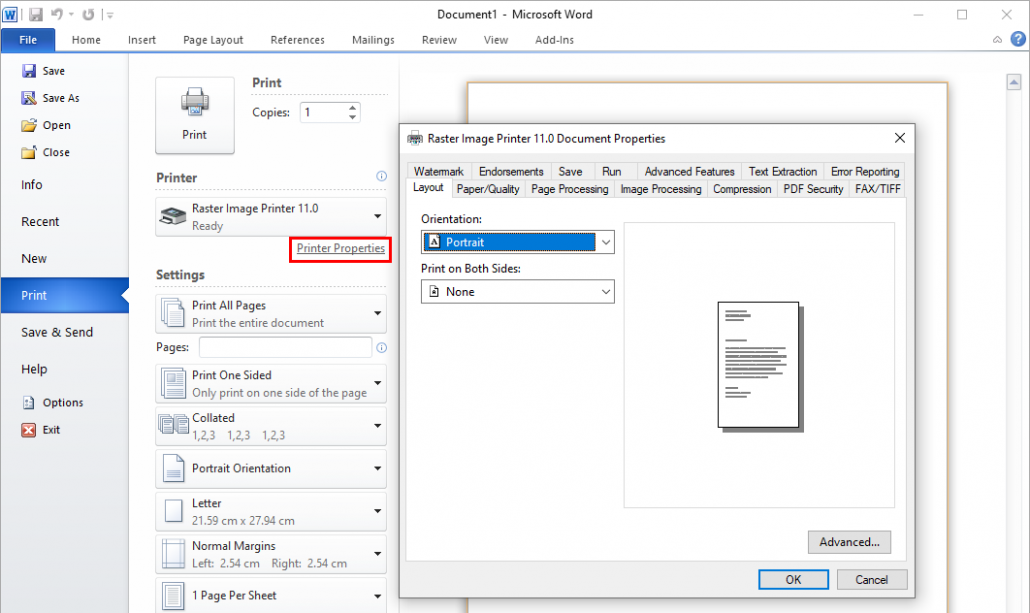
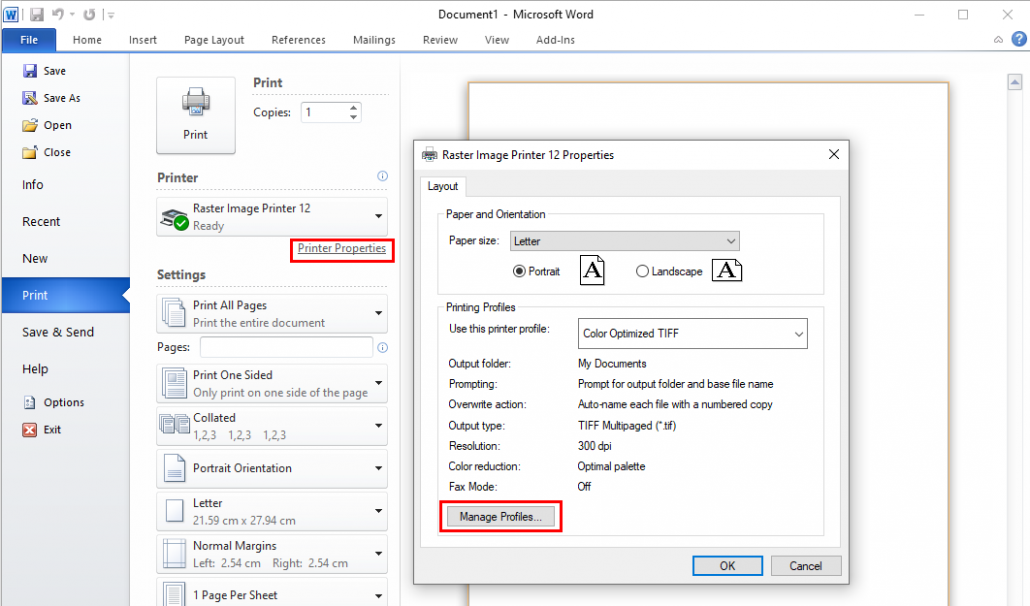
You can also select the profile by selecting Printer Properties from your printing application. This windows also provides a preview of the setting stored in each of your profiles, if you need a reminder. If you need to edit your settings at this point, select Manage Profiles to launch the Profile Manager.
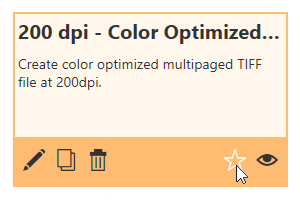
If you have several personal profiles, you can manage the list of profiles visible on the Save As dialog by hiding or favoriting profiles within Profile Manager. To hide profiles, select the eye icon for the profiles that you do not want to see in the list on the Save As dialog. To favorite profiles, select the star icon for the profiles you want at the top of the list on the Save As dialog.
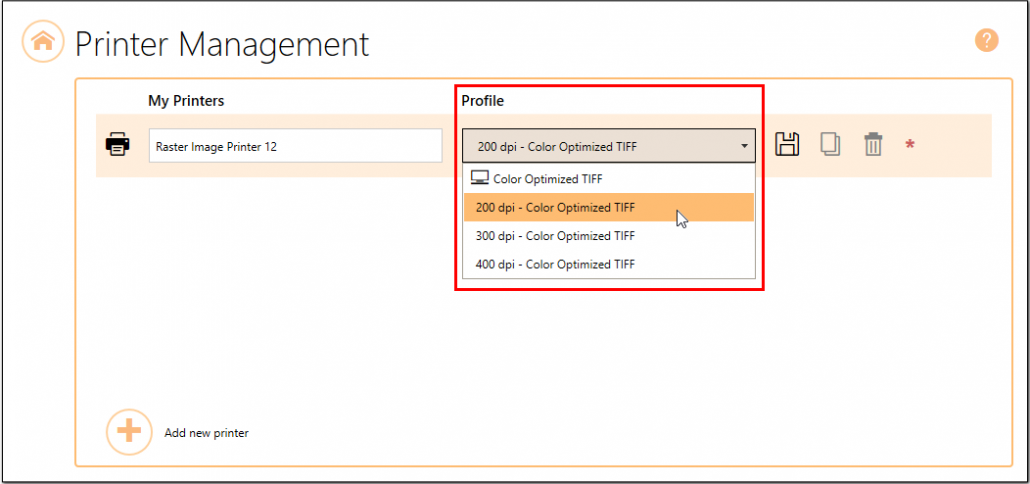
You can also change the profile that the image printer will default to on the Save As dialog through Printer Management to avoid having to select your desired profile each print.
For more information on transferring your printer properties from previous version to version 12, see our last post called: Upgrading to Image Printers 12. If you need assistance re-creating your printer settings after you upgrade to version 12, do not hesitate to reach out to the PEERNET team. Our support team is available to walk you through the new Profile Manager tools and assist you with the create of a personal profile.
If you are new to the PEERNET family of image printers, the best way to get started is by downloading our free trial. This is a fully functional trial with a watermark added to all output files. As always, the PEERNET support team is more than happy to answer any of your questions and help you evaluate the trial.

