Creating TIFF Files that meet Submission Requirements
A specific use case for PEERNET’s TIFF Image Printer or Raster Image Printer software is for surveyors to convert their AutoCAD drawings to TIFF files. PEERNET commonly sells these two products to Australian surveyors for this purpose. The Australian government requires that survey documents be uploaded and submitted to their online portal for approval in a very specific TIFF file format. The statutory authority requires the following specification:
- File Format – TIFF
- Page Size – true to the approved form size (A2, A3 or A4)
- Color – black and white (monochrome)
- Resolution – 200 dots per inch (dpi)
- Compression – CCITT Group 4 or CCITT T.6
With the recent release of version 12, PEERNET has changed the method by which printer properties are set. With version 12 we’ve introduced the concept of Profiles, which are a group of settings used to create the output file you want. These profiles can be created and editing through the Profile Manger utility which is available through the Dashboard. Below you will find instructions on how to create a personal profile in version 12 that will create a TIFF file that will be accepted by the Australian statutory authority for surveyors.
How to Create a Personal Profile that meets the Australian Government Requirements?
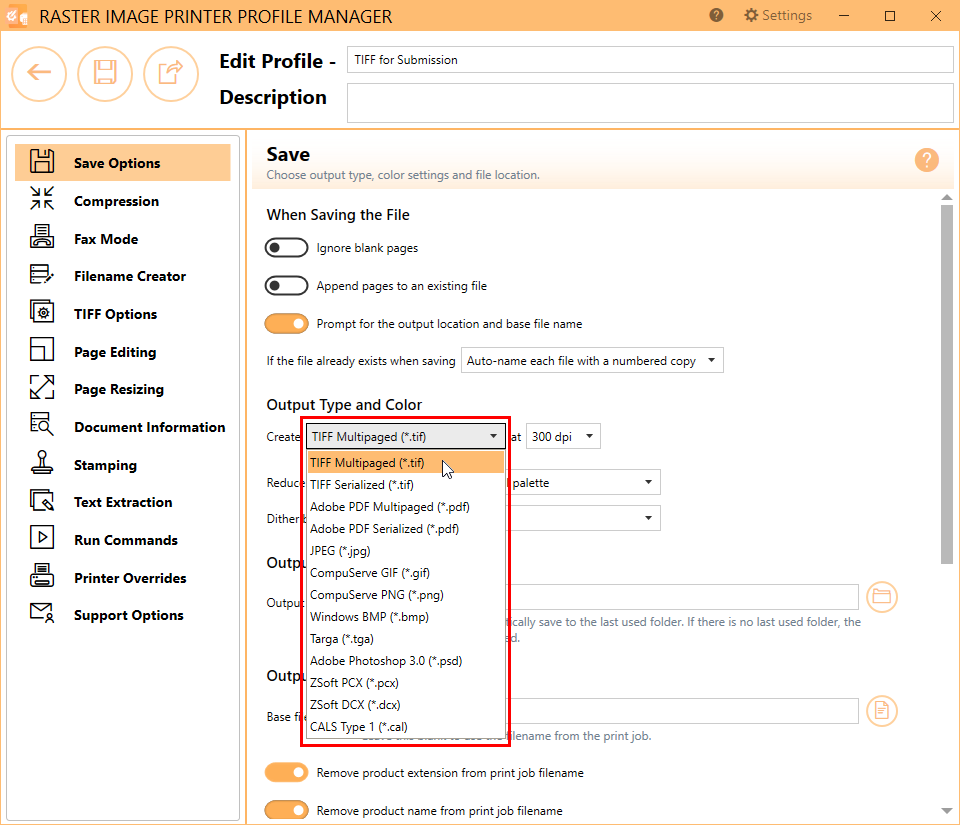
Personal profiles are created through the Profile Manager utility. Begin by opening the Dashboard for your product and select Edit & Create Profiles to launch Profile Manager. You can then either select Add a new profile, or create a copy of one of the system profiles and start editing from there. We recommend giving the profile a name that you will recognize (ie. TIFF for Submission).
File Format
To create a TIFF file, on the Save Options tab, ensure that the Output Type is set to TIFF Multipaged (*.tif). If you are a TIFF Image Printer user, the only output types available are TIFF file formats. Raster Image Printer users have access to several different output types including TIFF, PDF, JPEG, etc.
Page Size
The page size does not need to be set in the profile. This information will be transferred when you print from AutoCAD or any other application. Whether your AutoCAD drawing is an A2, A3 or A4 size, the created TIFF file will match this size.
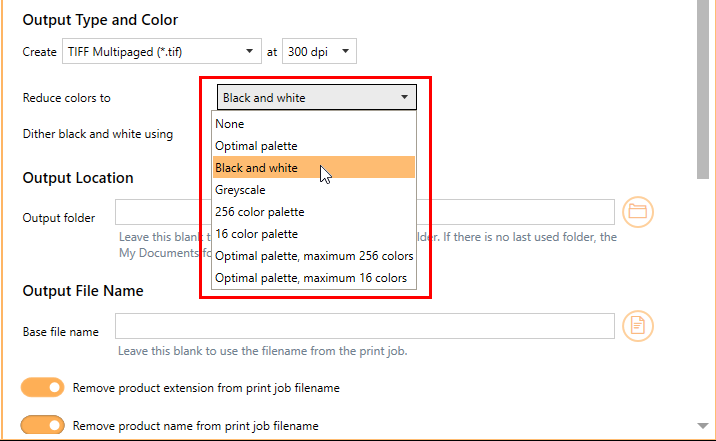
Color
To create a black and white / monochrome image, on the Save Options tab, change the color reduction method to Black and white. This means that only two colors will be stored in the output TIFF file – black and white.
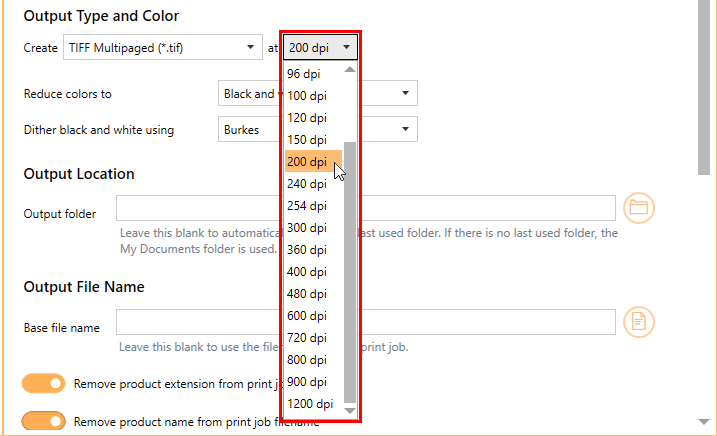
Resolution
To create a 200 dpi image, on the Save Options tab, change the resolution to 200 dpi. This determines the number of dots per inch of the output file. Higher resolutions produce graphic images that are sharper and show finer detail, but are also very large if they are not compressed. Low-resolution images are not of as high a quality, but they take up less disk space.
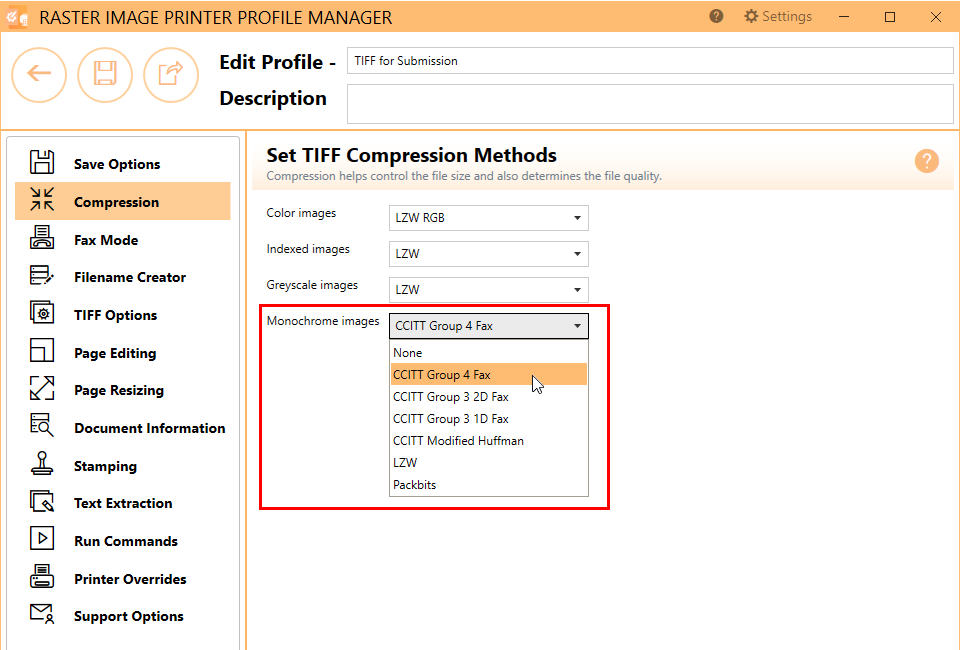
Compression
The compression method is set on the Compression tab. You only need to be concerned with the compression method being applied to monochrome images, as you just set your color reduction method to black and white (monochrome) on the Save Options tab. Ensure that the compression method for monochrome images is set to CCITT Group 4 Fax.
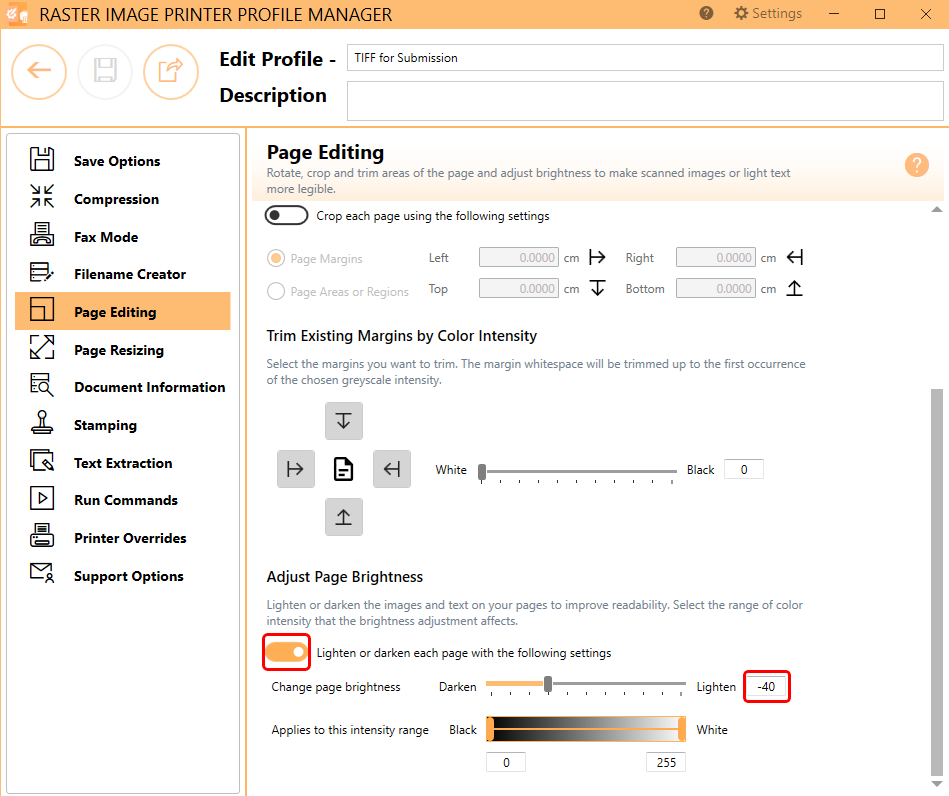
Adjust Page Brightness
Lastly, we recommend adjusting page brightness so that any light shades show up dark enough to be readable in the output TIFF file. This will ensure that any light, thin lines in the AutoCAD drawing as still visible after conversion. On the Page Editing tab, enable Lighten or darken each page with the following settings. Then set the page brightness value to -40.
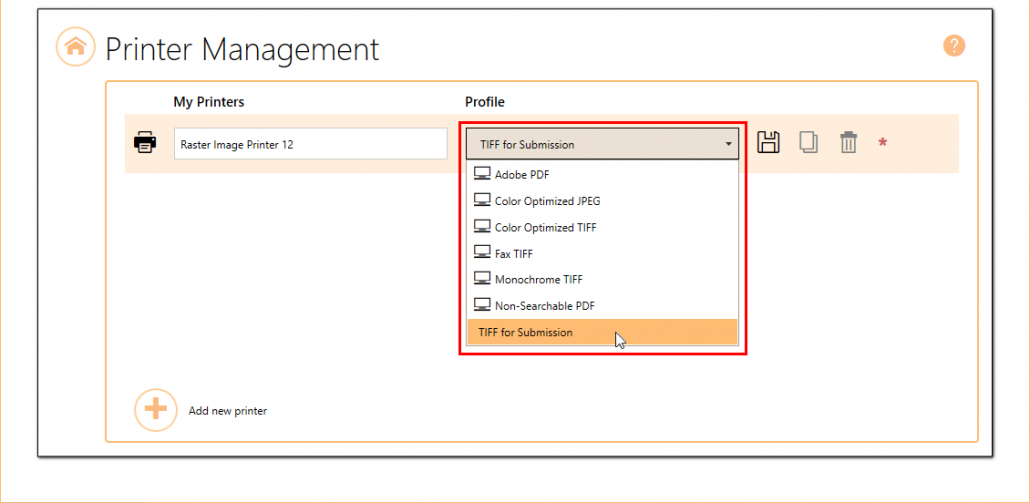
Once you have finished creating your person profile, save the profile and close Profile Manager. If this is the primary profile you want applied when printing to your TIFF Image Printer or Raster Image Printer, select Manage Printers from the Dashboard and set your personal profile as the default profile used by your printer. Now when you print to your TIFF Image Printer 12 or Raster Image Printer 12, your surveyor documents will be converted into TIFF files that meet the Australian government’s specific file requirements.
If you are new to the PEERNET family of image printers, the best way to get started is by downloading our free trial. This is a fully functional trial with a watermark added to all output files. As always, the PEERNET support team is more than happy to answer any of your questions and help you evaluate the trial.

