
Combine Files Into a PDF File
Combine files to a single PDF file and reap the many advantages. Reducing our digital clutter from different applications. emails from co-workers and clients, and file sharing sites has a direct impact on our day-to-day productivity. It is easier to search for information in a single file than in many files in a single folder. Even more so when many files spread across many folders are combined into a single PDF file.
PDF Image Printer and Raster Image Printer make combining files from different applications into a single PDF file easy.
Combine Files into PDF with Control
You are in control of the order of the files and pages in your PDF. To combine files to a single PDF file, simply enable append mode and print your files to your image printer in the order you want the pages to appear in your new PDF file. Save your new PDF in the same output folder with the same filename each time to add each document to the end of the file.
Creating the Append Printer Profile
Both image printers include several different printer profiles with common conversion settings for that printer. The Append mode feature is always off by default. You need to create a new profile and turn on append mode to combine files to a single PDF.
Step by Step Instructions
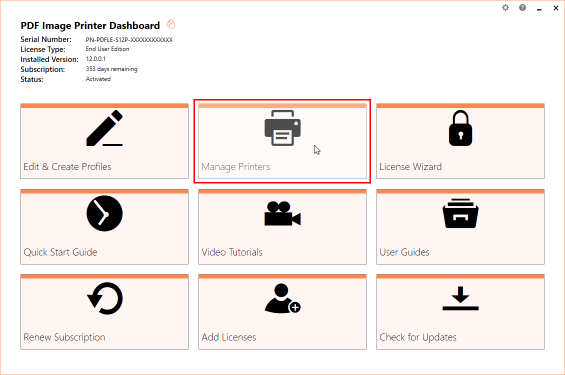
The first step is to open the Dashboard by double-clicking the desktop shortcut for your printer.
The Dashboard displays license information and tiles to access different tools and resources. From here select the Edit & Create Profiles tile to open the Profile Manager tool.

Adding the New Profile
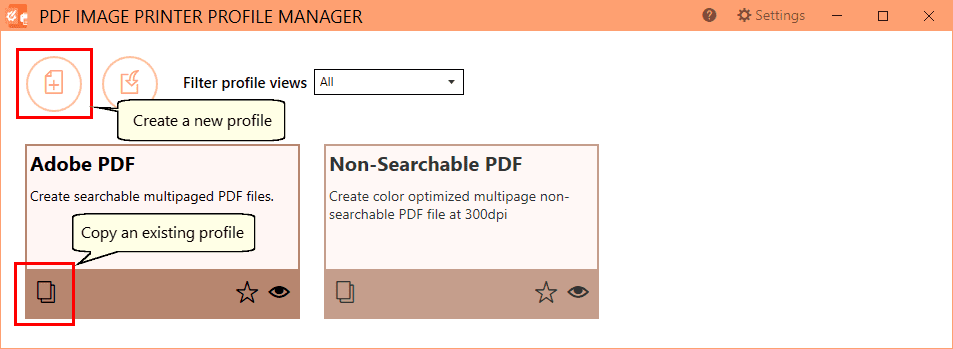
The main screen of the Profile Manager lists all of the available printer profiles. This includes profiles provided by PEERNET and any personal profiles you have created. To enable append mode so you can combine files to PDF you need to create a new personal profile.
You can copy an existing profile using the copy icon on the tile. You can also create a new profile using the Add new profile button in the upper left corner.
Enabling Append Mode
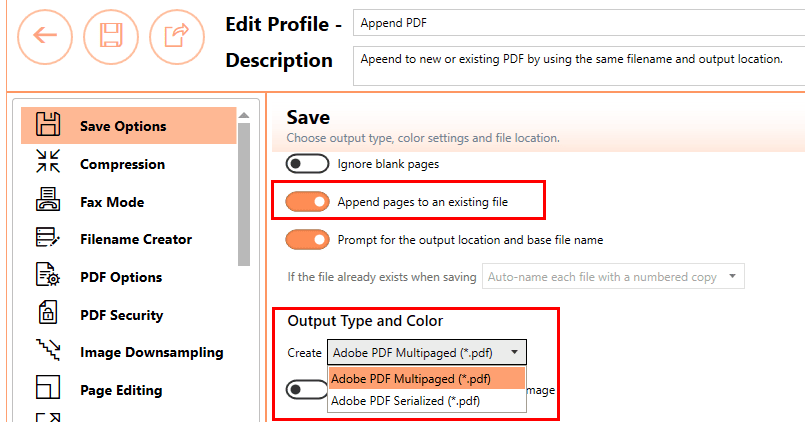
The next step is to edit the name of our new profile, and add a description for it. Then we will turn on append mode.
Select the Save Options tab from the list on the left. Enable the Append pages to an existing file option and make sure the Output Type is set to create PDF Multipaged.
To Prompt or Not to Prompt When Combining Files into PDF
When combining files to a single PDF file, each time you print a file to the image printer the output location and file name used to save the new PDF file must be the same to add the new pages to the end of the file.
You can do this on-the-fly using the Save As prompt that appears each time you print. If you need to combine different sets of files into separate PDF files in various locations this is the best approach. The Save As prompt always opens to the last used folder.
Alternatively, you can set the location and file name in the profile to always use the same folder and filename This approach is useful when you are creating a PDF file that is then moved or picked up as part of a workflow or other task.
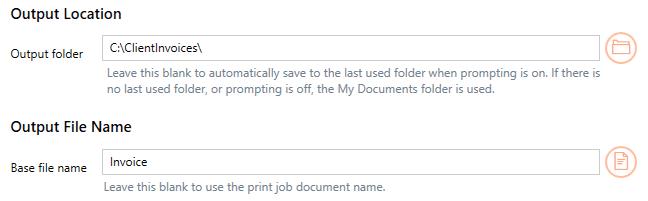
Set the same output location and file name to combine files into PDF

Now that the append settings are in the profile, save it, close the Profile Manager then return to the Dashboard.
Setting the Printer Profile to Combine Files Into PDF
Back on the Dashboard click on “Manage Printers” to open the Printer Management screen.
The Print Management window will list all copies of your Raster or PDF Image Printers and is quick way to set the profile the printer will use when creating output. If you’ve just installed you will only have one printer, either PDF Image Printer 12 or Raster Image Printer 12.
From here, select your new Append PDF profile from the printer profile drop box next to the printer name.
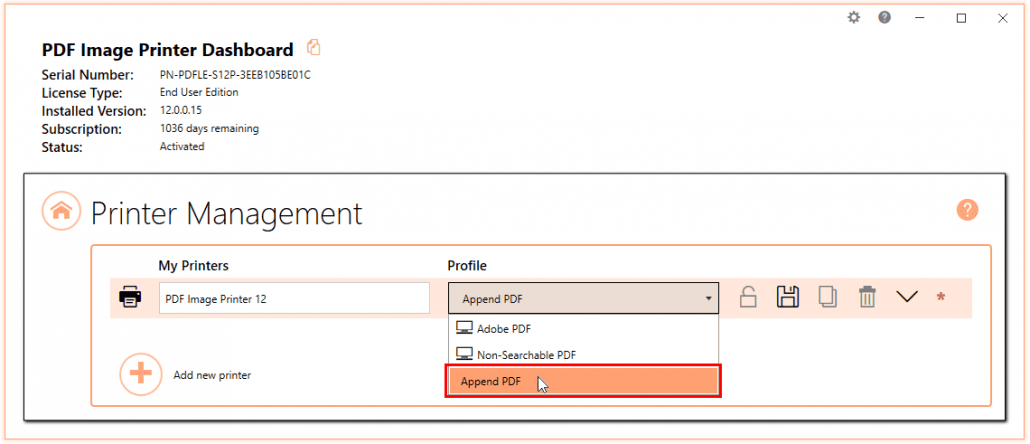
Next, click the Save icon beside the list of profiles to save the changes.

From here we can now close Printer Management and the Dashboard. The printer is now set to append PDF files together when the same output location and file name are used to name the new file.

Print Documents to Combine Files into PDF
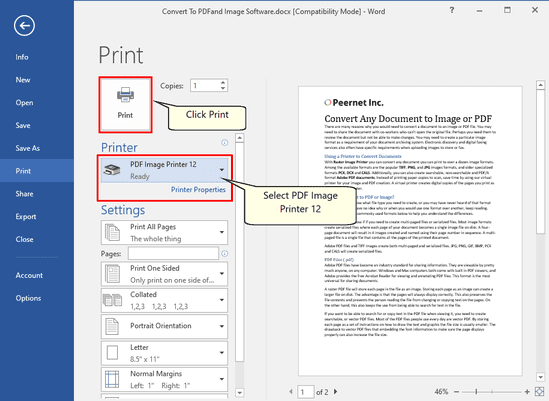
Open the first document you want in your combined PDF file. Here we are showing a Word document as an example. You can print any document you want.
Once open, go to File-Print from the application to select printing options. Choose PDF Image Printer 12 (or Raster Image Printer 12) from the list of printers then click the Print button to send the document to the printer.
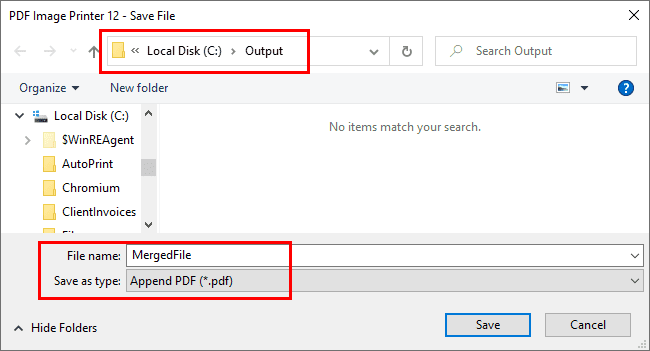
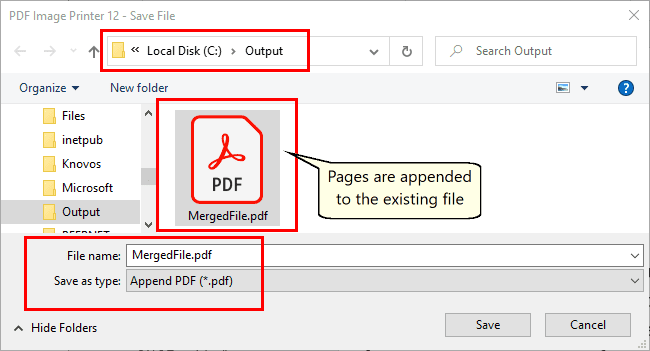
A Save File prompt will pop up allowing you to choose where to save your new PDF file. The default location is your Documents folder; you can change this to a different folder if needed.
In the Filename field, type the name for your combined PDF file. You will use this name each time you print a file you want to add to your new PDF file. The new file name is based on the original document name when possible.
Leave the Save as type set to your append profile created above.
The Save as type drop box below the name field is already set to use the Append Profile created above; we set printer to use this profile in Print Management above.
Print the next file in the sequence to Image Printer. Select the same output location and file name to append to the file we created above.
Continue printing any other files you want to combine into your single PDF file until you have added them all.
Your PDF file is now ready to share, email, or archive.
Conclusion
The Image Printers make merging files from many different sources into a single file simple. Furthermore, you can easily integrate creating these types of files into your workflow. Download a trial of TIFF, PDF or Raster today.

