How to Convert JPEG to TIFF
Convert JPG to TIFF quickly and easily with our versatile TIFF Image Printer. Your new TIFF image is only a click of the Print button away. Create separate TIFF images for each JPG, or use the append feature and combine your JPG images into one TIFF.
Whether to combine JPG images into a single TIFF for sharing and emailing or to convert JPG to TIFF for document archiving and eDiscovery software, our TIFF image printer has you covered.
Convert JPG to TIFF
Print your JPG image to our TIFF Image Printer to create TIFF images with just a few clicks of the mouse! Convert JPG and JPEG to TIFF images in seconds.
As simple as printing, our printer works with image viewers and any other Windows® application, so you can quickly convert any image or file into a TIFF image.
Create the TIFF you need with our many TIFF features for appending, custom naming, and creating color, monochrome, or FAX-style TIFF images.
Video Tutorial
Watch the video below to find out how to convert your JPG images to TIFF images.
Print to Convert JPG to TIFF
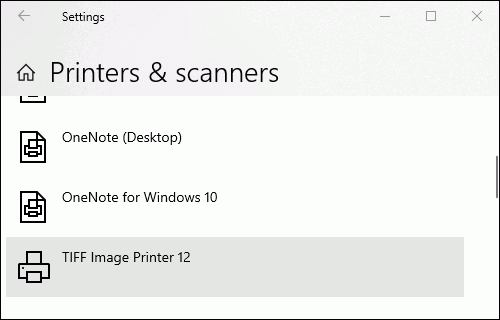
After downloading and installing the TIFF Image Printer on your computer, it appears as a new virtual printer in your Printers folder. You are now ready to convert JPG to TIFF.
Open and Print Your JPG Image
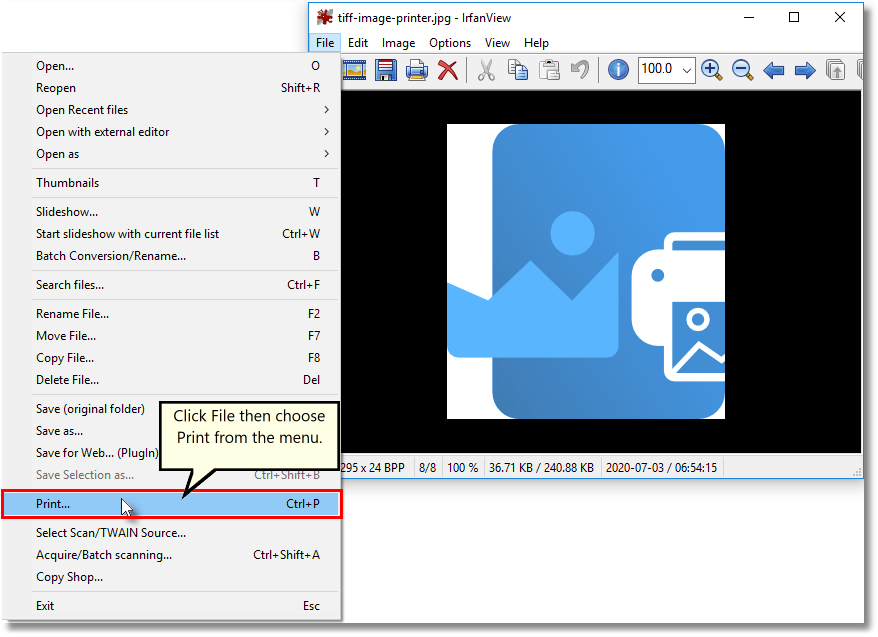
Open your JPG image in your favorite image view, then click File-Print from the application menu.
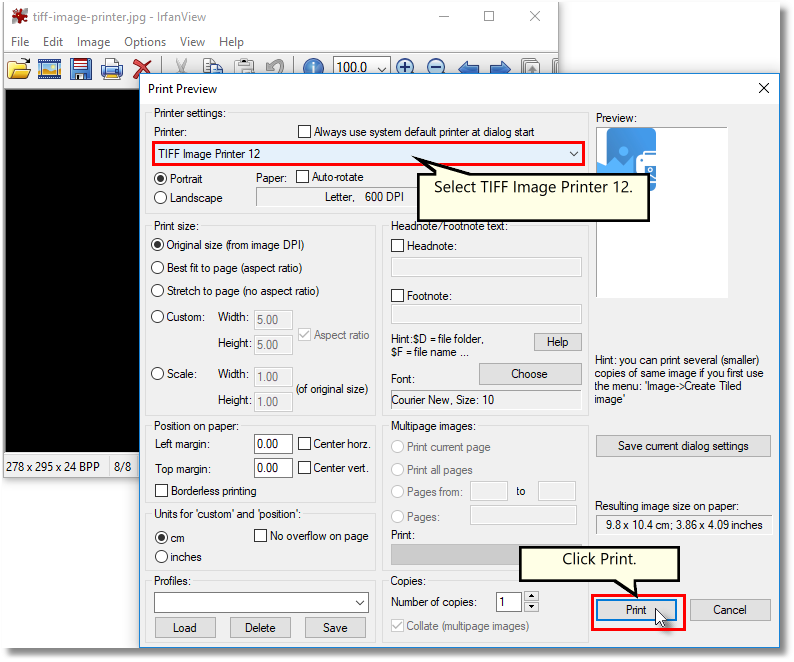
In most image viewer applications, this opens a print options or print preview dialog where you select the printer and any printing options. To convert JPG to TIFF, choose the TIFF Image Printer 12 printer from the list of printers. The last step is to click the Print button to send the file to our printer.
Choose Your TIFF Name and Location
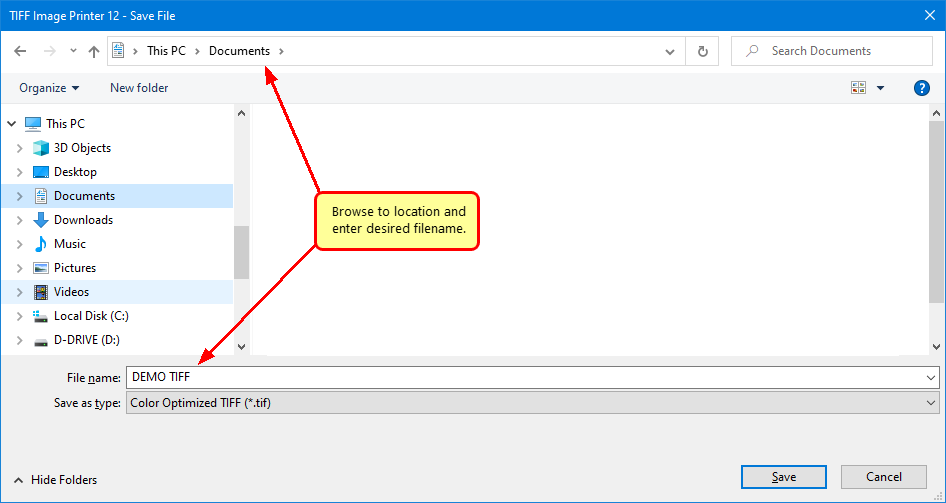
In the Save File prompt, choose where to save your new TIFF image and make any changes to the file name. The default is to use the original JPG image name and save the file to your Documents folder.
Create the TIFF You Need
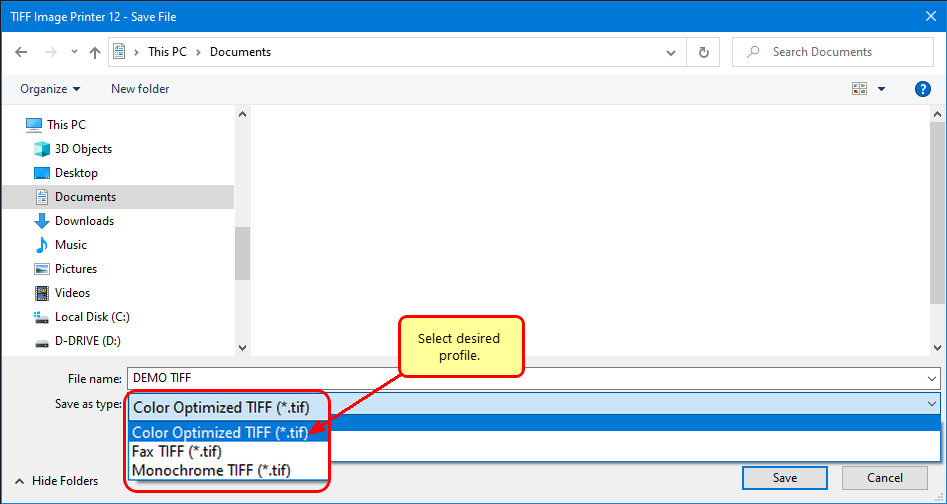
Next, in the Save as type drop box, select a printer profile to use when we convert JPG to TIFF. For color JPG to TIFF conversion, we recommend starting with the Color Optimized TIFF profile.
A printer profile is a collection of settings used by the printer when creating the TIFF image. It controls the type of TIFF, compression options, custom naming, and many other TIFF file options. You can choose from the three included profiles or create your custom profile using the Profile Manager available from the TIFF Image Printer Dashboard.
Save to Convert JPG to TIFF
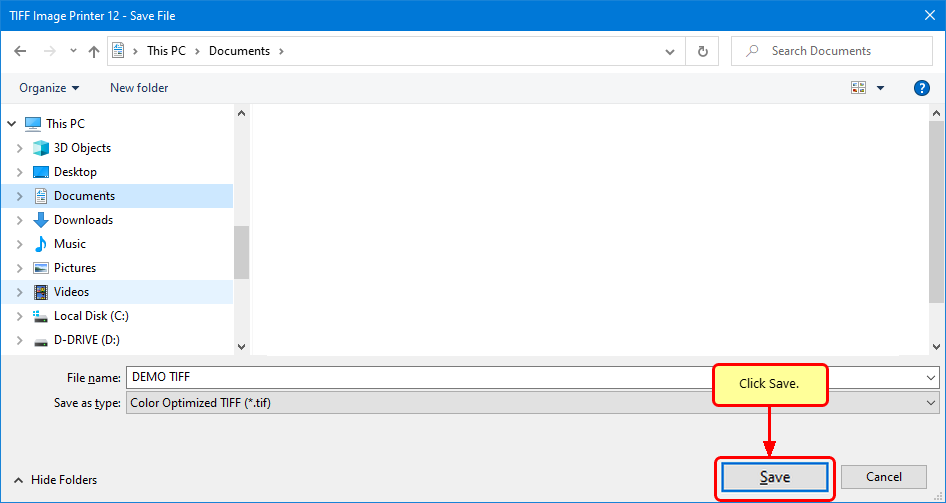
The last step is to click Save to create a TIFF image from your original JPG image.
Have Questions?
We’re here to lend a helping hand and ensure your product evaluation goes as smoothly as possible.
You can contact PEERNET for assistance by phone or email us to discuss what you are trying to accomplish.

