
Create Black and White TIFF Images
Black and white TIFF images are often the desired format for faxing, document archiving and storage, and even emailing images as attachments. Also called monochrome images, they tend to be smaller in size than their color counterparts. This smaller size can save both bandwidth and storage space when you are working with text documents, banking and insurance forms, faxes, scanned images and other types of business forms.
Both TIFF Image Printer and Raster Image Printer have support for converting printed document content into purely black and white images with various options controlling the conversion process.
Converting Color and Grayscale to Black and White Images
Converting a color or greyscale image to a monochrome image reduces the colors in the original image to either a black or a white pixel. Color images can have thousands or more distinct colors. A greyscale image consists of different shades of grey from a pre-determined grey color palette. We reduce these colors to either a black pixel or a white pixel using a process called dithering.
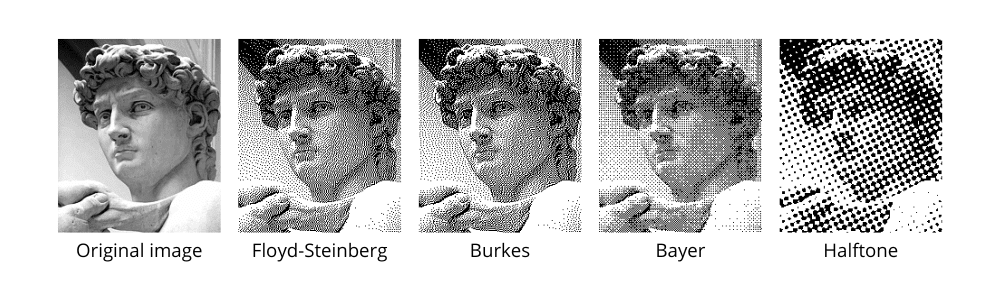
Dithering simulates the colors or shades of grey from the original image using patterns of pixels of black and white. This creates the illusion of color depth and fools our human eyes into seeing more colors and shades than are there. It also greatly enhances the clarity and appearance of the images. There are many methods to create these patterns of pixels using different dithering algorithms. Some dithering algorithms will work better on images with lots of text, others on images with charts and graphs. The sample images below show the effects of the different dithering methods on a greyscale image.
Creating Black and White Images Using the ‘Monochrome TIFF’ Profile
Both image printers include a built-in Monochrome TIFF profile for creating pure black and white TIFF images using the Burkes dithering method. A printer profile is a collection of settings controlling the image output created by the printer. After installing either printer you will see a Dashboard icon on the desktop. The dashboard is the central location for setting the printer profile for your printer, creating and editing printer profiles, and accessing video tutorials and other help resources.
The screenshots below are using the TIFF Image Printer. For Raster Image Printer your dashboard will be a different color but the steps are the same.
Setting the Printer Profile
First, open the the Dashboard by double-clicking on the desktop shortcut for your printer.

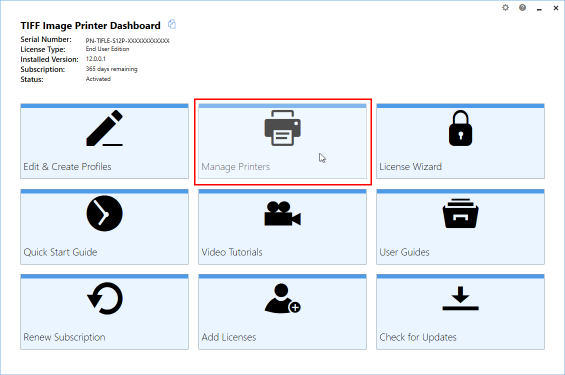
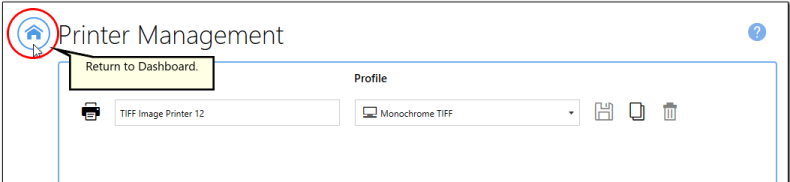
The Dashboard displays your license information and tiles to access the different tools and resources. From here select “Manage Printers” to open the Printer Management screen.
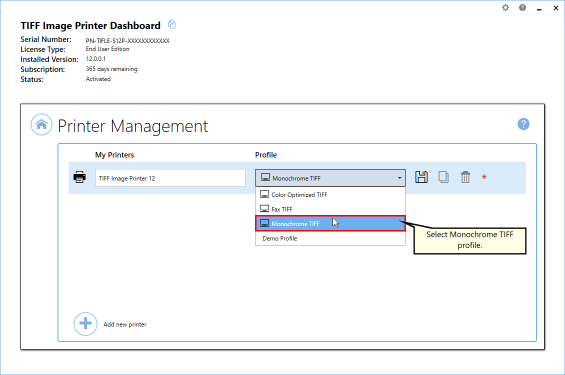
Print Management lists all of your TIFF or Raster Image Printers. If you’ve just installed you will only have one printer, either TIFF Image Printer 12 or Raster Image Printer 12. From here you can select which printer profile to use when creating your TIFF images. Beside the printer name, use the printer profile drop box to set the default profile as “Monochrome TIFF”. This profile creates multipaged TIFF images at 300 dpi with colors reduced to black and white.
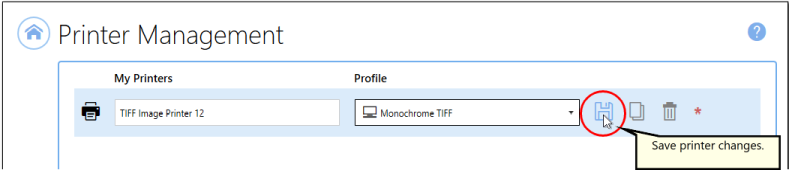
Next, click the Save icon beside the list of profiles to save the changes.
From here we can now close Printer Management and the Dashboard. The printer will now create the type of TIFF image we want.
Creating the TIFF Image
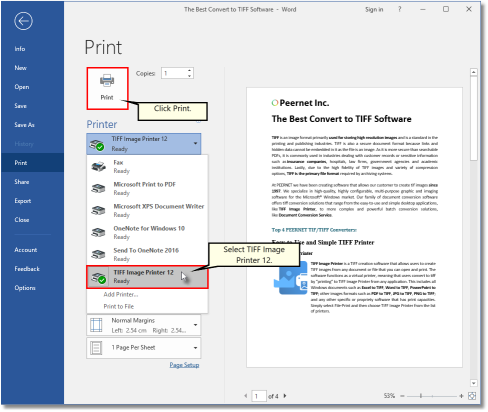
Now with the printer configuration set, open the document you want to convert to a TIFF image. Our example is using a Word document and printing from Microsoft Word. Once opened, go to File-Print to select the printing options and which printer to send the document to. Choose TIFF Image Printer 12 (or Raster Image Printer 12) from the list of available printers and then click the Print button to send your file to the printer.
A Save File prompt appears before creating the TIFF image. From here, choose where to save your new black and white TIFF image. The default location is your Documents folder.
In the Filename field, enter in a name for your TIFF image. The new file name is based on the original document name when possible.
The Save as type drop box below the name field will already have the Monochrome TIFF profile selected as we set this in Print Management above.
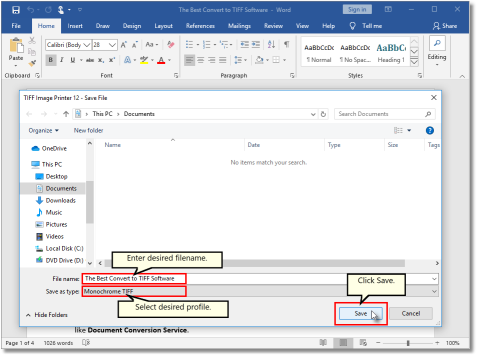
When you have set your desired name and location set, click Save to create your TIFF image.
