Create Fax TIFF Images
Why do I need to create fax TIFF images? It might seem surprising that faxes are still common in today’s world of email, cloud-sharing and digital accessibility. Nevertheless, faxes are still in use by health care, legal firms, and government agencies, among others. What has changed is how people send faxes. No longer restricted to hardware fax machines and rushing to the corner print & copy shops, almost anyone can digitally send a fax using email, web services or apps on their smartphones and tablets.
Who Still Uses Fax TIFF?
Medical clinics, health centers and legal firms are some of the industries that still rely on faxed documents. In the medical field, faxing is still preferable over email and text messages. This is due to the fact that prescriptions, privacy documents and medical records faxed between clinics and specialists are HIPAA-compliant. In the same vein, legal firms see faxed documents as legal and binding, as well as producing a paper trail for e-discovery. Other industries that may still rely on fax for the same reasons are banks and financial institutions, logistics companies and government agencies.
Fax TIFF produces a small, readable image from the original document, which also makes it ideal for document storage and archiving solutions.
What is Fax TIFF?
A fax tiff image is a TIFF image that is compatible with fax software or a hardware fax board. Fax TIFF images were historically monochrome (black and white) and compressed using CCITT Group 3 and CCITT Group 4 compression algorithms. A few years down the road, color fax machines, while not as common, also became available.
Supported Fax Format Profiles
All fax images use one of three fax format profiles. The first is Profile S, for simplified fax. It creates monochrome TIFF images using a small subset of supported fax resolutions. Profile F is the standard fax profile and supports the full set of fax resolutions. Profile C, or color fax, creates color fax and also supports only a subset of fax resolutions.
Create Fax TIFF Files Using the ‘Fax TIFF’ Profile
This profile creates the most common format of fax TIFF. Both TIFF Image Printer and Raster Image Printer include this profile as part of the product. With this profile you can create fax TIFF images using Profile F format with a fax resolution of 204×196 and a palette of 64 shades of grey. If you want to create a customized printer profile with specific fax settings, scroll down to the section Create a Custom Fax Profile below.
Applying the Printer Profile
Don’t confuse the printer profiles with fax format profiles. Our image printers use a different profile we call the printer profile to store the settings used to control the image output created by the printer. The printer profile stores all fax related settings including fax profile, fax resolutions, and fax paper size, as well as all other settings such as compression and save options used to create fax tiff.
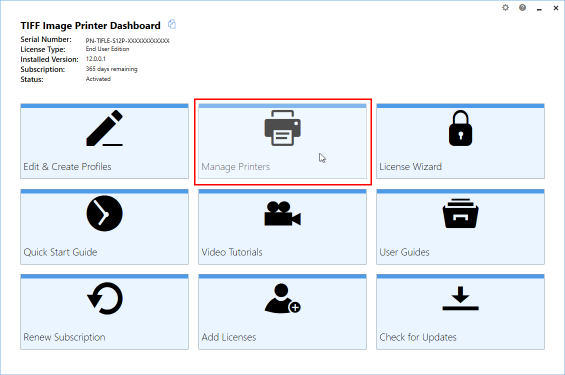
After installation you will see a Dashboard icon on the desktop. The Dashboard is your centralized location for access to licensing information, video tutorials and help resources. It also provides quick access to editing and creating printer profiles as well as setting the printer profile you want the printer to use.
To begin, open the Dashboard by double-clicking the desktop shortcut for your printer.

From the Dashboard tiles, select “Manage Printers” to open Printer Management.
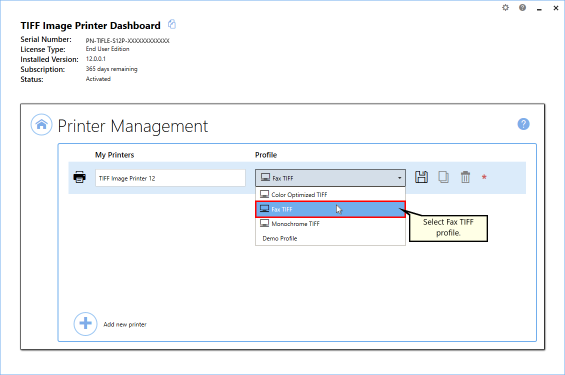
This screen lists all your Image Printers and provides access to setting the profile and other printer settings. Next to the printer’s name, use the printer profile drop box to set the printer profile to “Fax TIFF”. This profile creates serialized TIFF images at 204×196 dpi using fax Profile F.
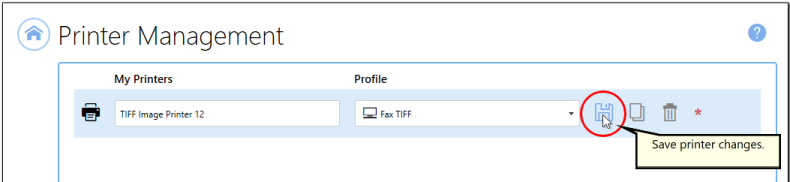
Now the we have the profile we want to use, select the Save icon to save the changes to your printer.
Now that the printer will create the type of TIFF image we want, close Printer Management, and then close the Dashboard.

Creating the Fax TIFF Image
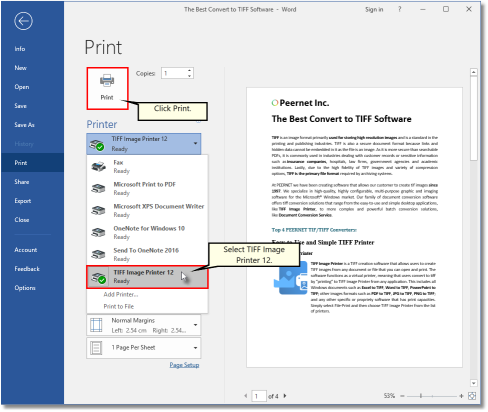
First, open the document you want to convert into a TIFF image. This can be any document that you can print, from any application. Here we are using a Word document as an example.
When you have opened your document, go to File-Print from within the application. From the list of printers, choose TIFF Image Printer 12 (or Raster Image Printer 12), then click the Print button to send your file to the printer.
In the Save As prompt that appears, choose the name and location of your new fax TIFF. The default location is your Documents folder. The new filename defaults to the original document name in the Filename field. You can change the name as you wish.
The Save as type drop box will already have the Fax TIFF profile selected from when we set this in Print Management above. We don’t need to make any changes to this field.
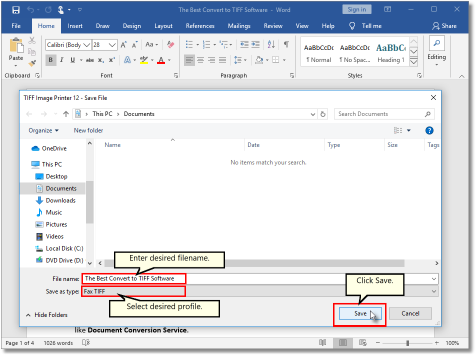
When you have chosen where to save the file and what to name it, click Save to create the TIFF image.
Create Fax Format Files From Custom Profile
Online fax services and hardware fax boards may require specific settings that may be different from the stock Fax TIFF profile provided. To create fax TIFF images with custom settings you will add a new custom printer profile with different fax settings.
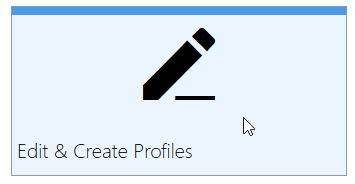
To create a new profile, first open the Dashboard. On the Dashboard select the Edit & Create Profiles tile to open the Profile Manager tool.
Adding the New Profile
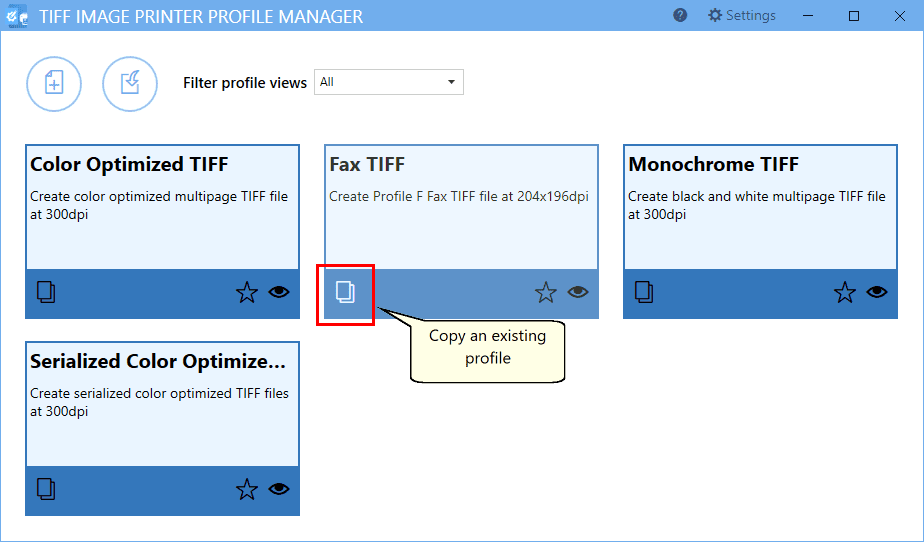
The Profile Manager lists all your printer profiles. There are system profiles that are provided by PEERNET as well as any personal, or custom, profiles you have created.
To create a custom fax TIFF profile, create a copy of the existing Fax TIFF profile using the copy icon on the profile tile.
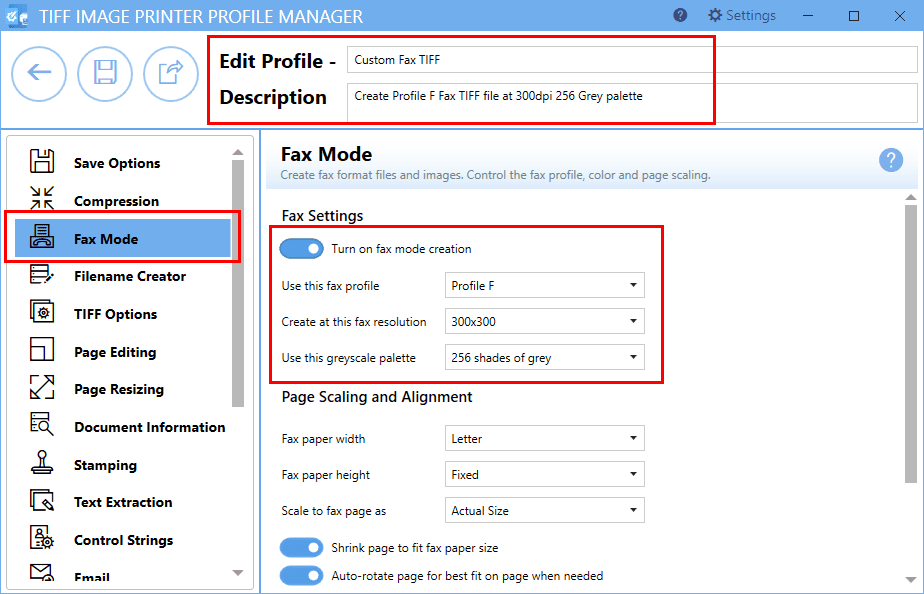
The next step is to edit the name of the new printer profile and add a description for it. Then we will change our fax settings.
Select the Fax Mode tab from the list of settings categories on the left. Fax mode is already on because we copied from an existing fax profile. Below this option are drop boxes to select different fax profiles, resolutions, and greyscale palettes. Here we changed the resolution to 300×300 and increased our greyscale palette to 256 colors of grey.
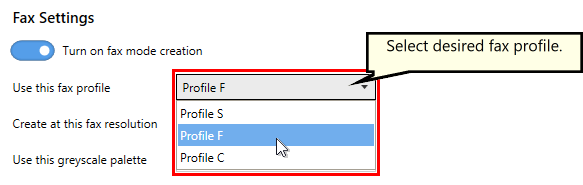
Fax Profiles
There are three fax profiles. Profile F will create standard monochrome faxes, Profile S will create simplified monochrome faxes and Profile C will create color faxes.
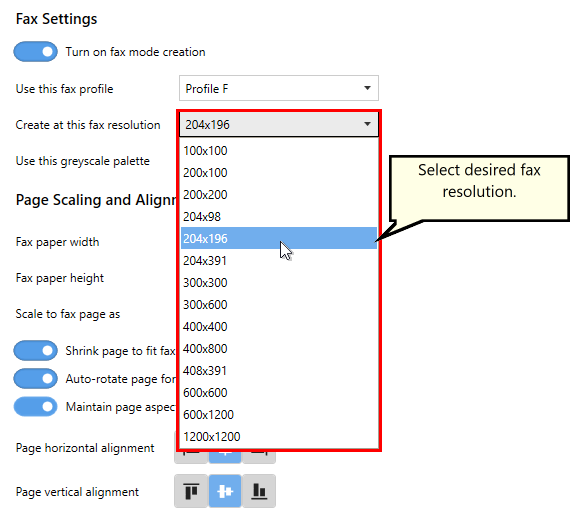
Fax Resolution
When you create fax tiff images, they need to be specific resolutions to be faxable. Profile F faxes can use any of the fax resolutions while Profile S and Profile C each support only a subset of the available resolutions.
Adjust any other fax related settings as you need to meet your requirements. See the Fax Mode tab in the Profile Manager section for more details.
When done, save your new profile and close the Profile Manager.
Return to the Dashboard and use the “Manage Printers” tile to open Printer Management. Select your new custom profile from the printer profile drop box, then click the Save icon to save the changes to the printer.

Close Printer Management and the Dashboard. The printer will now use your custom fax tiff profile to create fax tiff images with the settings you customized.
