Create Files with Custom Filenames
By default, TIFF Image Printer, Raster Image Printer and PDF Image Printer will save all output files to the My Documents folder and name them using the filename from the print job. You can change both the default output location and output file name through the profile manager on the Save Options tab, but for more customized file naming options we recommend exploring the Filename Creator tab. The custom file naming settings allow you to add, edit, and reorder output filename parts to automatically create unique filenames for your TIFF Image Printer output files.
The custom file naming options are controlled through the profile.
The steps below demonstrate how to use the Filename Creator tab to customize the default output location and output name of created file.
Please also read these tutorials:
- Creating a Custom Filename with Custom Text
- Creating a Custom Filename with a Unique File ID
- Creating a Custom Filename with a Date and Time
- Creating a Custom Filename with Dynamic Output Folders
Step by Step Instructions
- Launch the Dashboard.

- Select “Edit & Create Profiles” to open Profile Manager.
- Select “Add a profile” to create a personal profile, or create a copy of one of our system profiles.
- Name the profile, add a description, and click Save.
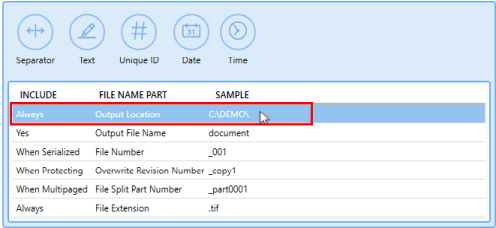
- On the Filename Creator tab, select the file name part for Output Location.
- Select the file icon to browse to your desired location. If you leave this field blank, your image printer will default to the last used folder. If there is no last used folder, the My Documents folder is used. You can also type directly into the Output folder field. If the folder location you enter does not exist, you will see a warning message explaining that this folder location does not exist and that when a new file is created your image printer will automatically try to create the missing folder if possible. Alternatively, you can click the red folder icon to create the new folder now.
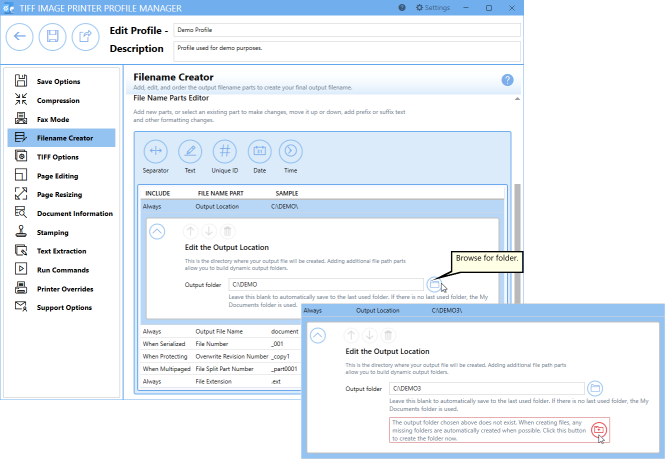
- Any changes made to this file name part will be reflected on the Save Options tab.
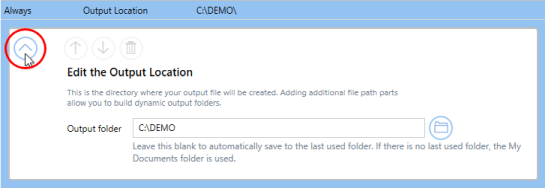
- Click the arrow icon to hide the file part details for Output Location.
- Select the file name part for Output File Name.
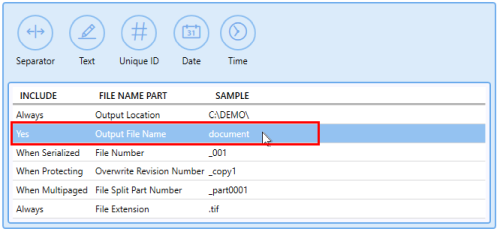
- Enter your desired base file name. If you leave this field blank, your image printer will use the filename from the print job. You also have the option to include prefix and/or suffix text to the filename.
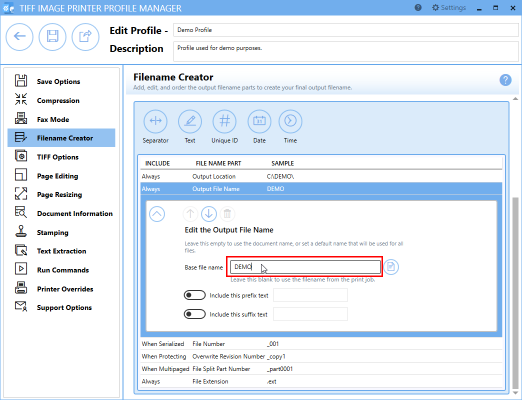
- Again, any changes made to this file name part will be reflected on the Save Options tab.
- Click the arrow icon to hide the file part details for Output File Name.
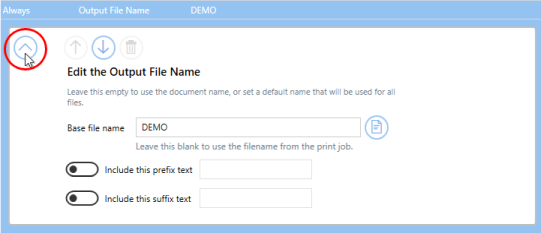
- There are four additional required file name parts which you can customize if you wish:
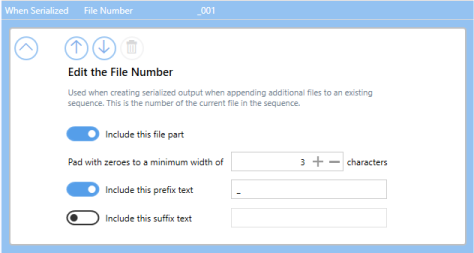
▪File Number – This is only applicable when creating serialized output. If desired, you can add or remove prefix/suffix text or increase/decrease the number of padding zeros. Do not remove this part unless you know you are only converting single page documents.
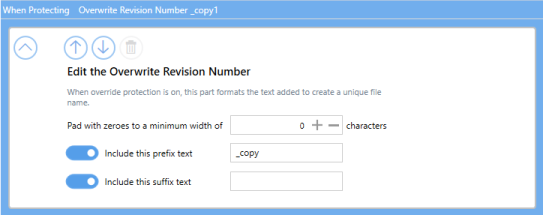
▪Overwrite Revision Number – This is only applicable when prompting is disabled and override protection is enabled. If desired, you can add or remove prefix/suffix text or increase/decrease the number of padding zeros.
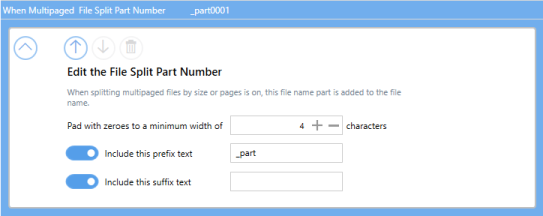
▪File Split Part Number – This is only applicable when automatically splitting multi-paged files. If desired, you can add or remove prefix/suffix text or increase/decrease the number of padding zeros.
▪File Extension – By default, the file extension of the output file will match the output type selected, but you also have the option to customize the file extension of the output file.

If you choose to set the Output Location and/or Output File Name, you may also want to disable prompting by the Save As dialog each time you print.
i.To turn off prompting by the Save As dialog, disable Prompt for the output location and base file name.

- Click Save-Back, and close Profile Manager.
If you plan to use these settings regularly, you may wish to make this personal profile the default profile used by TIFF Image Printer.
- Select “Manage Printers” to open Printer Management.
- Select the printer you wish to edit and use the Profile drop box to select your desired default profile.
- Select the Save icon to save changes.
- Select the Home icon to return to the Dashboard.
- Close the Dashboard. Now when you print your document to TIFF Image Printer, the output file will be saved to your desired output location with your custom filename.


