
Add Page Numbering Stamp
Adding page numbers to your document enhances its usability, professionalism, and organization. Page numbers allow for easier navigation, cross-referencing, and document review. They contribute to the readability of documents, whether printed or digital, and support effective communication among readers and collaborators.
TIFF Image Printer, PDF Image Printer, and Raster Image Printer all allow you to add page numbering to your created file.
Navigation
Page numbers are a simple and effective way for readers to navigate through longer documents. They can easily locate specific sections, refer to pages, or track their progress within the document. Page numbers are also helpful for quickly locating relevant sections when cross-referencing various documents, including research papers and legal documents.
Professionalism
Adding page numbers to formal documents, such as proposals, reports, or contracts, is standard practice. Page numbers add professionalism and organization to the created file.
Page numbers are an essential tool for keeping readers engaged in visual presentations and reports, as they create a clear sense of progress and direction.
Consistency
Page numbers offer a consistent structure throughout a document. They provide an easy way of checking that all pages are in the correct order and no pages have been lost during printing or sharing.
How to Add Page Numbering
All three of PEERNET’s image printers use printer profiles that control what type of file to create. All options, including adding page numbering stamps to your new files are set in a printer profile.
We are using TIFF Image Printer here, the steps are the same for Raster Image Printer and PDF Image Printer.
The first step to adding page numbering to your files is to create a new profile or edit an existing profile you already have.
All features for your printer can be found by double-clicking the Dashboard desktop shortcut. On the Dashboard, you will find license information, tools, and resources, as well as the ability to create and edit profiles.

In the Dashboard. click the Edit & Create Profiles tile to open the Profile Manager tool.
Creating and Editing Profiles
The Profile Manager tool is where you create and edit the profiles used by the printer. Each printer includes profiles created by PEERNET to start you off. You can create personal profiles from scratch using the Add new profile button. You can also start with a copy of an existing profile using the copy icon on the profile tile. By using profiles, you have easy access to creating multiple different types of files.
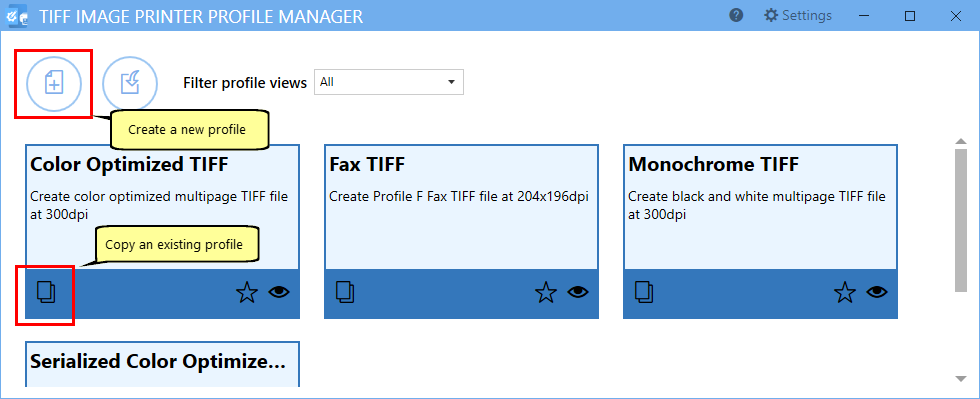
New profiles automatically open in edit mode. It’s a good idea to give them a name you will remember and add a short description. Do that first at the top of the editor before making any other changes to the profile. For existing profiles, click on the pencil icon to open it for editing.
Page Numbering is a Stamp
You can find the page numbering stamp in our Stamping features. There are also stamps for custom text, images, and date and time.
For text-based stamps, you can choose the text font, size, and color. Positioning, aligning, and rotating options allow you to place the stamp anywhere on the page. You can also choose which pages we will add the stamp to.
Adding a Page Numbering Stamp
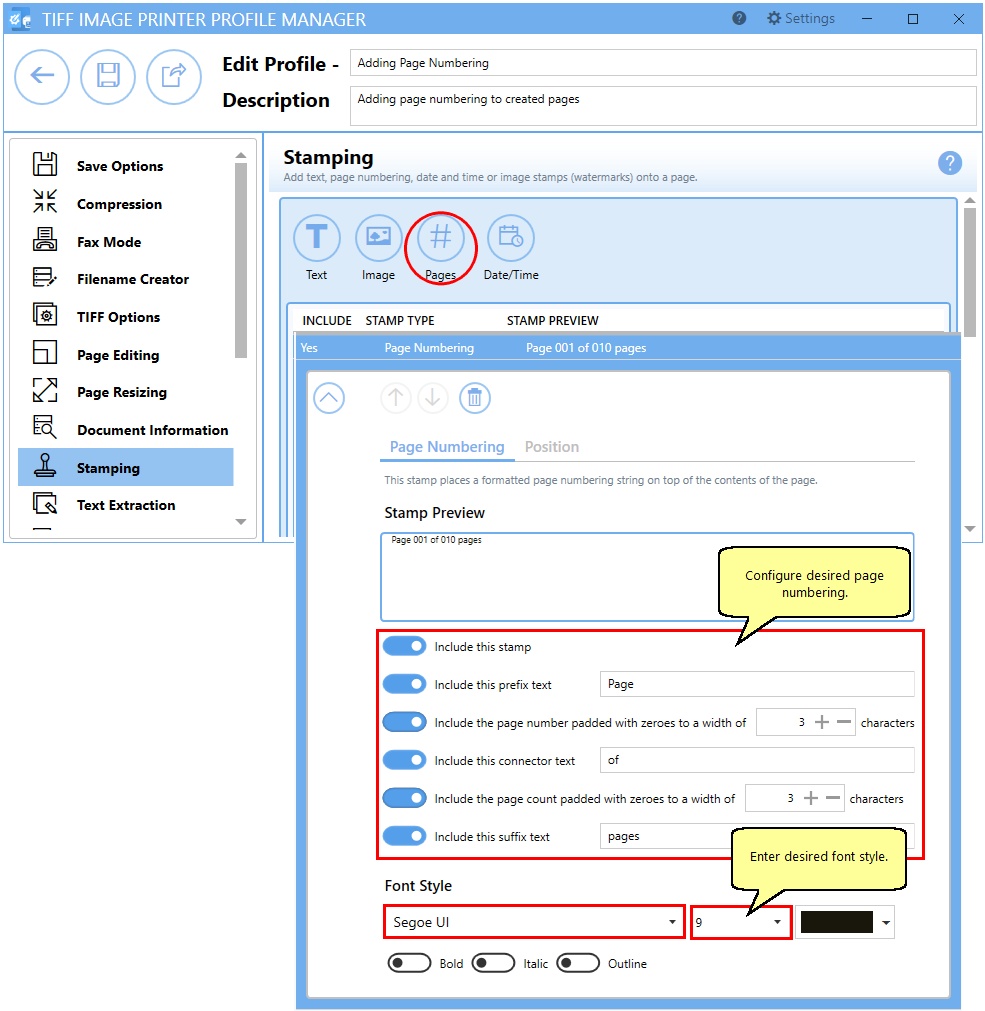
To start, select Stamping on the left-hand side to see the options on the right. Next, add a page numbering stamp to the created pages by choosing the Pages stamp.
After adding, the stamp automatically opens for editing and customizing. The syntax and text formatting for the page numbering is set on the Page Numbering tab. You can see a preview of your page number as you make changes.
Below, we have chosen to pad with zeros to a width of 3 characters, giving us a page stamp syntax of ‘Page 001 of 010 pages‘. The stamp text is created using the Segoe UI font, in black with a point size of 9.
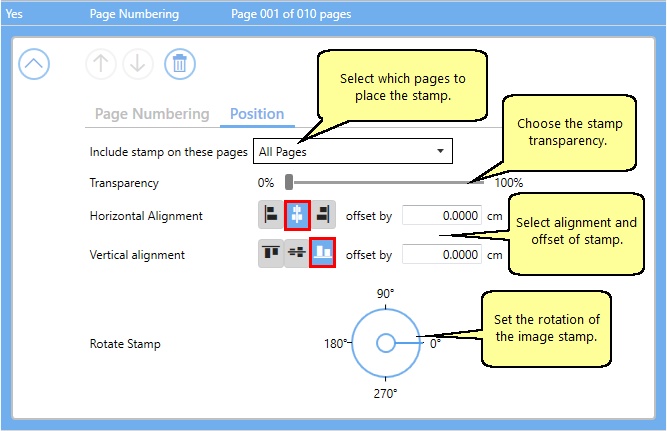
The next step is to decide where to place the stamp on the page by moving to the Position tab. Here, you can select which pages to add the stamp to, adjust transparency, and set alignment and rotation options.
Our page numbering stamp is placed in the bottom middle of every page.
Saving and Using the Profile
Use the Save button in the upper left to save when your changes are complete. Now when you print documents to the printer using this profile, you will see your page numbering stamp appear on your pages.
If your page has standard 1-inch margins, this stamp will appear in the footer area, but the Stamping tool does not reserve space for the stamp. When you have a page with no margins or very small margins, the stamp will be layered over the page content. If you have non-traditional margins and need to reserve space for a stamp in the header space, see how to add borders to the page using the border feature on the Page Resizing tab.
If you plan to use these settings regularly, you may wish to make this personal profile the default profile so that it is always used when printing.
