This section contains technical documentation on using and creating profiles in the Profile Manager utility, as well as covering the different settings in each property tab found in the profile editing view. For step-by-step instructions demonstrating how to use these property tabs to enable and configure specific settings offered by TIFF Image Printer, see the Working with TIFF Image Printer section.
TIFF Image Printer uses Profiles, which are a group of settings, to create the output image you want. Personal profiles are created and edited through the Profile Manager utility. A personal profile is only available to the user who created it. Users can select their default profile either using the Printer Management utility or on the fly during the printing process on the Save As dialog.
Personal profiles can also be converted to a shared profile. Promoting a personal profile to a shared profile allows the profile to be used by all users on the computer. See Create a Shared Profile topic to learn how to share a profile.

Profile Manager
To launch Profile Manager:
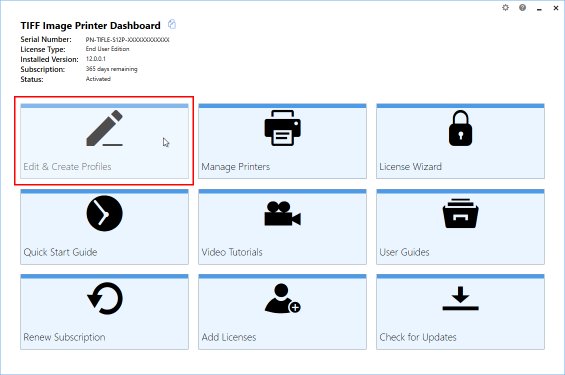
1.Begin by opening the Dashboard (double-click the TIFF Image Printer icon on your desktop or select TIFF Image Printer 12 from the Start menu).
2.Select "Edit & Create Profiles" to open Profile Manager.
On launch, Profile Manager will show you all of the existing profiles. If TIFF Image Printer has just been installed, only the system profiles that come with the printer will be present. TIFF Image Printer comes with system profiles: Color Optimized TIFF, Monochrome TIFF, Smallest Monochrome TIFF, Fax TIFF, and Serialized Color Optimized TIFF.