
Merge Multiple Files to TIFF
TIFF Image Printer and Raster Image Printer make it easy to merge multiple files to TIFF images. Both printer drivers have an append mode that allow you to print more that one file and have the pages added to a multi-paged TIFF image. As you print each file, the printer will add the new pages to the end of the TIFF image.
To create single-page TIFF images instead of a multipage TIFF image, you would also use append mode. This creates a series of single page TIFF images, one for each page, instead of adding each page to the end of a single file.
Merge Multiple Files to TIFF Using a Custom Profile
All append mode options are controlled using a printer profile. A printer profile is a collection of settings that controls the file name and output options the printer uses to create your TIFF image, as well as a host of other options.
With append mode on, the file name and/or output folder for the TIFF image can also be set. The printers look for a matching file of the same name and in the same output folder. If one is found, and append is on, the printer adds the pages to the existing file. It it does not exist, a new file is created.
Creating the Custom Profile
To create a new printer profile, we start by opening the Dashboard. The Profile Manager, other tools and help resources plus license information are available from here. You will see the Dashboard icon on the desktop after installing the printer; double-click it to open the Dashboard.

Click on the Edit & Create Profiles tile to open the Profile Manager.
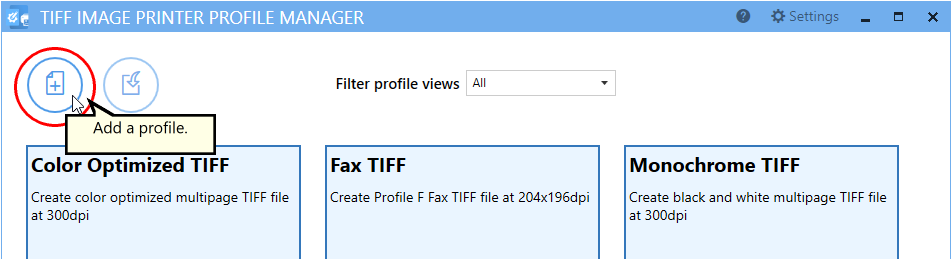
The Profile Manager opens in a separate window. The main view lists all profiles for your printer. The system profiles that are part of the printer install can only be copied. The icon with the page and plus sign in the corner will create a brand new profile.
To merge multiple files to a TIFF image we need a new profile. We’ll start by creating a copy of the ‘Color Optimized TIFF‘ system profile. Create a copy of this profile by clicking on the double-page icon in the corner of the profile’s tile.
Enabling Append to Merge TIFF
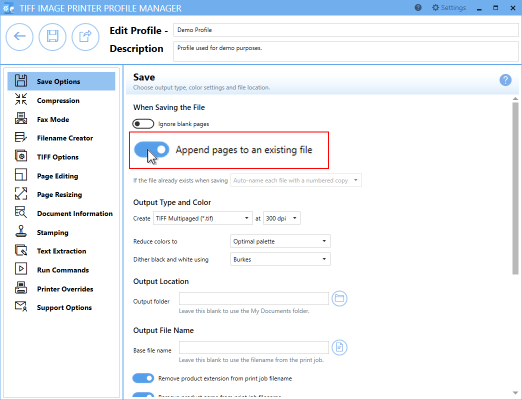
Once copied, the profile opens for editing. The first thing our new profile needs is a name, and a description, set at the top. We named ours “Demo Profile”, you should use a more descriptive name.
The left hand side lists categories of the settings available. Selecting a category displays the settings for that category on the right hand side. The Append mode settings, as well as file name and folder location are in the Save Options category.
Look for the When Saving the File section and enable the Append pages to an existing file option.
Setting the Merged TIFF Output Folder and File Name
To merge multiple files to a single TIFF image, we need to save each document that you print to the same location with the same filename. You can do this manually in the Save File prompt after each print. or you can set the desired Output Location and Output File Name in the profile.
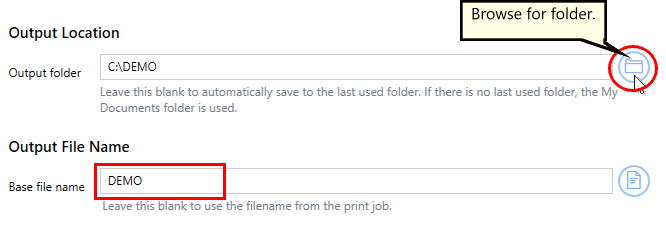
Use the file icon to browse to the output folder you want, or type it in the field. When left blank, the printer will default to the last used folder. When there is no last used folder, files are saved in the My Documents.
We need a base file name to create our merged TIFF images. In the Output File File name section, set your desired base file name. Here we are using “Demo” as our base file name and saving them to the output folder ‘C:\DEMO\’.
Controlling the Save File Prompt
If you choose to set the Output Location and/or Output File Name, you may also want to disable the Save As dialog from appearing each time you print. To do so, turn off the Prompt for the output location and base file name option just below the Append option.

Setting the Printer Profile
Now that the profile is configured to merge TIFF images, save the profile using the Save icon in the upper left, then return to the Profile Manager using the Back (left arrow) icon. Your new profile is available to use. We’re now going to set it as the default profile for the printer.
Close the Profile Manager and return to the Dashboard, This time, select the tile ‘Manage Printers’ to open Printer Management.
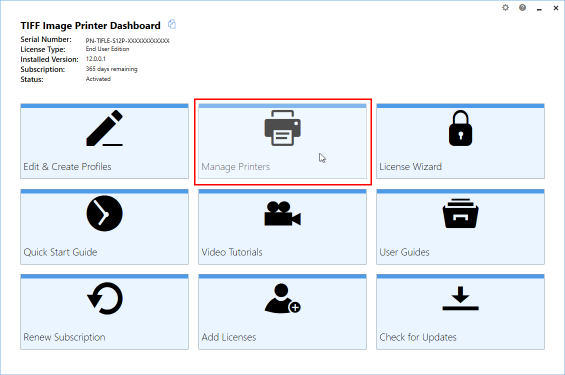
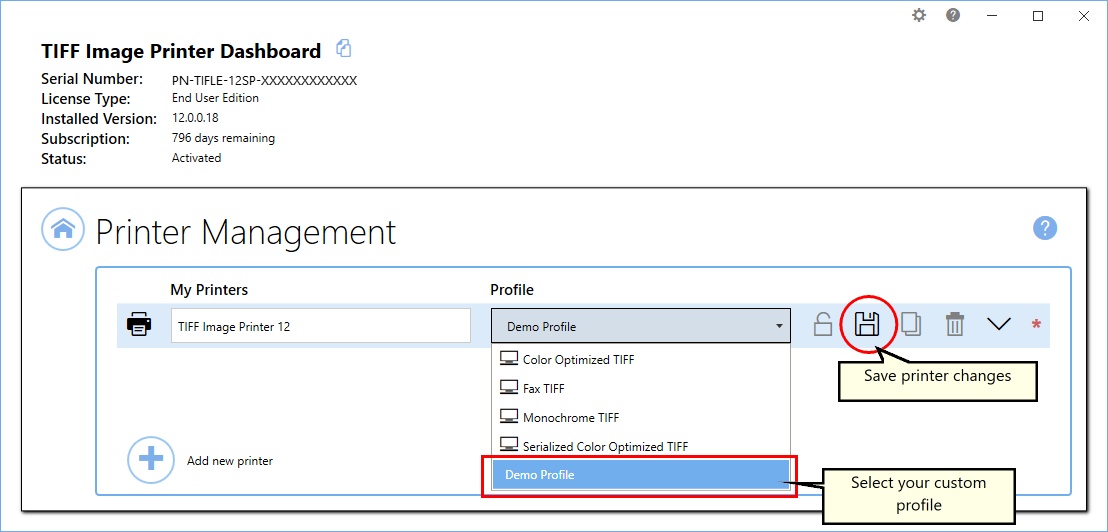
Printer Management allows you to quickly choose the profile the printer will use when creating images. From this screen you can also add, delete and rename copies of the printer.
To use the new merge TIFF profile, click the drop box beside the printer name to select it from the list. We are choosing Demo Profile, as that is the name of our profile created above. Choose the name of your new profile from this list.
Click the Save icon beside the profiles drop box to save the changes to the printer. Then close both Printer Management and the Dashboard.
Now when you print your documents, the printer will append all pages into a single multi-paged TIFF image. For our sample profile, that image is located at C:\DEMO\DEMO.tiff.

