Send Email on Conversion Failure
TIFF Image Printer, Raster Image Printer and PDF Image Printer feature the option to send an email, using either SMTP or Outlook, when a file fails to convert successfully.
This functionality is useful in cases where you want to be notified if a conversion failure occurs, so you can investigate the failure. For example, you are converting files as part of an automated process (no user interaction) with the profile configured to overwrite existing files and one of the existing files is set to read-only, so it cannot be overwritten. This would cause a conversion failure since the image printer cannot successfully save the newly created file over the read-only protected file. The image printer can be configured to send an email to notify one or more email addresses of the conversion failure.
Setting up Email on Conversion Failure
We are using TIFF Image Printer but the same steps are identical in Raster Image Printer and PDF Image Printer.
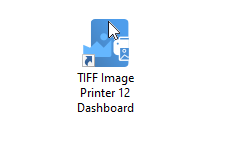
Launch the Dashboard.

Select “Edit & Create Profiles” to open Profile Manager.
Select “Add a profile” to create a personal profile, or create a copy of one of our system profiles.
Name the profile, add a description, and click Save.
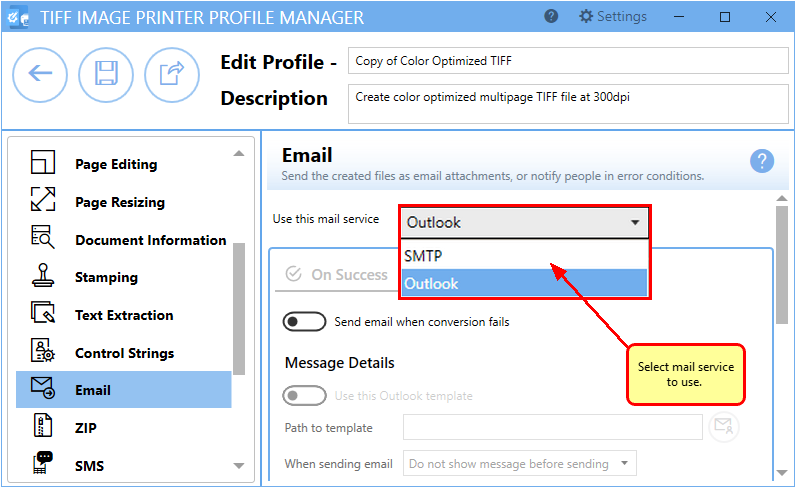
On the Email tab, under Use this mail service, select Outlook or SMTP.
- If you select Outlook, the application must be installed and an email account created in order to send email.
- If you select SMTP, click the Settings button to open the SMTP Settings flyout. The server name, port, connection type and any required authentication settings for your SMTP server should be available from your IT department or your email provider. See SMTP Settings for more details on this panel.

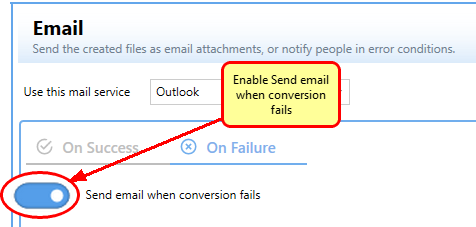
Select On Failure and enable Send email when conversion fails

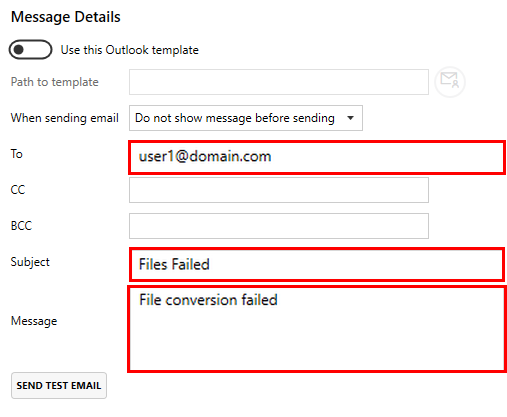
Enter your desired Message Details (if you are not using an Outlook template). The Message Details parts To, Subject, and Message are required.

Click Save-Back, and close Profile Manager.
If you plan to use these settings regularly, you may wish to make this personal profile the default profile.
- Select the printer you wish to edit and use the Profile drop box to select your desired default profile.
- Select “Manage Printers” to open Printer Management.
- Select the Save icon to save changes.
- Select the Home icon to return to the Dashboard.
Close the Dashboard. Now when you print your document to your image printer, you will receive an email notification after a failed conversion.


