Exporting and Importing Printer Profiles
When everyone needs to create the same file type, exporting and importing printer profiles is an easy way to share the same settings with everyone.
Most archiving software and systems require a particular file type when uploading scanned documents. Our printer profiles make it easy to configure the file type to create. Once you have your profile, it is easily exported and shared with other users. You can also export any profile as an excellent way to back up any customized settings for safekeeping.
TIFF Image Printer, Raster Image Printer, and PDF Image Printer provide an easy-to-use Profile Manager app to create, export, and import custom profiles.
Open the Profile Manager
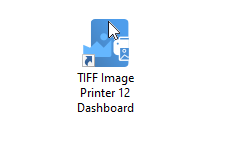
The Profiles Manager app is accessible through the Dashboard app. Open the Dashboard app by double-clicking its icon on your desktop.
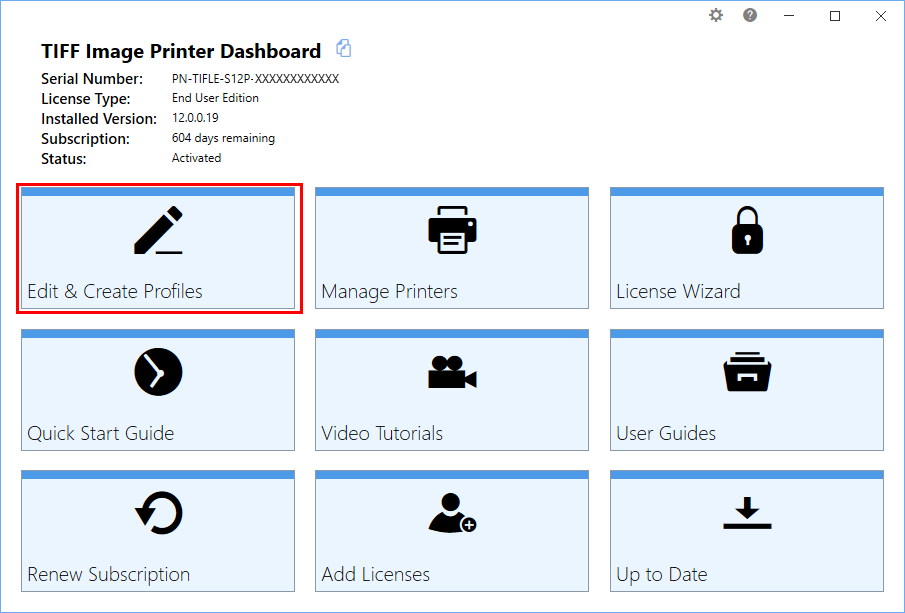
Next, click the Edit & Create Profiles tile to access the Profiles Manager app.
Exporting a Profile
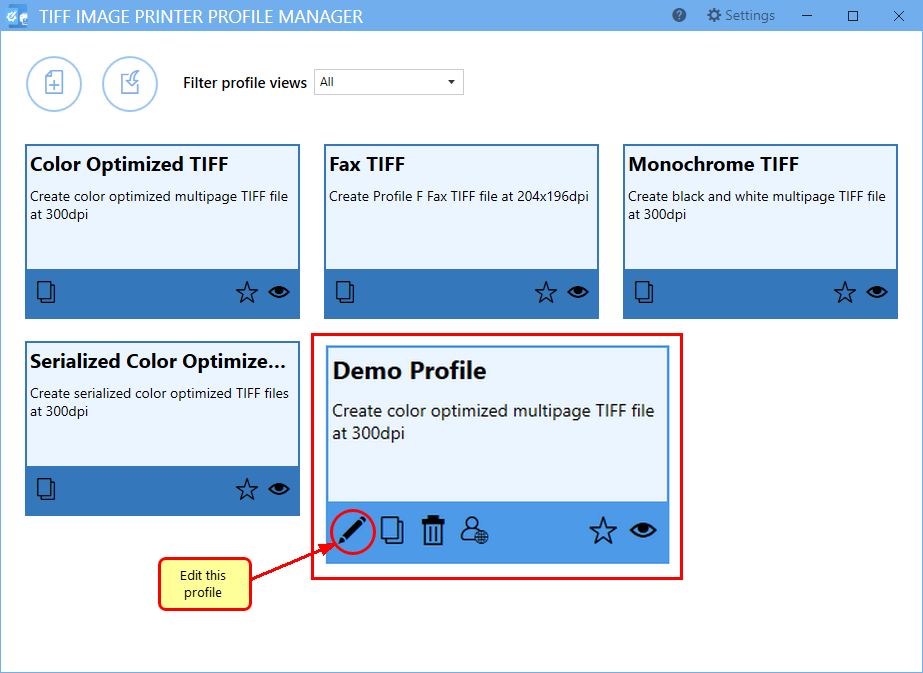
The Profile Manager lists all available profiles. Some profiles are system profiles. Although you cannot edit a system profile, you can copy it to create a new personal profile you can edit and export.
To edit or export a personal profile, click the pencil icon in the lower left of the profile tile.
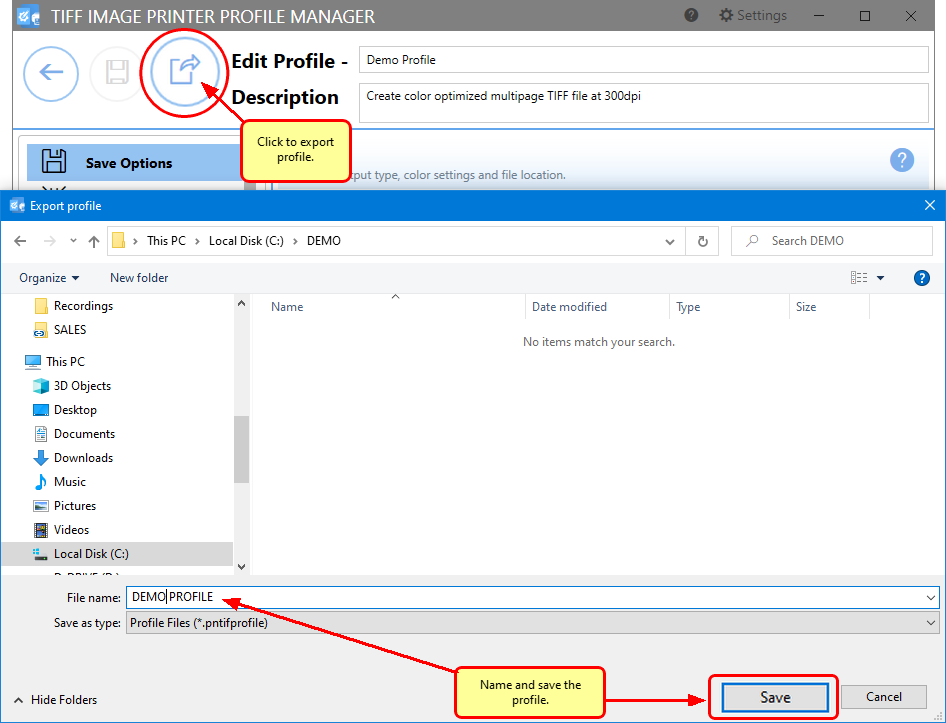
Once you have the profile open, you can export it using the Export Profile icon in the upper left to export your profile. Choose a name for your exported profile and where to save it.
Importing a Profile
Now that we have our exported profile, the next step is to import that file on a different computer. Firstly, install the matching TIFF Image Printer, Raster Image Printer, or PDF Image Printer on the target computer if it is not already there. Profiles are not interchangeable between products.
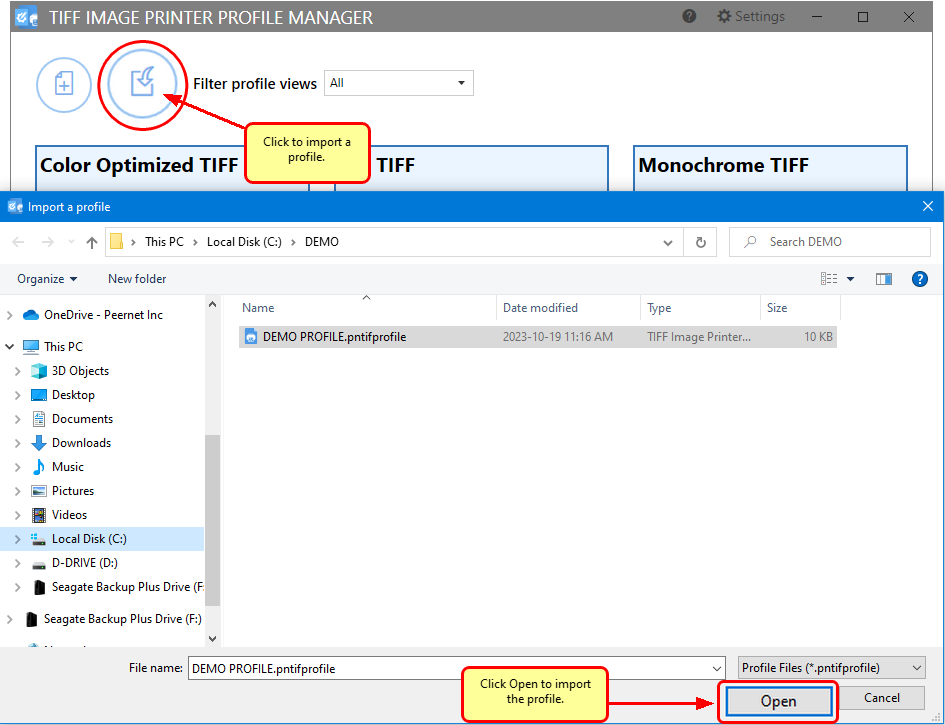
As we did when exporting above, we need to open the Profile Manager from the Dashboard. Next, we import the new profile using the Import Profile button in the upper left of the Profile Manager main screen.
Use the Import Profile dialog to browse and find the profile, then select Open to import the file. If you have a profile with the same name as the profile you are importing, the import step will update the name of the new profile by adding “Import of” as a prefix.
When finished, close the Profile Manager and return to the Dashboard.
If you need to use the imported profile every time you print, you may wish to make it the default profile used by the image printer. The Manage Printers tile in the Dashboard app opens the Printer Management screen. In Printer Management, you can set the default profile for the printer. Other options are available, such as printer resolution, paper size, and copying, creating, and deleting printers.


