How to use Custom Paper Sizes
For most applications, when the original file is printed, the paper size is part of the information being sent to TIFF Image Printer, Raster Image Printer and PDF Image Printer. The image printer uses the paper sizes listed in the Windows Paper Forms List when creating the output file.
If you are printing a file on a unique paper size, like a 20″ x 28″ map or a 6″ x 9″ Word document, and the paper size is not in the Windows Paper Forms List, then the image printer uses the closest paper size from the Windows Paper Forms List. Therefore, you may find the created output file rendered on a different paper size than what the original file specified. You can add the custom paper size to the Windows Paper Forms List so you can then select that paper size in the application when printing. There are some instances where you may need to override the paper size within the image printer, such as when printing oil well logs.
Add a Custom Paper Size
The following steps are to add a custom paper size in Windows 10, Windows 11, Windows Server 2016, Windows Server 2019 and Windows Server 2022. To add custom paper size in the other supported Windows platforms, see Adding custom paper sizes to Windows 7 and Windows Server 2008 R2
How to Add a Custom Paper Size
Close any open applications.
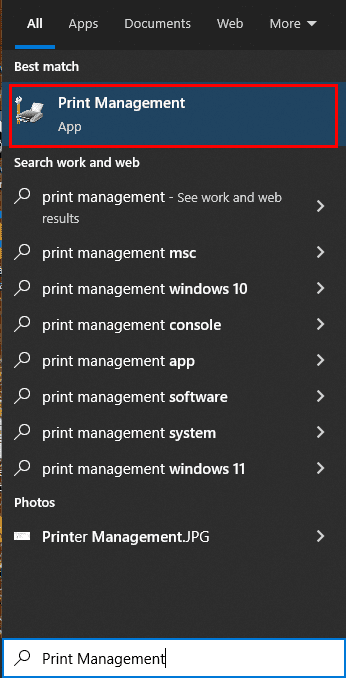
Go to Start and search for “Print Management” to open Print Management applet.
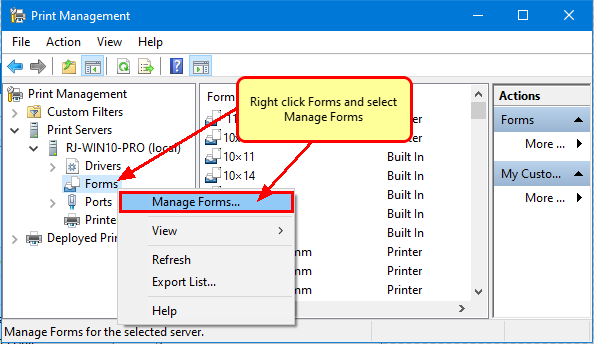
Select Print Servers and then select the name of your computer (ie. Server1).
Right-click Forms and select Manage Forms…
Check “Create a new form”.
- Enter a descriptive name in the “Form name:” field (e.g. “6 x 9” or “20 x 28”)
- Set the measurement units of “Metric” or “English”
- Enter the desired Width and Height for your paper size. NOTE: Always make the Width less than the Height (e.g. Width 20, Height 28) as you can always choose Landscape orientation later.
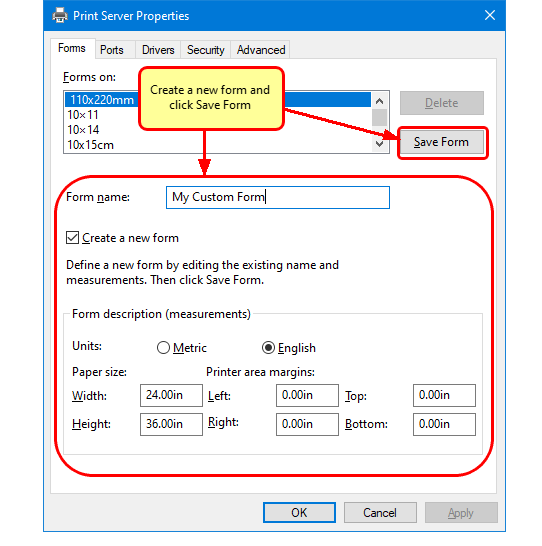
Click Save Form, and then click OK to close the window.
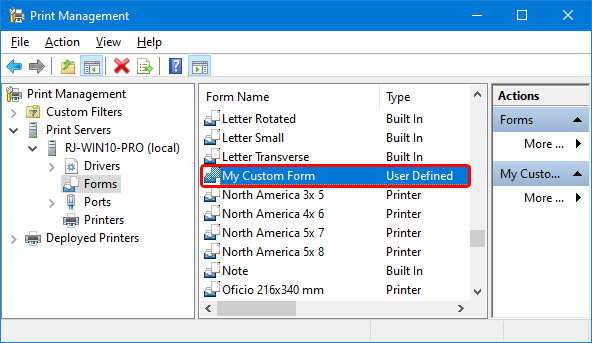
You can now use your new computer paper size in your application, or as a paper size on your image printer’s Profile Manager Printer Overrides tab.
Use a Custom Paper Size
All settings to override paper size are controlled through the profile. Note that configuring a custom paper size within the profile will override any other paper size selection that you have set on the application.
Setting Custom Paper Size in Image Printer
Launch the Dashboard.
Select “Edit & Create Profiles” to open Profile Manager
Select “Add a profile” to create a personal profile, or create a copy of one of our system profiles.
Name the profile, add a description, and click Save.
On the Printer Overrides tab, under Force Paper Size, enable Use the following form or custom paper size.
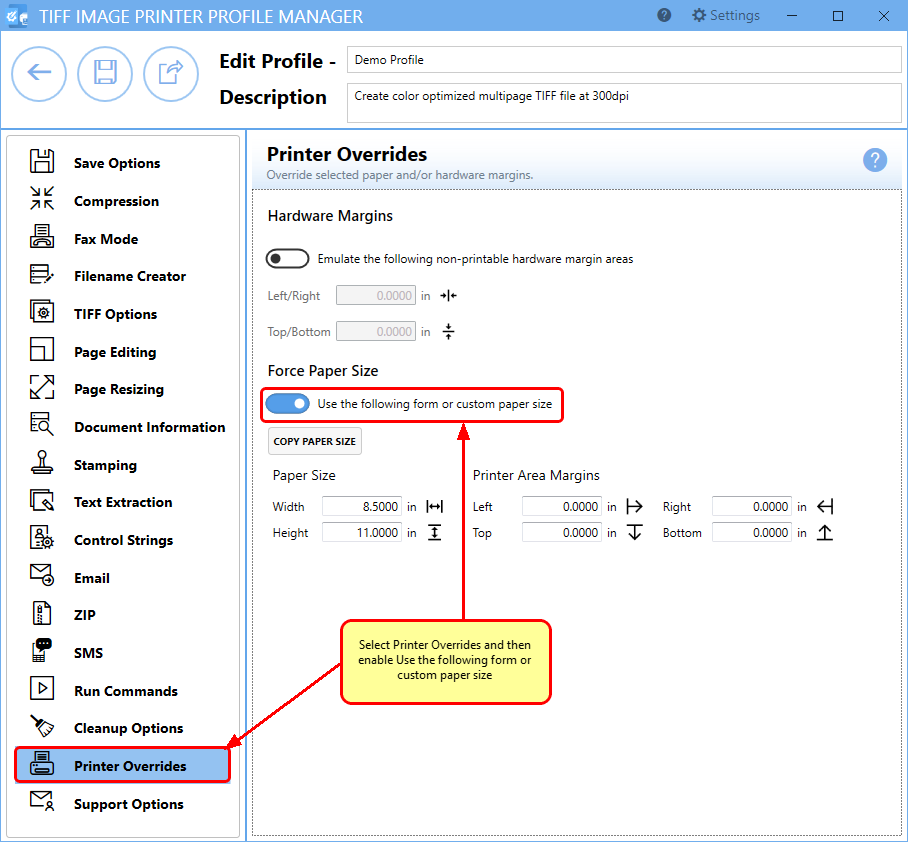
Enter the desired Width and Height for the custom paper size, or use the Copy Paper Size button to copy the dimensions from our list of standard paper sizes. Dimensions for Paper Size are entered based on a portrait oriented page. You can change the units by selecting Settings from the top right hand corner of the Profile Manager window, and toggling between inches (in) and centimeters (cm).
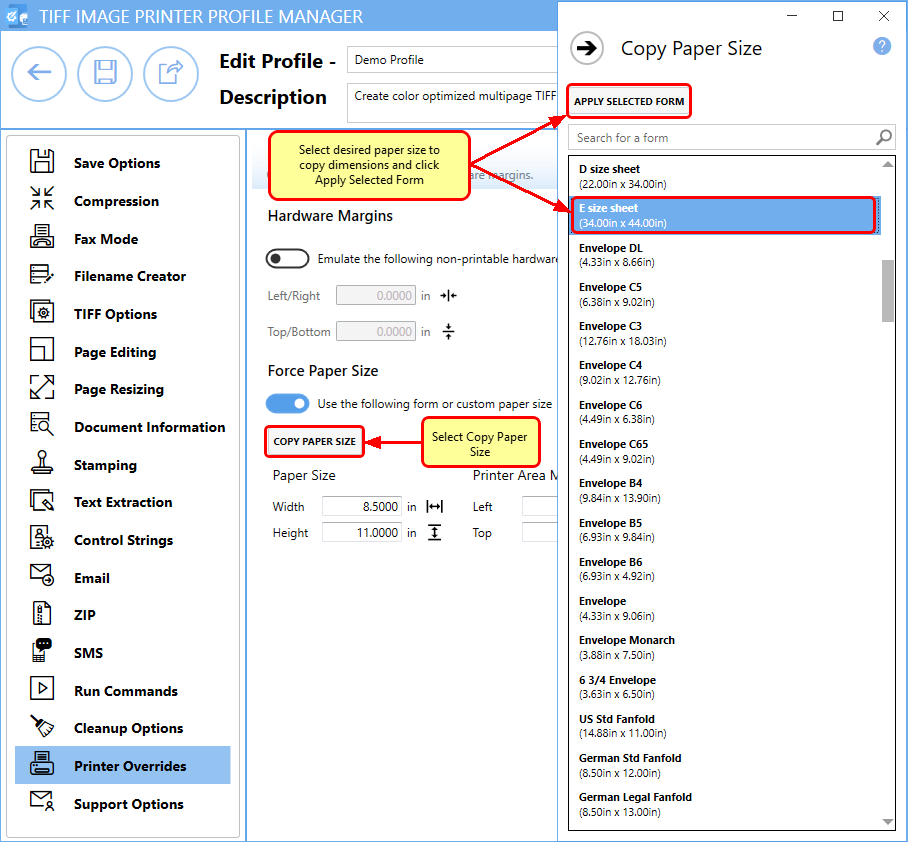
Click Save-Back, and close Profile Manager.
If you plan to use these settings regularly, you may wish to make this personal profile the default profile used by your image printer.
- Select the printer you wish to edit and use the Profile drop box to select your desired default profile
- Select “Manage Printers” to open Printer Management.
- Select the Save icon to save changes.
- Select the Home icon to return to the Dashboard.
Close the Dashboard. Now when you print your document to your image printer, the output page size will match the custom paper size you entered.


