When creating multipaged output the files created can be automatically split into a sequence of smaller files using one or both of the following criteria:
•split the file as soon as it exceeds a size threshold
•split the file based on a page count
If both file splitting options are enabled, the file will be split at the first condition that is met. File splitting only applies to the following multipaged file formats:
•TIFF Multipaged (*.tif)
When file splitting is enabled the serialized naming profile is always used to name each file in the sequence. For example, printing a 15 page report from an invoice database to a multipaged TIFF image and setting the file splitting page count to 5 pages will result in 3 output files, each with 5 pages, named as follows:
•Invoice_part001.tif
•Invoice_part002.tif
•Invoice_part003.tif
Automatic file splitting is controlled through the profile.
Step by Step Instructions
1.Launch the TIFF Image Printer Dashboard.
2.Select "Edit & Create Profiles" to open Profile Manager.
3.Select "Add a profile" to create a personal profile, or create a copy of one of our system profiles.
4.Name the profile, add a description, and click Save.
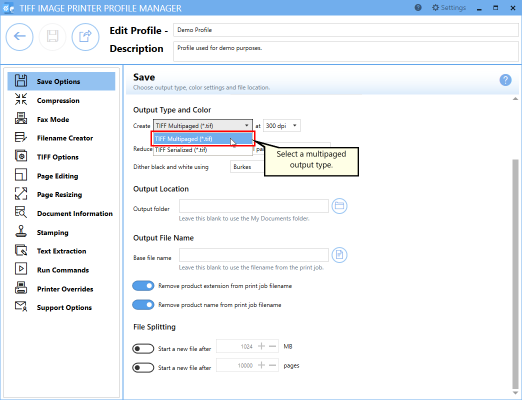
5.On the Save Options tab, under Output Type and Color, drop the box to select TIFF Multipaged
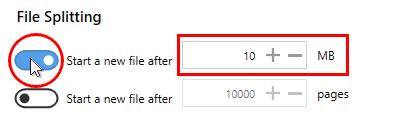
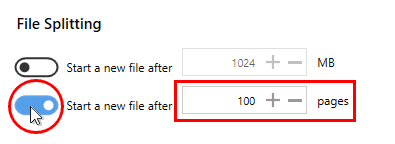
6.Under File Splitting,
a.to split the file based on a size threshold, enable the first criteria and set "Start a new file after" to your desired size value (ex. 10MB).
b.to split the file based on a page count, enable the second criteria and set "Start a new file after" to your desired page count (ex. 100 pages).
When splitting files into a sequence of smaller files, you may be interested in setting the Output Location and Output File Name within the profile.
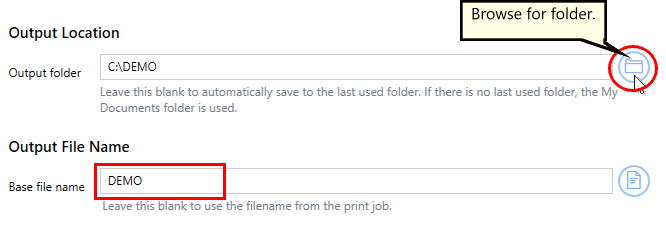
i.To set the Output Location, select the file icon to browse to your desired location. If you leave this field blank, TIFF Image Printer will default to the last used folder when prompting is enabled and the printer is using the last used folder option. If there is no last used folder, or prompting is disabled, the My Documents folder is used.
ii.To set the Output File Name, enter your desired base file name. If you leave this field blank, TIFF Image Printer will use the filename from the print job.
7.On the Filename Creator tab, you can see the naming convention that will be used when naming each file in your created sequence of smaller files. By default, TIFF Image Printer adds "_part0001" to the filename from the print job when creating a sequence. If desired, you can add or remove prefix/suffix text or increase/decrease the number of padding zeros.
8.Click Save-Back, and close Profile Manager.
If you plan to use these settings regularly, you may wish to make this personal profile the default profile used by TIFF Image Printer.
i.Select the printer you wish to edit and use the Profile drop box to select your desired default profile.
ii.Select "Manage Printers" to open Printer Management.
iii.Select the Save icon to save changes.
iv.Select the Home icon to return to the Dashboard.
9.Close the Dashboard. Now when you print your document to TIFF Image Printer, the output will be automatically split into a sequence of smaller files using your desired criteria.