Word to PDF With Bookmarks
Convert a Word to PDF with bookmarks and hyperlinks using the Save as PDF Microsoft Add-In. This Add-In is installed with PDF Creator Plus. Bookmarks in a PDF file have the same purpose as the Headings in the navigation pane in Microsoft Word. In both places they make for easy navigation of large documents.
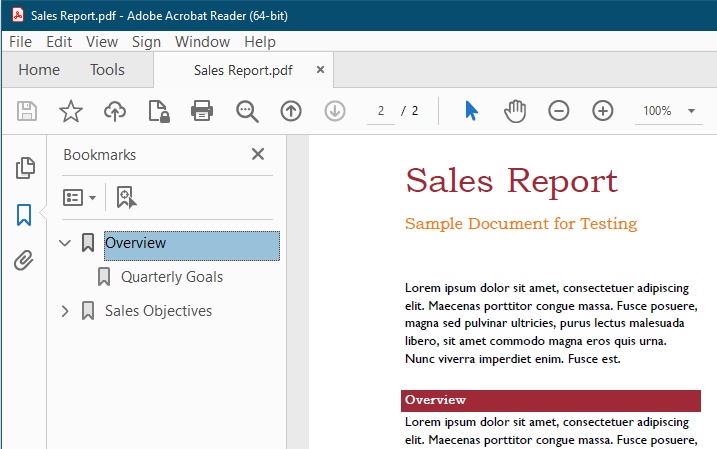
When viewing a PDF file in Adobe Reader the bookmarks in a panel on the left hand side. Clicking on a bookmark moves to that section in the document. This is the same as moving around in a Word document using the navigation pane or a table of contents page.
The Save as PDF Microsoft Add-In will also process and keep hyperlinks in the Word document as well. This includes links in a table of contents and links to web pages, internal locations and other files created in the body of the document.
Using the Save As PDF Add-In
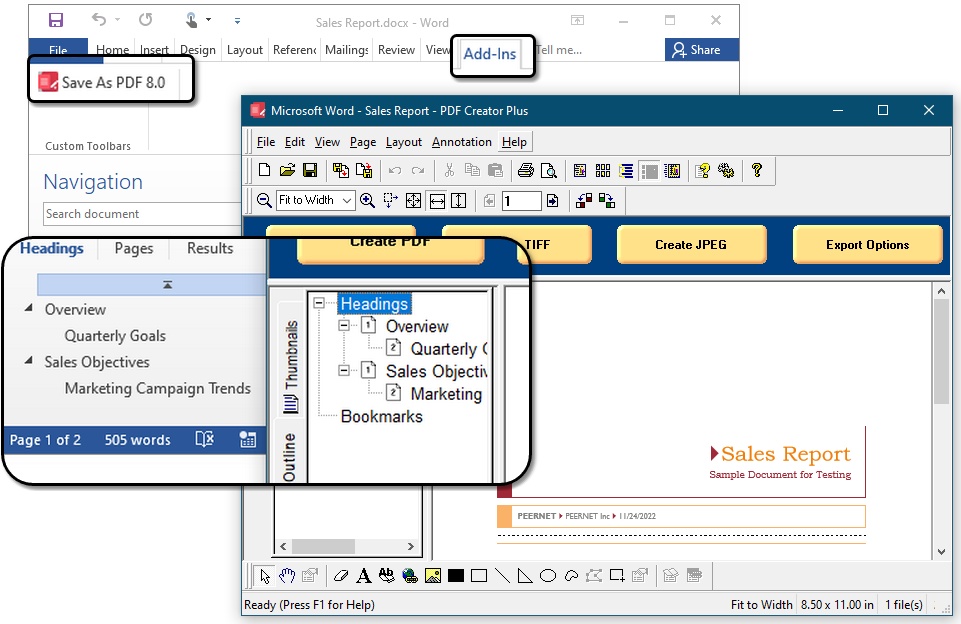
To create a PDF with bookmarks from Word, use the Save As PDF tool. This tool is on the Add-Ins tab on the ribbon interface.

To send your Word document with bookmarks and hyperlink information to PDF Creator Plus, click the Save As PDF button. This will open the PDF Bookmark Creation Settings dialog.
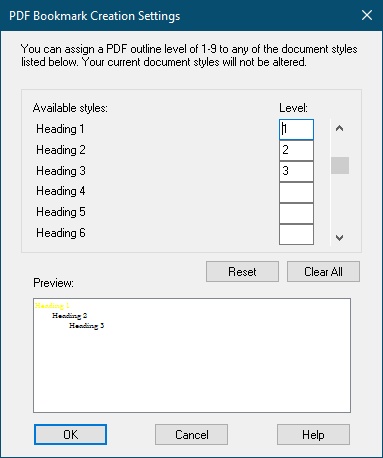
These settings control which headings and styles from your Word document we will use to create the bookmarks in your PDF.
The initial settings include all text styled as Heading 1, 2 and 3. They map to Level 1, 2 and 3 bookmarks in the PDF. We show how to add additional bookmark levels below. For now, leave the settings to the default of three levels.
Click OK to start converting your Word document to PDF with bookmarks and hyperlinks. A progress dialog shows the steps as Save AS PDF Add-in processes the document. This can take a bit of time depending on the complexity of your document.

When complete, the Add-In sends the pages as well as the bookmark and hyperlink information to PDF Creator Plus.
Creating the PDF with Bookmarks and Hyperlinks
We can now create from our Word file a PDF file that will include bookmarks and hyperlinks. To start, click the Create PDF button from the task window, or select File – Create PDF… from the menu.
From here, choose where to save your new PDF file and set any additional PDF options.
To create a PDF with bookmarks, make sure you check the Create hyperlinks and Create outline option in the PDF Options section.
You can have your PDF file open automatically by checking the Open file option in the Actions section.
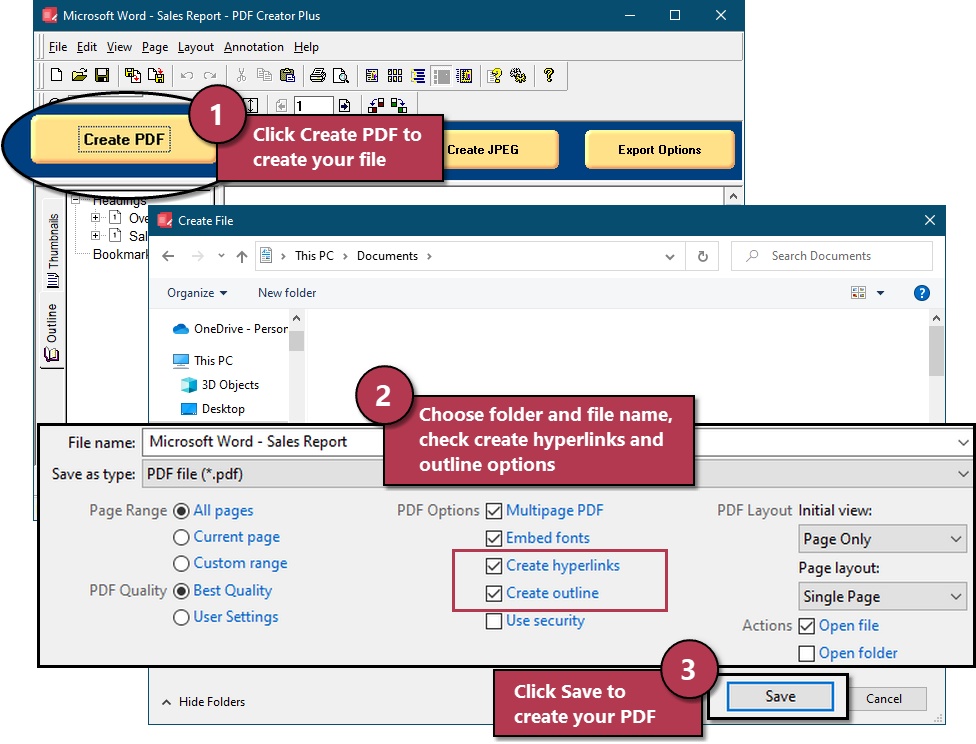
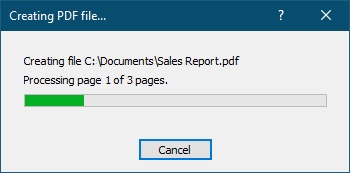
Press the Save button to create your PDF document. A progress dialog appears while we create your PDF, and will close when complete.
There you have it, a PDF file from a Word document with bookmarks and hyperlinks.
If you selected the Open file action, your new PDF file will open using your default PDF viewing application. This is often Adobe® Reader. but can also be the Microsoft® Edge browser, or another PDF viewer application.
A Note on PDF Bookmarks and Word Styles
The Save As PDF Add-In maps Word styles to PDF bookmark levels. In a Word document, using styles to format your text leads to a polished and professional look. They allow for quick formatting of headings, paragraph text and other elements. An added bonus, the built-in heading styles make it easy to generate a table of contents.
The PDF Bookmark Creation Settings dialog uses these styles to decide which styles, normally the built-in Heading styles, map to which PDF bookmark outline level. You can choose what outline level, from 1 to 9, to assign each available style in the document. Only styles assigned a bookmark level will be in the outline.
The default settings map heading styles 1,2 and 3 to PDF bookmark levels 1,2 and 3, respectively. Text in the Word document marked with these styles will become the PDF bookmarks in your PDF.
To add additional PDF bookmark levels, map level to the appropriate style. Here we add any text styled as Heading 4 and Heading 5 in our Word document as level 4 and 5 bookmarks in our PDF.


