
Converting Wide Format Text Documents
NOTE: Also see our how-to guide on Converting Landscape Text Files with Document Conversion Service.
A customer recently approached us with a need to convert text-based reports to PDF files. His particular text documents were being generated by a financial software application and were much wider than normal landscape mode text documents.
Large banking institutions and institutions in the health industry, like hospitals using older mainframe-based applications, often create these types of text files.

With a few tricks, you can use Microsoft Word to properly display and print the report to any of the printers in PEERNET’s suite of file conversion software to convert the text document to PDF, TIFF or another image format. Even if your files are not quite as wide as the client above, many organization’s files are wider than the standard Letter, Legal or A4 sized paper; if that’s the case, you can use the same steps below to customize your conversion process to fit your organization’s particular needs.
The basics are as follows:
- Open the text file in Word and select one of PEERNET’s printers as the printer
- Set the document font
- Set the document orientation
- Set the document margins
- Set the document paper size
Open the Text File and Select the Printer in Word
If your text file is very wide, when you open this document in Word, it will look very, very wrong. Don’t worry! The steps listed below will change that.
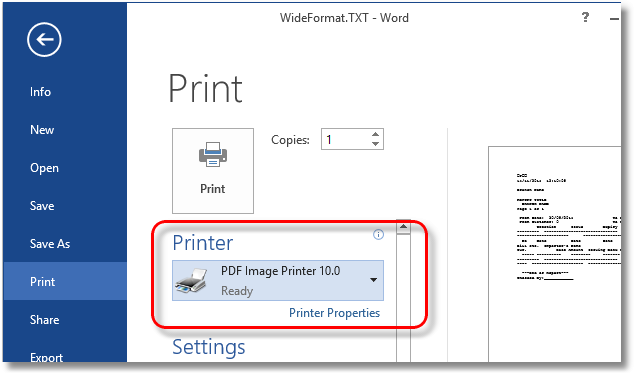
The first thing that needs to be done is to select one of PEERNET’s printers. By doing so, we are increasing the number of predefined paper sizes that are available to help us layout the document.
To select the printer, click on File and then on Print in the left hand column and choose one of PEERNET’s printers. We do not actually need to print the document at this point so just click the back arrow in the upper left corner or on the File tab to return to your text file.
Set the Document Font
Text-based reports are often designed to be printed on a certain size of paper with specific margins and using a specific font at a specific font size. A change in any of these can result in a report that’s laid out incorrectly.
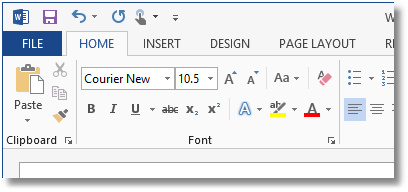
The default font used for text documents in Microsoft Word is Courier New, size 10.5, or Courier New, size 10, for versions of Office prior to Office 2010. If you know the font that needs to be used, select the entire document contents and set that font from the Font section on the Home tab. If you don’t know the font type and size, leave the font set to the default for now. You can always change this later after applying margins and paper size to your document to get your text to align properly.
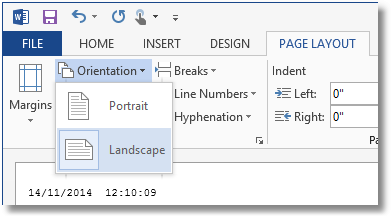
Set the Document Orientation
In Microsoft Word, text files are opened in portrait orientation by default. If this text document is very wide, the first thing you’ll need to do is change the orientation to landscape. You can do this right from the Orientation drop down on the Page Layout tab. Depending on the layout of your text document, you may or may not need to do this.
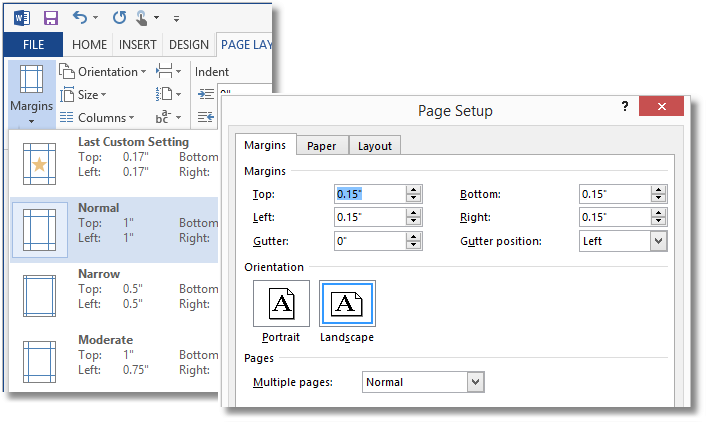
Set the Document Margins
When opening TXT files, Word defaults the document margins to the last used custom margin settings. For text documents this is often not what is desired. Changing the margins also allows each line of text to be wider or narrower, as needed, to get each line to match the required layout of the text file.
You can change the margins to one of Word’s predefined margin settings available from the Margins drop down list on the Page Layout tab, or use the Margins tab on the Page Setup dialog to set your own custom margins.
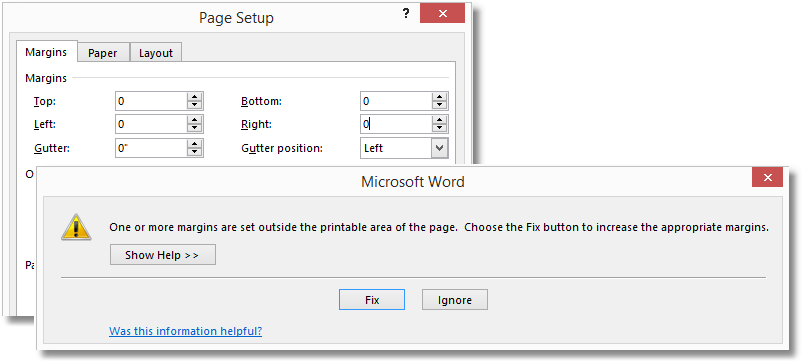
To have Word automatically determine the smallest margins, set all of the margins to 0 and then click OK to set them. If the printer doesn’t support 0 width margins, Word will prompt you with a message stating that the margins are outside the printable area. Click the Fix button from this prompt to set the smallest margins allowed for printer you have selected.
Set the Document Paper Size
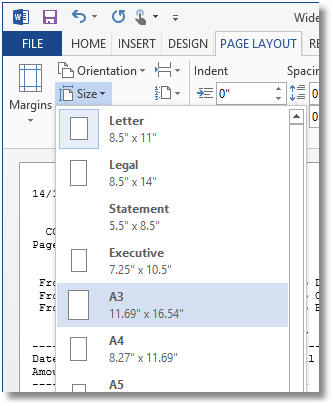
The last step is to set the actual paper size. Like margins, there are several paper sizes available from the Size drop down list.
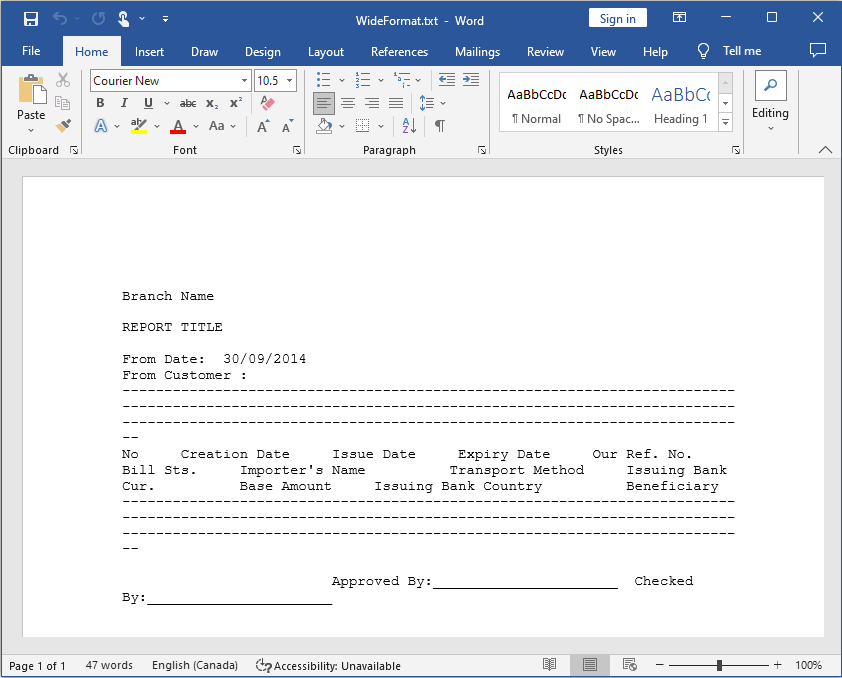
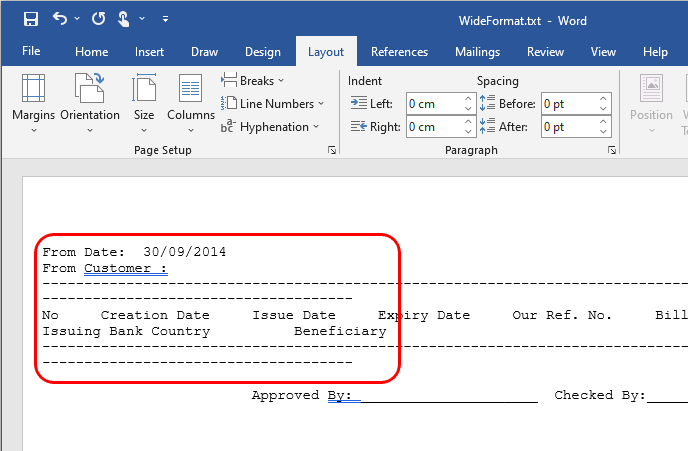
In some cases, all you need to do is choose a different paper size to have the text file display properly while in others you may need to set a larger or even a custom paper size for the document to be displayed properly. In the sample document below, the original text report was designed to be printed on landscape A3 (11.69’ x 16.54”) sized paper so we will start with choosing A3 from the list.
Setting the paper size to A3 widens the report; but because the font used by Word is not the original font used when the report was designed, the layout is still not quite correct. The highlight rectangle shows that the columns and underlines are not aligned, and the text “Page 1 of 1” is wrapped to the left when it should be at the very end of the previous line.
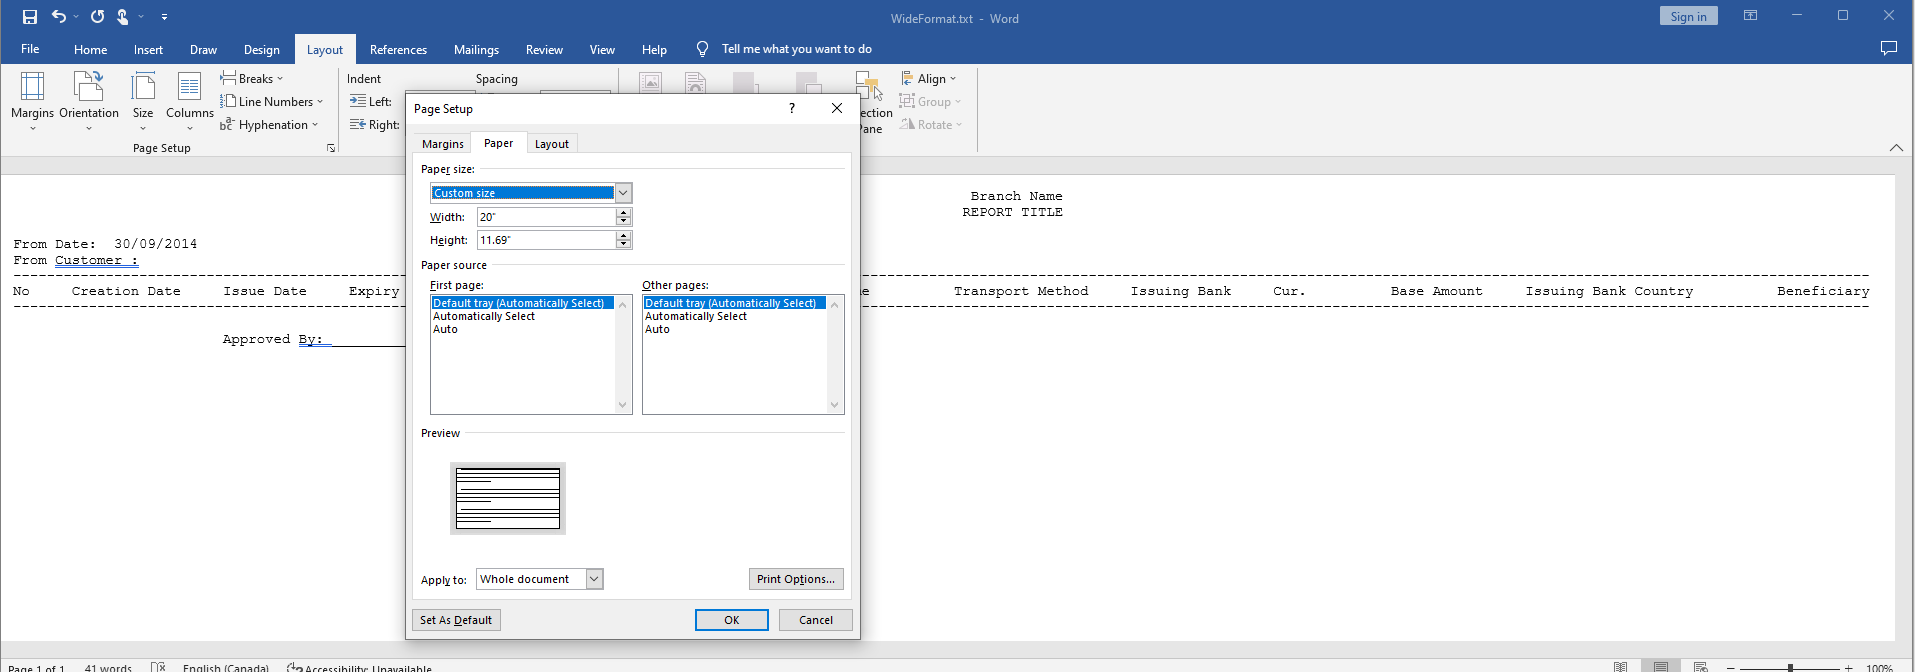
To fix this adjust the width of the paper size until the report is displayed correctly. From the Size menu in Page Layout go to More Paper Sizes… and adjust the width until the text is wrapped correctly. In our case, we had to increase the paper width from 16.59 inches to 21 inches.
Printing the Text Report
Now that the report is displaying correctly on the screen, we can print this to any of PEERNET’s line of conversion software to get our report in PDF, TIFF or other image format.
If you need the report in its original size of A3, you can choose to scale the paper size to A3 when printing from Word, or use the scaling features on the PEERNET Image Printers to create your final A3 sized output.
Give it a Go!
This process might seem to have a lot of steps, and may seem complex at first. But after doing it once or twice, you’ll see how easy it really is. As always, if you have problems getting your text file the way you need it to look, don’t hesitate to contact us – we’re always happy to help.
If you are automating your conversion with our Document Conversion Service, pop over to our how to guide Converting Landscape Text Files with Document Conversion Service to learn how to create a conversion profile to handle these types of documents.

