Split Files by Size or Page Count
File size and page count limits can be set to split multipage TIFF, PDF and ZSoft DCX files into a sequence of smaller files. Splitting can be enabled by file size, page count or both at the same time, and occurs as soon as the limit for the file size or page count limit is exceeded. When both limits are set the split occurs on the first limit exceeded. The file splitting feature is included in the TIFF Image Printer, Raster Image Printer and PDF Image Printer.
File splitting limits are configured on the Save tab, at the bottom of the tab.

The series of files created when file splitting is enabled are numbered in sequence. A fifteen-page report printing to TIFF Image Printer and split to a limit of five pages each creates three output files, each with five pages and named as follows:
- document_part0001.tif
- document_part0002.tif
- document_part0003.tif
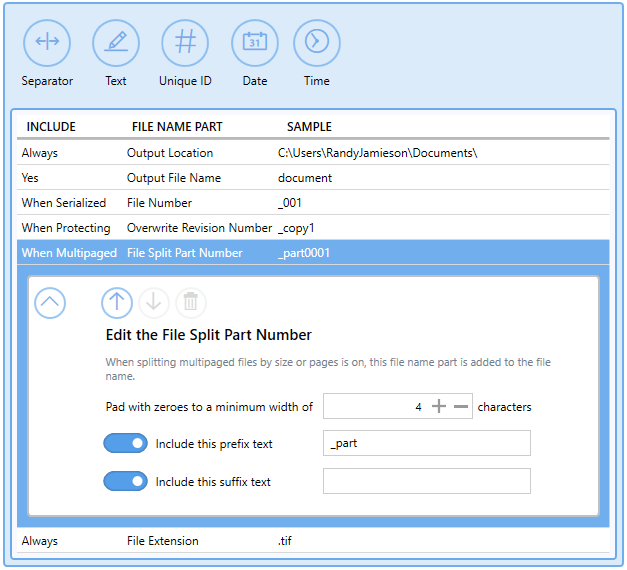
The Filename Creator tab controls how this sequence of files is named. The File Split Part Number file part defaults to use the prefix of _part followed by the number of the file in the sequence padded with up to three leading zeroes. This file part can be customized add, remove, or change the prefix and suffix text, and to change the minimum number of characters used for the file number in the filename. A preview of the formatted file name part is show in the row, and a sample file named is displayed at the top if the Filename Creator tab.
Step by Step Instructions
Launch the TIFF Image Printer Dashboard.
Select “Edit & Create Profiles” to open Profile Manager.
Select “Add a profile” to create a personal profile, or create a copy of one of our system profiles.
Name the profile, add a description, and click Save.
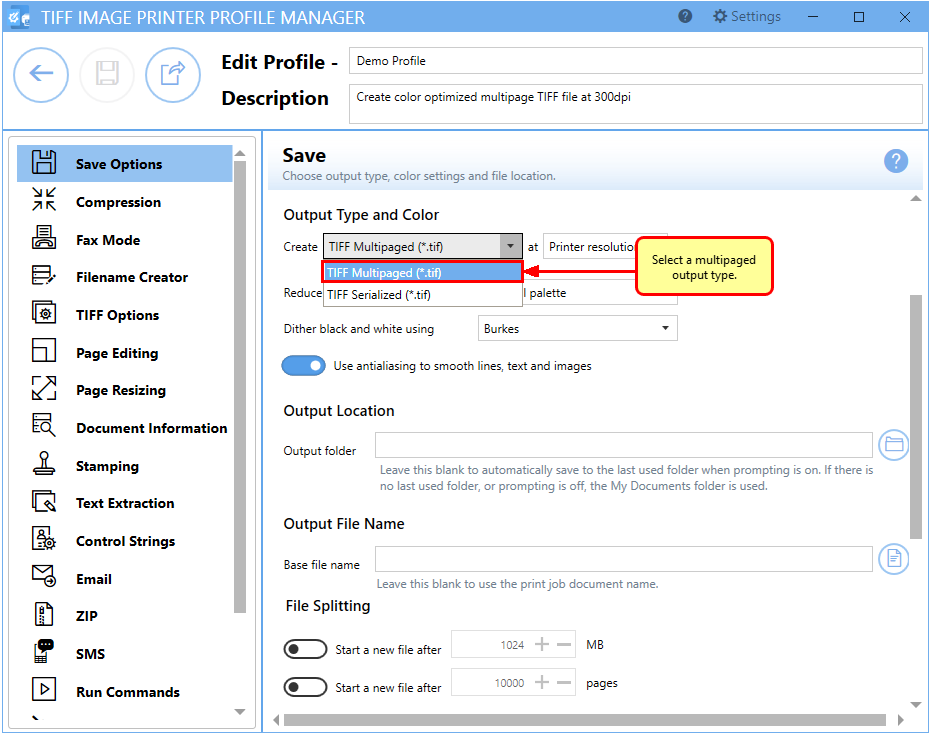
On the Save Options tab, under Output Type and Color, drop the box to select ‘TIFF Multipaged (*.tif)’
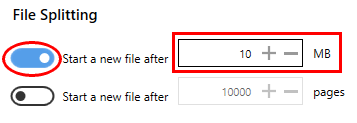
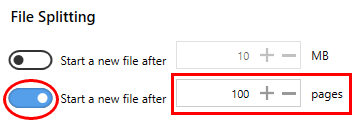
Under File Splitting, to split the file based on a size threshold, enable the first criteria, and set “Start a new file after” to your desired size value (ex. 10MB). To split the file based on a page count, enable the second criteria, and set “Start a new file after” to your desired page count (ex. 100 pages).
On the Filename Creator tab, you can see the naming convention that will be used when naming each file in your created sequence of smaller files. By default, File Split Part Number file name part adds “_part0001” to the filename from the print job when creating a sequence. If desired, you can add or remove prefix/suffix text or increase/decrease the number of padding zeros.
Click Save-Back, and close Profile Manager.
If you plan to use these settings regularly, you may wish to make this personal profile the default profile used by your image printer.
- Select the printer you wish to edit and use the Profile drop box to select your desired default profile.
- Select “Manage Printers” to open Printer Management.
- Select the Save icon to save changes.
- Select the Home icon to return to the Dashboard.
Close the Dashboard. Now when you print your document to the Image Printer, the output will be automatically split into a sequence of smaller files using your desired criteria.


