
Adjust Page Brightness and Remove Grey Backgrounds
Page brightness refers to how dark or light your image appears. When you adjust page brightness you are lightening or darkening the images and text on your page. Darkening the page can help to make light-colored text more readable while lightening a page can make a dark image more visible. Lightening an image can also remove grey backgrounds that can occur with scanned documents.
Adjusting page brightness is often necessary to improve the quality, readability, and visual appeal of scanned documents, photos, and artwork. It is also an important step is preparing scanned files for document archival, digital forensics, and electronic evidence discovery systems.
Improve Readability with Page Brightness
Scanned documents can vary greatly in quality. Documents created from older or low-quality scanners can be too light or too dark or have uneven brightness levels. Adjusting page brightness can improve the readability of the text and content, and produce a more uniform image.
Remove Scanning Artifacts with Page Brightness
Historically, scanning a document to a digital image required placing a physical copy of the document onto the glass surface of a scanner. The scanner would use lights and sensors to capture an image of the document. Shadows, glares and smudges, and marks on the glass surface often cause unwanted artifacts to also be captured as part of the image. These artifacts can be removed or reduced by adjusting image brightness.
Prepare for OCR with Page Brightness
Document archiving and evidence discovery often require an OCR (Optical Character Recognition) step. This is where the printed or handwritten text on the image is recognized and converted into an editable and searchable text document. Adjusting the page brightness can make the text more distinct, easier to recognize, and improve accuracy.
Improve Faded Documents and Old Photos with Page Brightness
Paper documents and old photos can fade and yellow over time. If you have scanned copies of these documents, brightness adjustment can help with image clarity and enhance lost details.
How to Adjust Page Brightness
TIFF Image Printer, Raster Image Printer, and PDF Image Printer all use printer profiles to control what type of file to create, where to save it, and many other options including page brightness.
Here, we show how to create a printer profile that adjusts page brightness to remove a grey background from a Word document. This is a simple example but the same concept applies when working with scanned documents, photos, and other files. The images below are taken using TIFF Image Printer; the steps are the same for both PDF Image Printer and Raster Image Printer.
Start by opening the Dashboard using the desktop shortcut. The dashboard is the hub for everything for your printer. Creating profiles and printers, help resources, licensing, and more are all found here.

From the Dashboard, open the Profile Manager by clicking on the Edit & Create Profiles tile.
Creating and Editing Profiles
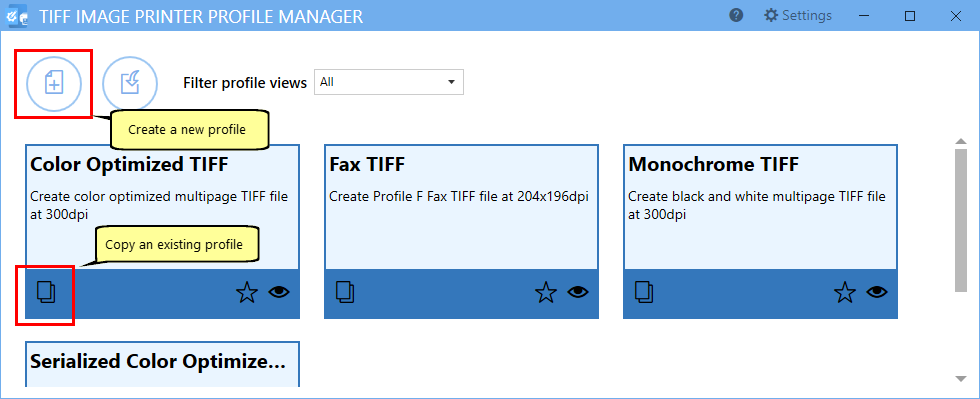
The profile manager is where you create and edit the profiles used by the printer. To make changes to adjust page brightness, you first need to create a new profile using the Add new profile button. You can also start with one you already have or make a copy using the copy icon on any of the profile tiles.
Set Options to Adjust Page Brightness
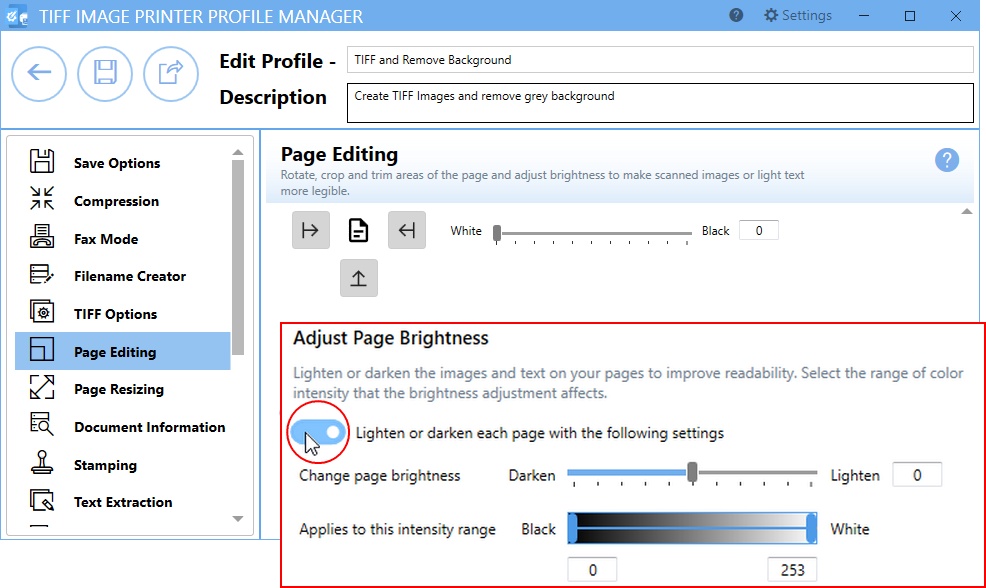
All of the settings in a profile are grouped in categories on the left. Options for the selected category are shown on the right. Select the Page Editing category and scroll down to the Adjust Page Brightness section at the bottom on the right.
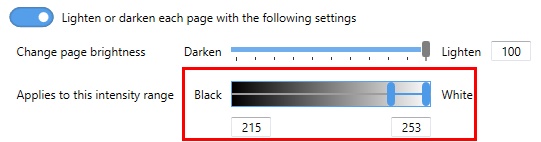
Click on the toggle Lighten or darken each page with the following settings to turn on the page brightness option.
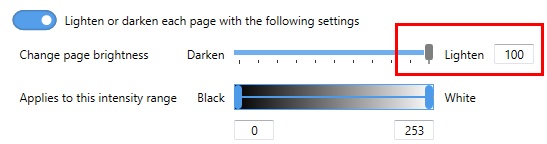
The next step is to say what color to change the grey background. Since we want to remove it all, we’re going to change all the grey to white. To do this, drag the slider all the way to the right, or set the brightness to 100.
Finally, we need to say what shades of grey to replace with white. You will want to keep this range narrow enough to only replace the grey background in the document. We do not want to remove any lighter-colored text or content that you want to keep. Our sample is a Word document with a single color so the range is quite narrow. With scanned documents, the background is not always the same color due to variations with scanning software, Use this range to adjust for these variations.
Saving and Using the Profile
Once the Adjust Page Brightness settings are set, save the profile using the Save button in the upper left. You can now print your document to the printer using your new profile to remove the grey background.
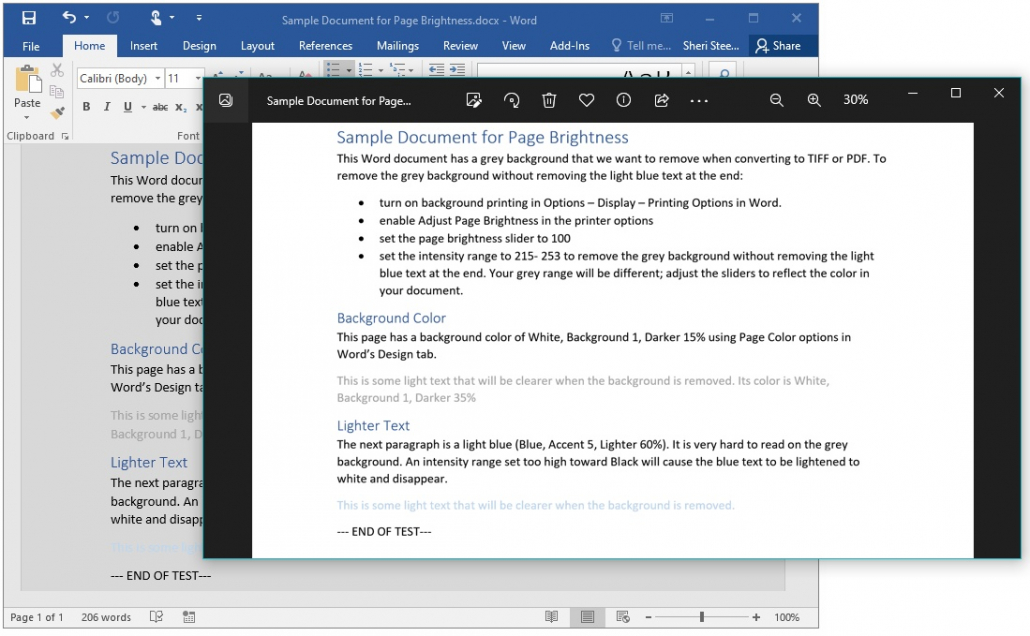
Remember, each document may be different. Experiment with the intensity range and darkening and lightening. Here we have removed the grey background. Conversely, we can choose a different intensity range and darken those colors instead if we have a scanned document with very light text that needs to be darker for legibility.
And, as always, reach out to our support team with any questions, they’ll be happy to help you.

