Reduce TIFF File Size
When trying to reduce TIFF file size, it’s important to strike a balance between size reduction and maintaining an acceptable level of image quality. TIFF (Tagged Image File Format) has long been a trusted choice for those seeking the highest quality and resolution. However, with these advantages also comes the drawback of potentially large file sizes.
These hefty files can be a burden when it comes to storage, sharing, or uploading online. Fortunately, there are several techniques that you can use to reduce TIFF image size without sacrificing too much quality.
In this blog article, we explore the color reduction, compression, and antialiasing options provided in TIFF Image Printer 12 & Raster Image Printer 12 to help you strike the perfect balance between quality and size.
Reduce TIFF File Size with Color Reduction
The first way to reduce TIFF file size is with color reduction. TIFF images support various color modes and bit depths. Choosing the appropriate color mode and bit depth can make a big difference in file size.
TIFF images can be color, indexed color, grayscale, or monochrome (black and white). Grayscale images use only shades of gray, resulting in a smaller file size, while monochrome uses the fewest count of colors, black and white. If you do not have a lot of color in your document, consider converting to greyscale or monochrome.
If you want to keep the color in the document, you can experiment with indexed color mode and changing the bit depth. TIFF files support different bit depths, such as 8-bit, 16-bit, or 24-bit. Indexed color mode reduces the number of colors in the image palette, further reducing file size. Try reducing the color to 8-bit or even 16-bit, which can significantly reduce the file size.
Compress TIFF File to Save Space
The second way to create smaller TIFF images is to compress the image. TIFF images support different compression options that can significantly reduce their size. The amount of color in your documents will also come into play when choosing a compression method.
LZW (Lempel-Ziv-Welch) and ZIP (Deflate) compression are two commonly used lossless compression methods for color TIFF images. A lossless compression method compresses the image data while still keeping all the original image data intact with no loss of quality. Images with large areas of solid color and repetitive patterns compress best with LZW. On the other hand, ZIP compression can be more effective with complex images of varying colors and gradients.
Lossy compression methods, such as JPEG, throw away unnecessary data. This can give smaller file sizes over LZW or ZIP but comes with a trade-off in image quality. JPEG works best on documents that are mostly photos and minimal text.
Antialiasing and Image Size
Lastly, turning off antialiasing can also help reduce your TIFF image size. A digital image is essentially a grid of tiny squares we call pixels. By coloring in the pixels on the grid we create the lines, shapes, and text in the image. When the lines are straight, they look good because they align perfectly with the grid. Diagonal and curved lines and text with rounded shapes, however, are at other angles or not whole pixels wide. This causes jagged edges, also known as the staircase effect.
Antialiasing adds extra pixels in a mix of the shape and background colors to make lines and shapes appear smoother and more appealing to the eye. This does come at a cost, however. Adding these extra pixels to smooth out the edges takes up more space in the image, resulting in larger files.
To help reduce your TIFF file size, you can turn off antialiasing. You will lose some of the visual quality in the image with the trade-off of a smaller file size.
Setting Color Reduction, Antialiasing, and Compression Options
Our image printers use printer profiles that control what type of file to create, as well as other options such as output location and file name. Color reduction, antialiasing, and compression are also options set in the printer profile. By using profiles, you have easy access to creating multiple different types of files.
To change the color reduction, antialiasing, or compression options in a profile, you first need to create a new profile. If you already have an existing personal profile, you can edit it to make your changes.
Double-click the Dashboard desktop shortcut. This will open the Dashboard, your access to everything for your printer. License information, profile creation and editing and other tools and resources are all here.

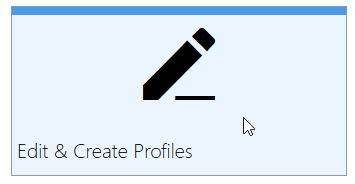
In the Dashboard. click the Edit & Create Profiles tile to open the Profile Manager tool.
Creating and Editing Profiles
The Profile Manager tool is where you create and edit the profiles used by the printer. Each printer includes profiles created by PEERNET to start you off. You can create your own personal profiles from scratch using the Add new profile button. You can also start with a copy of an existing profile using the copy icon on the profile tile.
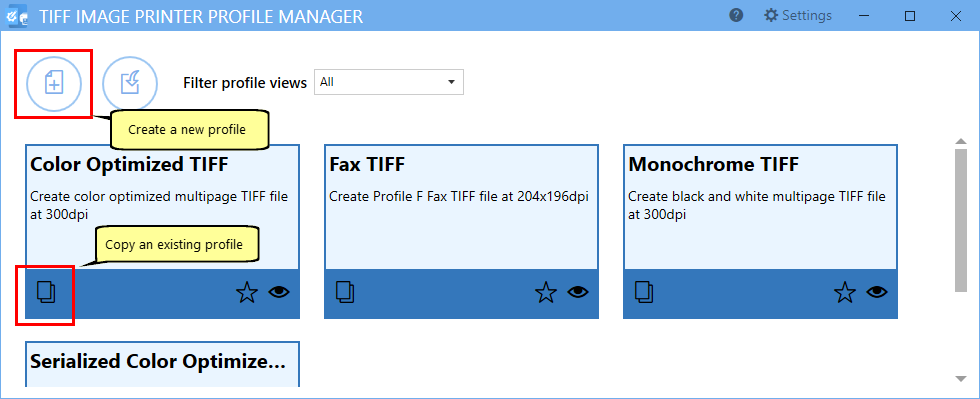
New profiles automatically open in edit mode. It’s a good idea to give them a name you will remember and add a short description. Do that first at the top of the editor before making any other changes to the profile.
Change Color Reduction to Reduce TIFF File Size
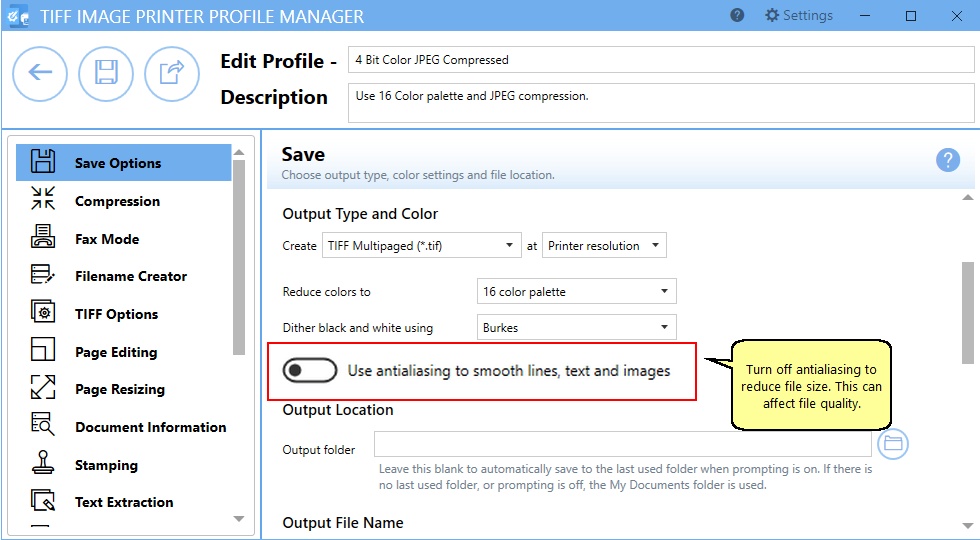
In edit mode, you can see all of the profile categories on the left-hand side. The color reduction options are in the first category, Save Options.
In the right-hand panel look for the Output Type and Color section. Use the drop box next to “Reduce colors to” to select your desired color reduction.
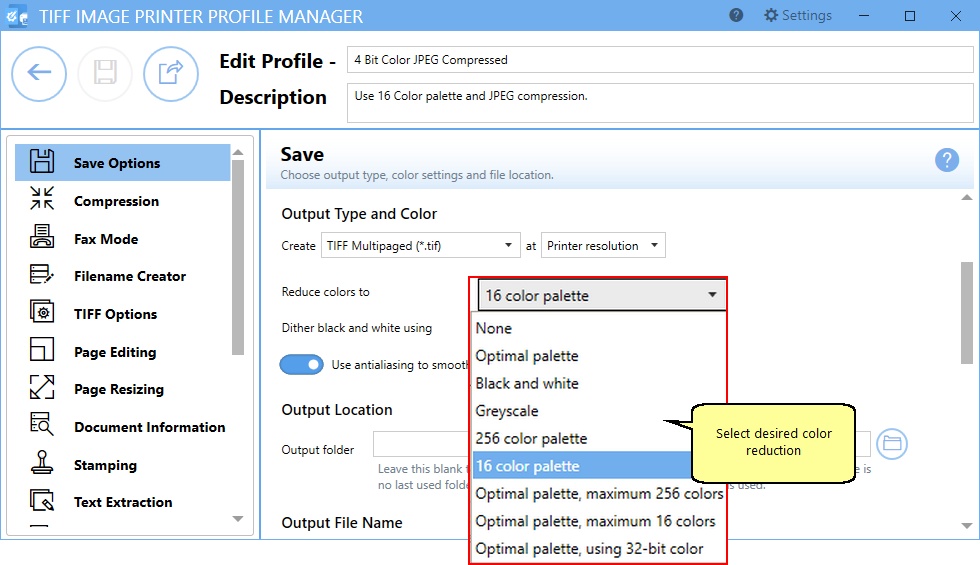
The default setting is Optimal palette. This means the printer will reduce each image down to the smallest number of colors required to represent that page. All colors present in the original file are kept in the output TIFF image. With this option, some images will be full color, some 16-bit or 8-bit color, and some monochrome.
To create 8-bit or 4-bit color images only, change the color reduction to 256 color palette or 16 color palette.
To create greyscale or monochrome images instead, choose Greyscale or Black and white for your color reduction setting.
You can learn more about the other color reduction options in our online user guide.
Turning off Antialiasing to Reduce TIFF Image Size
Antialiasing adds extra pixels and information to create the effect of smoother lines, curves, and shapes. This adds more data to be stored, causing the file to be larger. You can turn this option off to see how much space you will save.
Antialiasing is also in the Save Options category. It is on by default. Click on the toggle to turn it off.
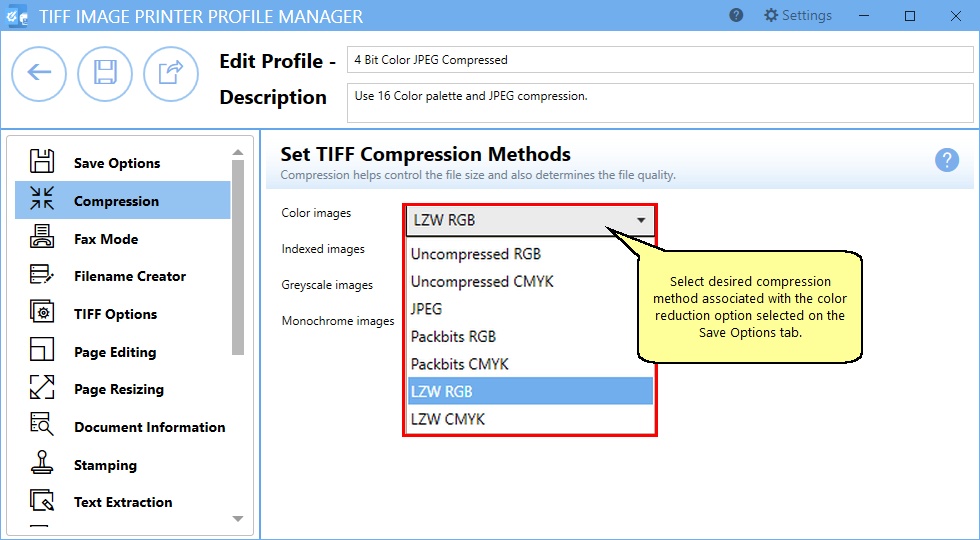
Change Compression to Reduce TIFF File Size
The other way to save space is to change the compression method to use when saving the image. To change this, select the Compression category on the left. There are different compression options for Color, indexed, greyscale, and monochrome images.
The color reduction you have chosen above determines which of the compression options apply.
If you are using Optimal palette, the compression options for Color, Indexed, and Monochrome can all apply as each image is reduced to its minimal number of colors.
When the color reduction is set to Greyscale, the compression method chosen for Greyscale images is used to compress the images. Likewise, when color reduction is Black and white, the Monochrome image compression method is used.
Saving and Using the Profile
When you are done making changes, save the profile using the Save button in the upper left. You can now print your document to the printer using your new profile to see the changes in TIFF image size.
Remember, when reducing the file size of TIFF images, it’s important to strike a balance between size reduction and maintaining an acceptable level of image quality. Experiment with the different settings to see how they affect your file size and quality. And, as always, reach out to our support team with any questions, they’ll be happy to help you.
If you plan to use these settings regularly, you may wish to make this personal profile the default profile used by TIFF Image Printer.

