
How To Create and Print CD/DVD Labels – PEERNET Reports
In addition to printing standard labels and reports, PEERNET Reports Designer lets you create CD and DVD labels, as well as inserts for jewel cases. All you need is CD/DVD label stock and you’re ready to produce professional-grade industry standard CD/DVD labels and reports quickly and easily.
You can choose a pre-packaged Avery® label stock for printing CD or DVD labels, or you can design your own using paper stock backgrounds to lay out those areas on the label that shouldn’t be printed in (such as the middle portion that normally contains the spindle of the disk).
If you want to get started producing CD and DVD labels right away without having to go through the hassle of setting up the paper stocks required, you can download a CD/DVD Label Sample Project that contains all of the popular Avery® label stocks for CDs, DVDs and jewel cases, and sample labels that you can modify to meet your needs.
Printing CD Labels – Configuring the Paper Stock
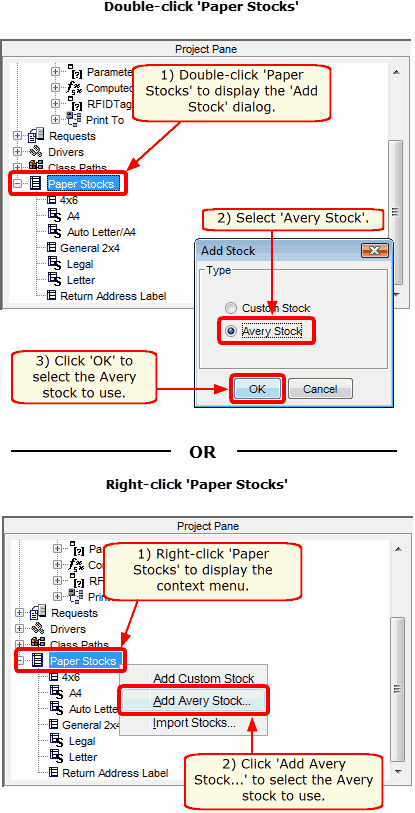
- We must first create the paper stock for the CD/DVD label before we can use it to print a label. Select the Paper Stocks node from the Project Pane; double-clicking and selecting ‘Avery Stock‘ or right-clicking and selecting ‘Add Avery Stock…’ on the ‘Paper Stocks‘ node will allow you to add a new Avery label stock to the paper stocks available to any labels or reports that you create.
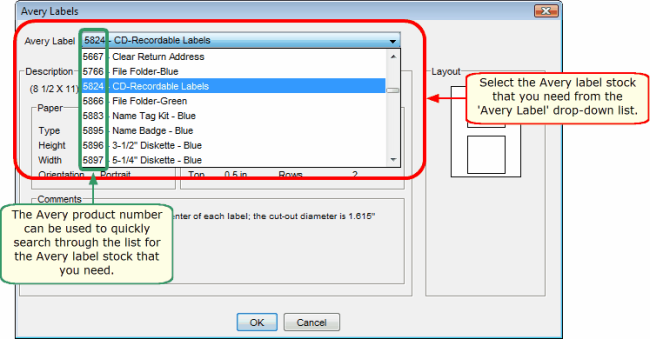
- Select the Avery label stock that you require from the list of available stocks in the Avery Labels dialog and click ‘OK‘. Each package of Avery labels has a product number located in the top-left or top-right corner of the package, identifying the type of label. This number can be used to quickly search through the available Avery label stocks in PEERNET Reports Designer for the label stock appropriate to your needs.

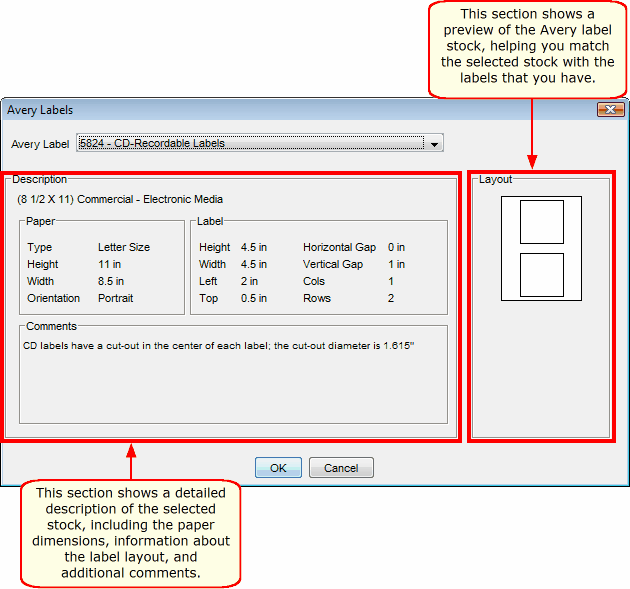
Each Avery stock available contains information regarding the dimensions and properties of the stock, including a preview of the label stock layout, further helping you narrow down the choice of stock that you need.
Printing CD Labels – Creating and Printing the Label
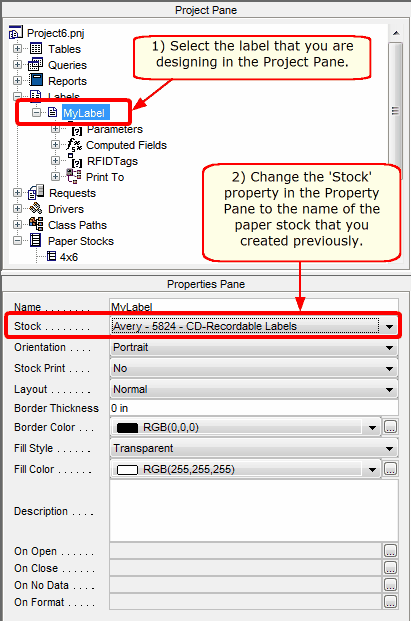
- Once you have defined a paper stock, you must associate the paper stock with the label so that the correct paper stock is used when the label is printed. Select your label in the Project Pane and in the Properties Pane, change the value of the ‘Stock‘ property to the paper stock that you created in Step 2.

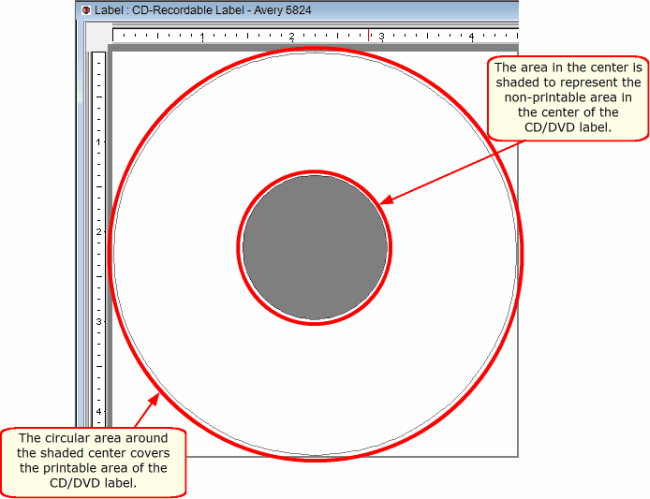
- In the Design View, design your label using the elements that you require. The CD/DVD Label Sample Project contains labels for CDs and DVDs, jewel case inserts (including jewel case covers and spine inserts), as well as CD/DVD envelopes. The CD/DVD labels use Avery stocks that have had backgrounds applied to them to lay out areas of the label that are outside of the printable area (such as the center cut-out and the corners of the label). A sample is shown below:

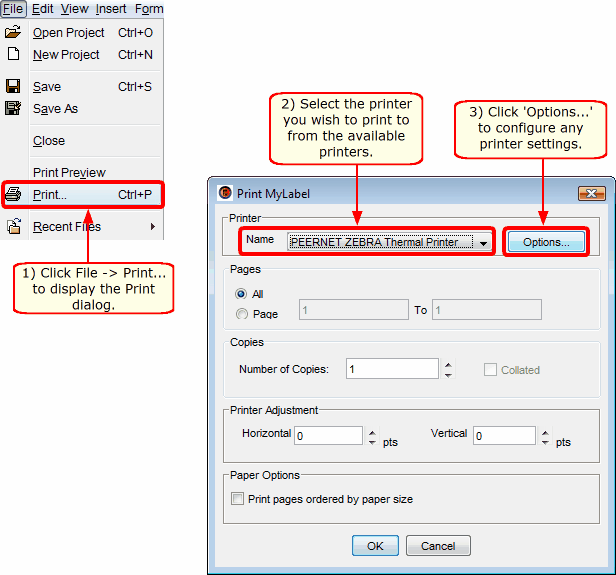
- If you have not added a printer to the ‘Print To‘ node in the label format, you can print the label by selecting File -> Print… from the menu bar to print the label that you have created. When the Print Dialog appears, select the printer that you wish to print to from the list of available printers. If you need to change any printer settings, simply click on the ‘Options‘ button.

- If the paper stock that you have associated with your label contains more than one row or column, you are presented with additional options in the Print Dialog: you can choose which row or column to start printing at, and you can change the direction of printing.

- Click ‘OK‘ on the Print Dialog to print the label to the printer.
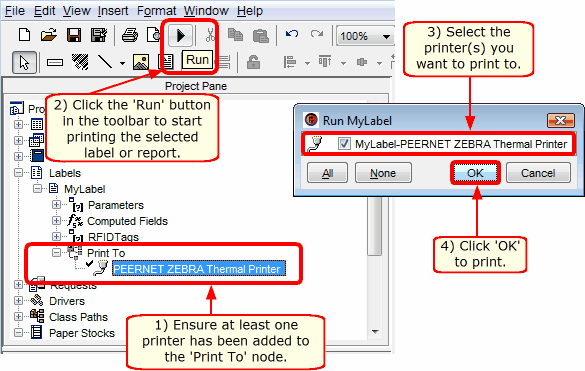
- If you have added a printer to the ‘Print To‘ node in the label format, simply select the label and click the ‘Run‘ button in the toolbar. This will display the Run Label dialog, which will display all of the printers that have been added to the currently selected label. Select the one or more printers that you want to print to by enabling the check box next to the appropriate printer(s) and click ‘OK‘. This will print the label to the printer(s) that you selected.


Once you have created a CD or DVD label or report design, you can print it to any printer that PEERNET Reports Designer supports without having to create a new design for each type of printer (although there is nothing stopping you from doing that – PEERNET Reports Designer is very flexible).
The same label or report definition can also be made available over the web, allowing anyone in your organization to take advantage of PEERNET Reports “design once, print anywhere” philosophy.
The ability to support any user-defined paper stock and hundreds of Avery® paper stocks, as well as the ability to connect to many different types of data sources allows you to tie PEERNET Reports easily into your existing infrastructure and extend the functionality and usefulness of any label or report designs that you create.
Try PEERNET Reports for free on-line and start creating your own unique CD and DVD labels!

