Create JPEG Images
You need to be able to open and print your original document in order to create a JPEG image. For example, to create a JPEG from a Word document, you would need to have Microsoft Word, or another application that can open and print Word documents, installed on your computer.
Raster Image Printer 12 uses Profiles, which are a group of settings, to create the output image you want. Raster Image Printer comes with a few system profiles including: Color Optimized TIFF, Monochrome TIFF, Fax TIFF, Serialized Color Optimized TIFF, Adobe PDF, Non-Searchable PDF, and Color Optimized JPEG. To create color JPEG images, simply set the profile “Color Optimized JPEG” as Raster Image Printer’s default profile.
Step by Step Instructions
- Launch the Raster Image Printer Dashboard.
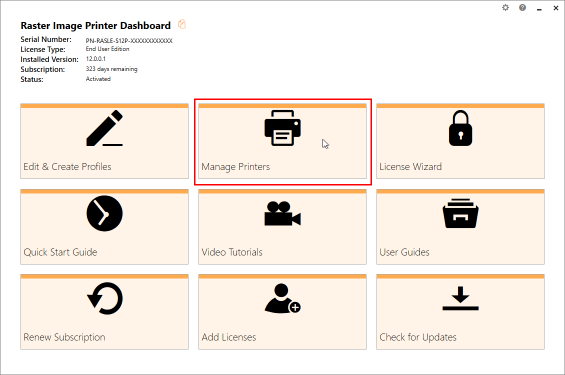
- Select “Manage Printer” open Printer Management.
- Beside Raster Image Printer, use the drop box to set the default profile as “Color Optimized JPEG”. This profile is configured to create JPEG images at 300 dpi with colors reduced to optimal palette.
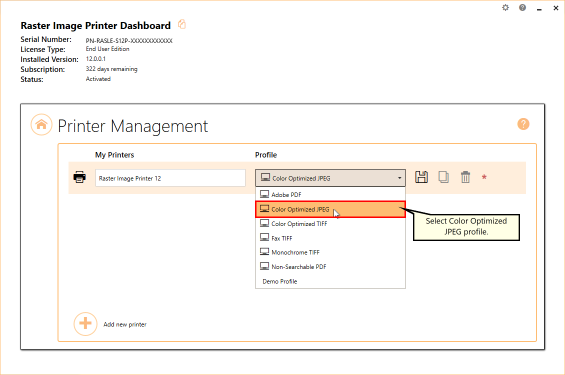
- Select the Save icon to save changes.

- Close Printer Management and Dashboard.

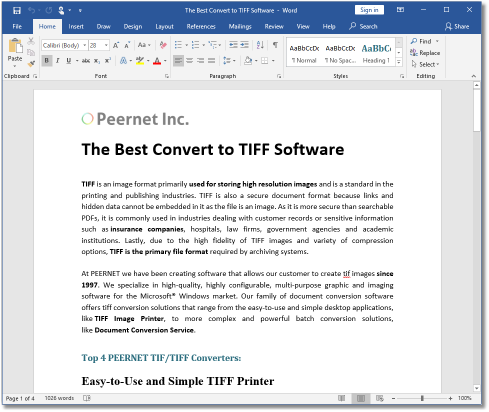
- Open the document you want to convert into a JPEG image.
- Select File – Print from your application, and select Raster Image Printer 12 from the list of printers.
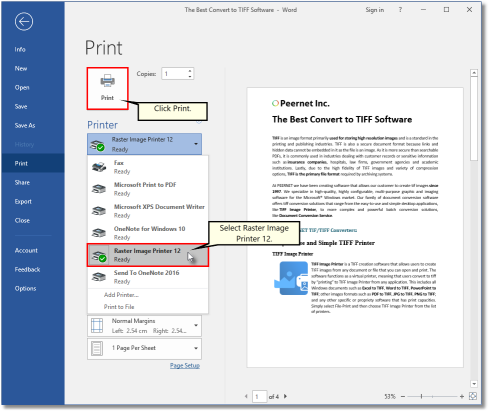
- Print and then set the name and save location of your new color JPEG image.
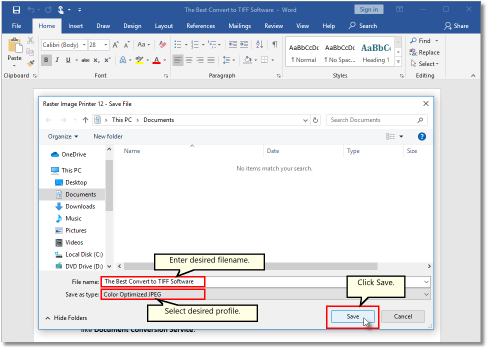
- Navigate to the folder where you wish to store your JPEG image. Your Documents folder will be selected for you by default.
- In the File name field, enter a name for your JPEG image. A default name for your image has been filled in based on the file name of the document you printed to Raster Image Printer.
- In the Save as type field, you can change the profile that will be applied to your JPEG image on the fly.
- Click Save to create the JPEG image. The image will be created in the chosen folder with the name specified.

