How can I make a single PDF file of several files?
Answer: Use PDF Creator Plus 6.0
PDF Creator Plus has a project work space in which you first print all the files you want to include in your PDF. Once all the pages have been collected you can then do the following as needed:
- Add annotations using the Annotation bar at the bottom of the screen
- Remove unwanted pages using the Thumbnail panel on the left
- Change the order of pages using the Thumbnail panel on the left
- Create PDF, TIFF, JPEG, BMP or EMP files of the pages in the project work space
How to do it:
- Open the first file and print it to the PDF Creator Plus 6.0 printer.
- When the file appears in the PDF Creator Plus 6.0 project window leave the application open.
- Open your next file and print it to the PDF Creator Plus 6.0 printer.
- An Incoming Document window will appear. Select “Append the pages to the end of the project” to add the pages from the second file to your PDF project.
- In the Incoming Document window you can check the “Do not show this prompt for the rest of the session” option to automatically append any pages to the end of the project without prompting. This will last until PDF Creator Plus is started again.
- Again, leave PDF Creator Plus 6.0 open. Continue to print all the remaining files you want to create into a single PDF file.
- When you have finished printing, in the PDF Creator Plus 6.0 project screen you can then:
- Change the page order
- Remove unwanted pages
- Add annotations such as text and hyperlinks to pages
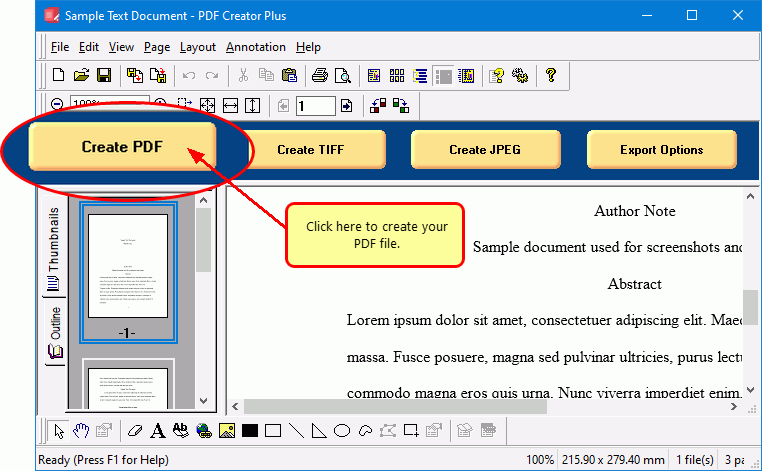
- Click the “Create PDF” button in the top left to create the PDF file.
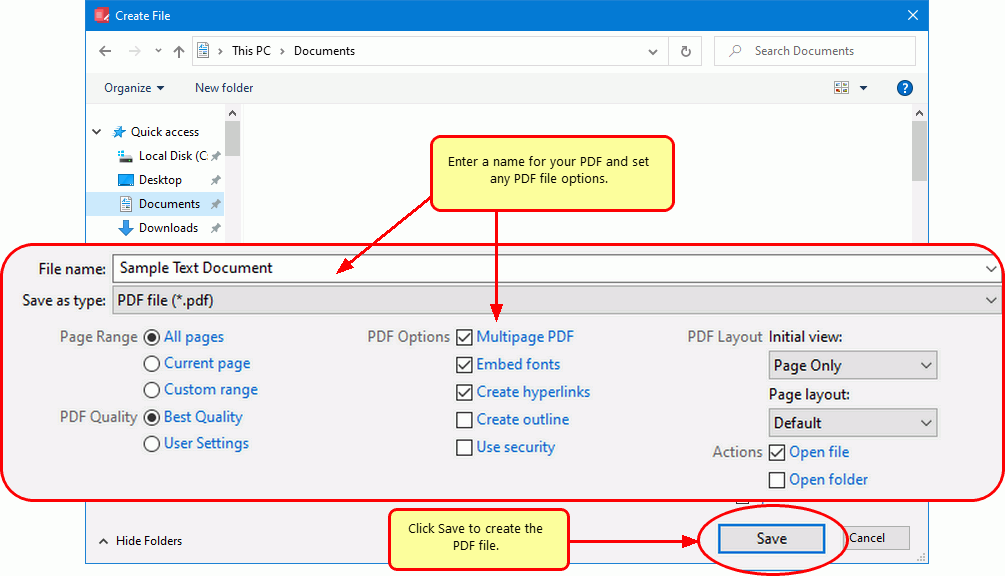
- In the Create File window:
- Specify the output location in the Save In field at top of window
- Enter the name of the PDF file in the File Name field
- Click Save to create the PDF file


