The steps below demonstrate using the Email tab to send an email using the SMTP mail service. The created files will be zipped and attached to the email, and then automatically deleted using the Cleanup Options once finished.
Step by Step Instructions
1.Launch the TIFF Image Printer Dashboard.
2.Select "Edit & Create Profiles" to open Profile Manager.
3.Select "Add a profile" to create a personal profile, or create a copy of one of our system profiles.
4.Name the profile, add a description, and click Save.
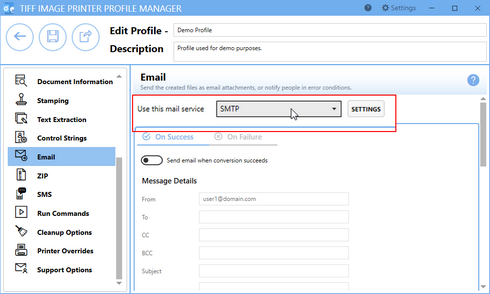
5.On the Email tab, under Use this mail service select the SMTP option..
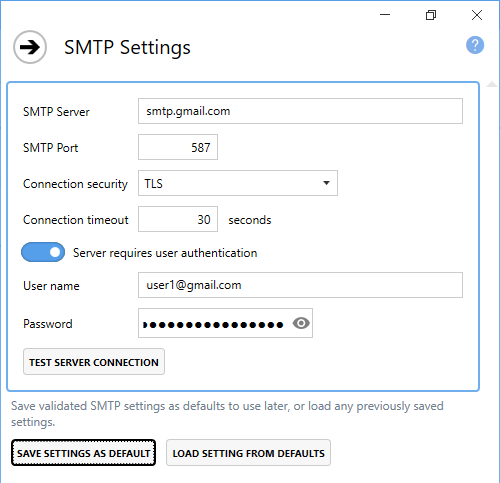
6.Click the Settings button to open the SMTP Settings flyout. The server name, port, connection type and any required authentication settings for your SMTP server should be available from your IT department or your email provider. Here, we are using GMail's SMTP settings. See SMTP Settings for more details on this panel.
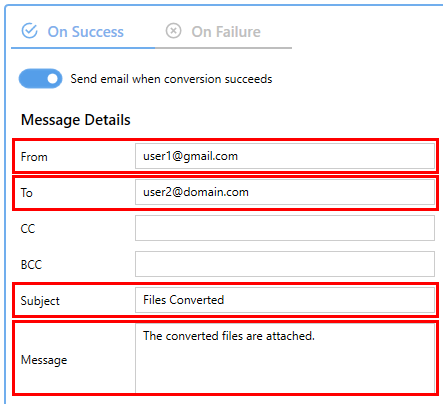
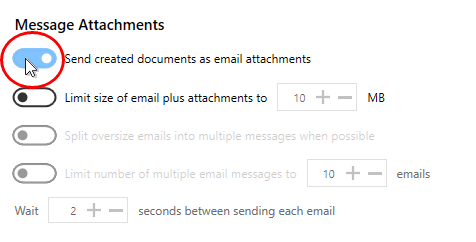
7.Enter your desired Message Details parts. From, To, Subject, and Message are required. CC and BCC are optional.
8.By default, the email settings are configured to send created documents as email attachments. There are additional settings options to limit the size of the email, split oversized emails, and limit the number of emails sent at once. See the Email section for more details.
9.To ZIP the created documents before attaching to the email, enable ZIP the files before attaching to the email.
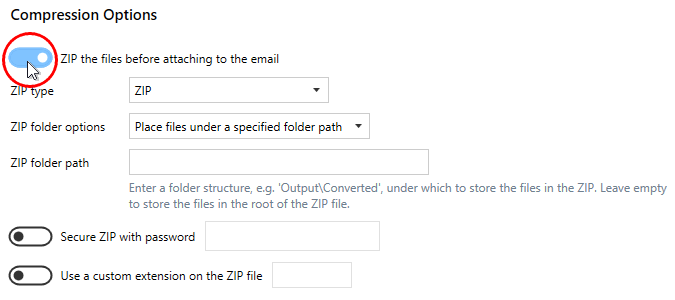
10.Select your desired ZIP folder option and enter your desired ZIP folder path if required. If the ZIP folder path is left empty, the files will be stored at the root of the ZIP file.

11.There are also options to add a password to the ZIP file and to use a custom extension.
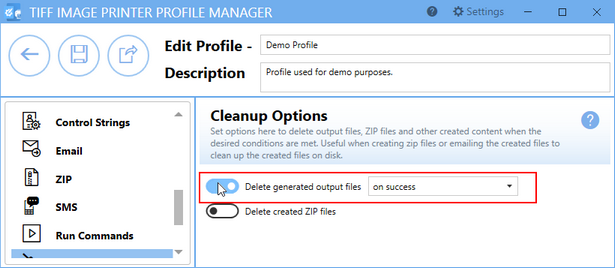
12.To automatically delete created documents after sending, go to the Cleanup Options tab.
13.Enable Delete generated output files and select on success.
14.Click Save-Back, and close Profile Manager.
If you plan to use these settings regularly, you may wish to make this personal profile the default profile used by TIFF Image Printer.
i.Select the printer you wish to edit and use the Profile drop box to select your desired default profile.
ii.Select "Manage Printers" to open Printer Management.
iii.Select the Save icon to save changes.
iv.Select the Home icon to return to the Dashboard.
15.Close the Dashboard. Now when you print your document to TIFF Image Printer, you will receive an email notification after successful conversion with the created document attached as a zip file. The created files will automatically be deleted.