Heading objects are the same as bookmarks in a PDF document. Adding heading items can be thought of as building your table of contents.
1.Go to the page in the project that you want to be the target of the heading. Select the Outline annotation tool.

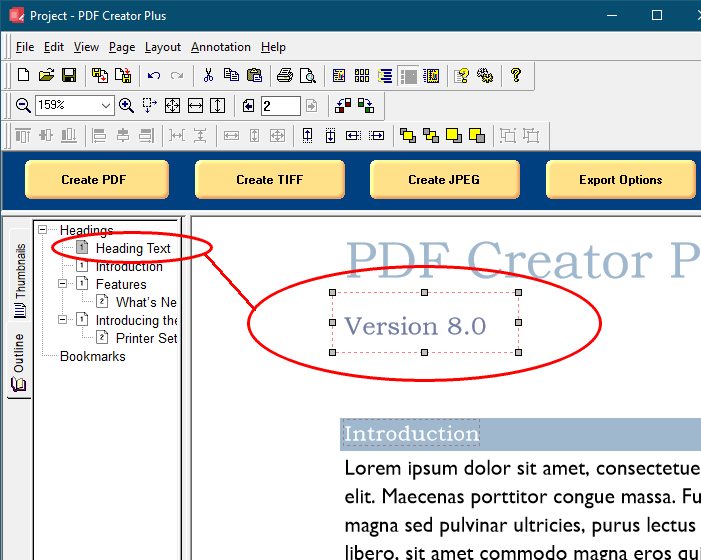
2.The cursor will change from the mouse pointer to a small cross hair cursor (+). Click and hold the left mouse button while you drag to create a rectangle around the area on the page that you want to represent the heading. Heading objects are normally, but not limited to, a line of text on your page. Here we are creating a heading object that encompasses the graphic at the top of the page.
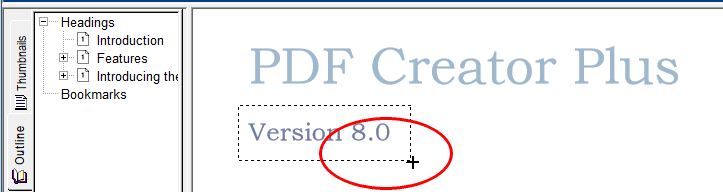
3.Release the mouse button when you are done. The outline object creates a heading object by default. The size and position of the rectangle can be adjusted as required. Headings are shown outlined with a red dotted rectangle. This rectangle is shown only on the screen to make seeing the heading annotation easier; it is not included when the page is printed or used to create a PDF, TIFF or any other type of file.
The new heading annotation has also been added under the Headings section in the Outline view. If you cannot see the Outline view, click on the Outline tab, the tab with the book icon, in the Navigation view to bring the tab forward.
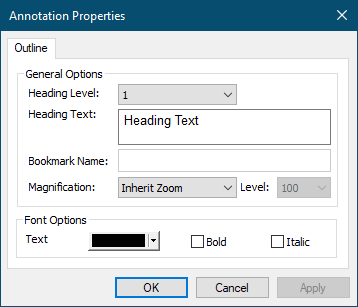
4.You can change the properties of the Heading through the Outline properties dialog, accessible from the Annotation Properties or the Edit Outline toolbar button.

5.From the Annotation Properties dialog, you can change the text displayed for the heading, the heading level, its magnification settings and its font options. See Outline Properties for a full description of this dialog box and its options.