1.Select the Outline tool  from the Annotations toolbar.

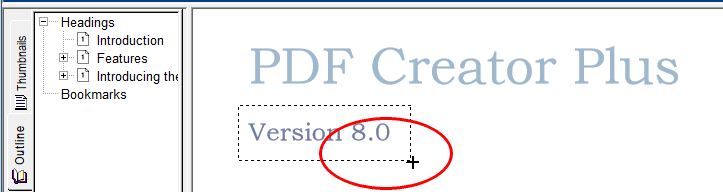
2.The cursor will change from the mouse pointer to a small cross hair cursor (+). Click and hold the left mouse button while you drag to create a rectangle outline around the area on the page where you want the bookmark to be.
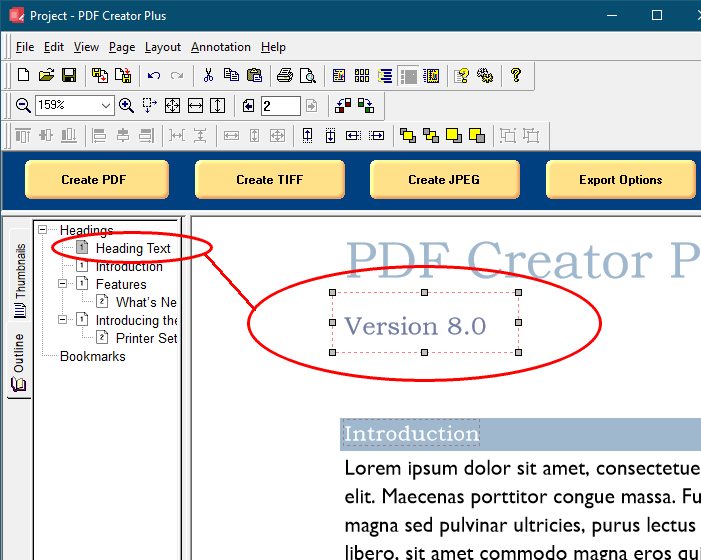
3.Release the mouse button when you are done. The Outline annotation tool creates a heading annotation by default. To create a bookmark, the heading annotation properties have to be changed.
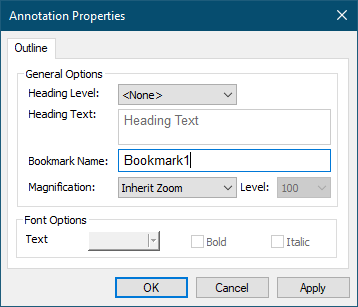
4.The heading annotation is changed to a bookmark annotation through the Annotation Properties dialog, accessible from the Annotation Properties ( ), the Edit Outline (
 ) toolbar button, or by pressing the Enter key with the bookmark annotation selected.

5.The Annotation Properties dialog will appear showing the properties that are available to be edited for the bookmark. Change the Heading Level to <None> and enter in a name for your bookmark in the Bookmark Name field. If you change a property, the Apply button in the lower right corner will become enabled. By clicking this button, the changes you have made will be temporarily applied to the annotation on the page. To keep the changes, click OK. Clicking Cancel will abandon the changes and return the annotation back to its original state.
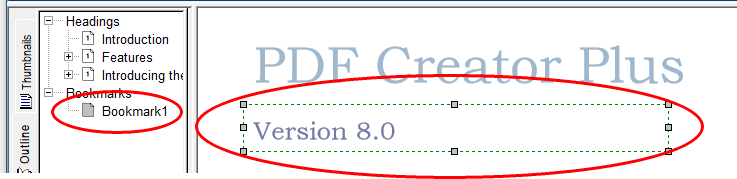
6.The bookmark will be shown outlined with a green dotted rectangle. This rectangle is shown only on the screen to make seeing the bookmark annotation easier; it is not included when the page is printed or used to create a PDF, TIFF or other type of file.
The new bookmark annotation has also been added under the Bookmarks section in the Outline view. If you cannot see the Outline view, click on the Outline tab, the tab with the book icon, in the Navigation view to bring the tab forward.