The Document Information feature allows basic descriptive information to be added to your output file. These descriptions are used by Adobe’s search engine and also by many search engines to describe the document in their results list. This feature is primarily used when creating PDF files, but is also applicable to select image formats (ie. TIFF images).
By default, all descriptive information fields are left empty. These descriptions will not auto-populate. Conversely, if a value is entered in these descriptive information fields, all files created will have the same entered description.
All document information settings are controlled through the profile.
Step by Step Instructions
The steps below demonstrate how to use the document information feature to add descriptive information to PDF files.
1.Launch the Raster Image Printer Dashboard.
2.Select "Edit & Create Profiles" to open Profile Manager.
3.Select "Add a profile" to create a personal profile, or create a copy of one of our system profiles.
4.Name the profile, add a description, and click Save.
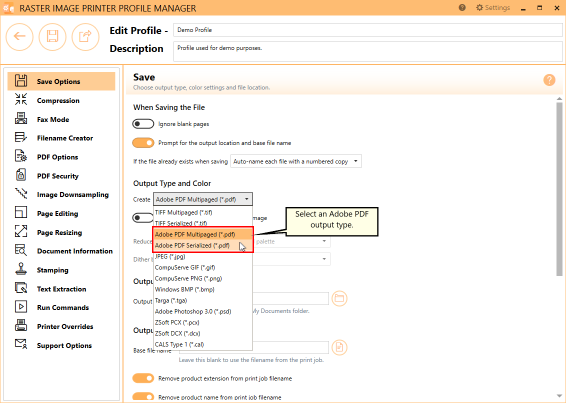
5.On the Save Options tab, ensure that Output Type is set to create Adobe PDF files.
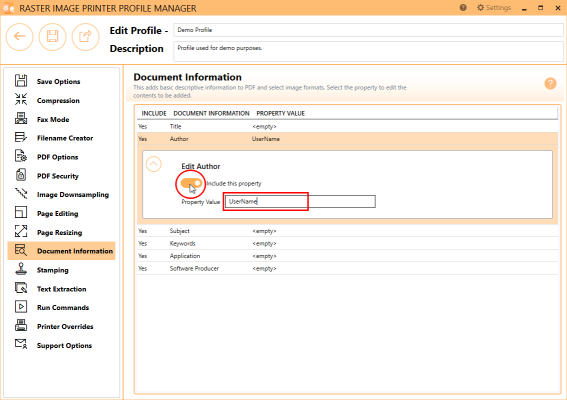
6.On the Document Information tab, select each document information type and enter your desired descriptive information in the Property Value field.
•Title - ex. enter the filename
•Author - ex. enter the user's name
•Subject - ex. enter the topic or group creating the file
•Keywords - ex. enter the main topics discussed in the file
•Application - ex. enter the application name of the original document (If left empty, all files created will have Raster Image Printer 12 as the application.)
•Software Producer - ex. enter your company name (If left empty, all files created will have Raster Image Printer 12 as the software producer.)
7.Click Save-Back, and close Profile Manager.
If you plan to use these settings regularly, you may wish to make this personal profile the default profile used by Raster Image Printer.
i.Select the printer you wish to edit and use the Profile drop box to select your desired default profile.
ii.Select "Manage Printers" to open Printer Management.
iii.Select the Save icon to save changes.
iv.Select the Home icon to return to the Dashboard.
8.Close the Dashboard. Now when you print your document to Raster Image Printer, your desired document information will be stored within the output PDF file. If viewing your PDF file in Adobe Reader, the information be viewed by selecting File - Properties.