The cropping features in Raster Image Printer are used to crop, or cut away, the outer parts of the page, and keep the inner area. While most often associated with editing photos, cropping also works to remove unwanted areas of your printed pages.
There are methods available that you can use to crop images or pages:
•Page Margins
•Page Areas or Regions.
A side effect of cropping can be a change in outputted page size. If you need to remove the margins, and also keep the original page size, see also Copy Page Contents to a New Page Size.
All cropping settings are controlled through the profile.
Cropping Page Margins
The steps below demonstrate how to use the crop page margins features to remove a solid-color frame (border) on each page, such as the white border around the page shown below.
Step by Step Instructions
1.Launch the Raster Image Printer Dashboard.
2.Select "Edit & Create Profiles" to open Profile Manager.
3.Select "Add a profile" to create a personal profile, or create a copy of one of our system profiles.
4.Name the profile, add a description, and click Save.
5.On the Page Editing tab, under Crop Margins or Areas, enable Crop each page using the following settings.
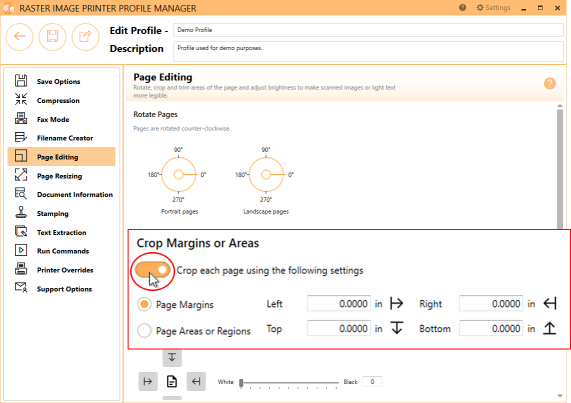
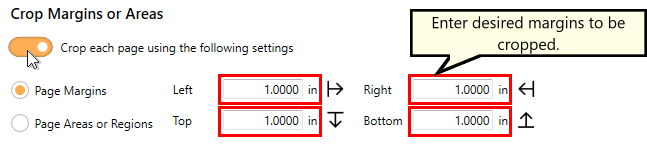
6.Ensure that the Page Margins cropping method is selected.
7.For each side of the page, Left, Top, Right and Bottom, enter your desired margins to be cropped. You can change the units by selecting Settings from the top right hand corner of the Profile Manager window, and toggling between inches (in) and centimeters (cm).
8.Click Save-Back, and close Profile Manager.
If you plan to use these settings regularly, you may wish to make this personal profile the default profile used by Raster Image Printer.
i.Select the printer you wish to edit and use the Profile drop box to select your desired default profile.
ii.Select "Manage Printers" to open Printer Management.
iii.Select the Save icon to save changes.
iv.Select the Home icon to return to the Dashboard.
9.Close the Dashboard. Now when you print your document to Raster Image Printer, the margins (white border) will be cropped away and removed from the output file.
Cropping Page Areas or Regions
The steps below demonstrate how to use the crop page areas or regions features to cut the desired part of the image out of the page, such as cutting out the colored areas of the page shown below.
Step by Step Instructions
1.Launch the Raster Image Printer Dashboard.
2.Select "Edit & Create Profiles" to open Profile Manager.
3.Select "Add a profile" to create a personal profile, or create a copy of one of our system profiles.
4.Name the profile, add a description, and click Save.
5.On the Page Editing tab, under Crop Margins or Areas, enable Crop each page using the following settings.
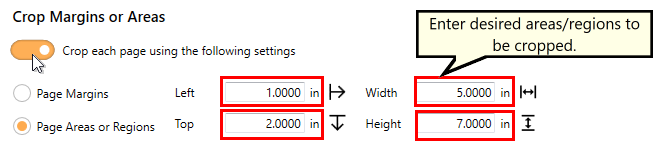
6.Select the Page Areas and Regions cropping method.
7.For each of the Left, Top, Width and Height fields enter your desired area/region to be cropped:
•Left - enter how far from the left hand side to start cropping
•Top - enter in how far down from the top edge of the page to start cropping
•Width - enter in the width of the area to crop
•Height - enter in the height of the area to crop
You can change the units by selecting Settings from the top right hand corner of the Profile Manager window, and toggling between inches (in) and centimeters (cm).
8.Click Save-Back, and close Profile Manager.
If you plan to use these settings regularly, you may wish to make this personal profile the default profile used by Raster Image Printer.
i.Select the printer you wish to edit and use the Profile drop box to select your desired default profile.
ii.Select "Manage Printers" to open Printer Management.
iii.Select the Save icon to save changes.
iv.Select the Home icon to return to the Dashboard.
9.Close the Dashboard. Now when you print your document to Raster Image Printer, the area/regions (colored area) will be cropped out and saved in the output file.