By default, only a single instance of Raster Image Printer is created. If you know that you need to use two groups of settings - two profiles - on a regular basis, you may considering creating a second instance of Raster Image Printer instead of continuously changing the profile that is being applied to output files. A common example of this is users that need to create both color and black and white TIFF images.
NOTE: Adding an new printer is an action that requires administrative level permissions. See Printer Management and User Permissions for details on which actions you can do and how to run the Raster Image Printer Dashboard as an administrator to perform this task.
Step by Step Instructions
1.Launch the Raster Image Printer Dashboard.
2.Select "Manage Printers" to open Printer Management.
3.Select the Add icon at the bottom of the screen to add a new printer.

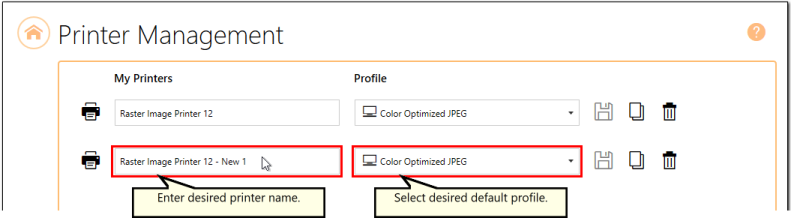
4.By default, the newly added printer will be named "Raster Image Printer <%PRODVERSION_S% - New 1" and will be assigned the default profile Color Optimized JPEG.
i.You can change the name by selecting the current name of the printer and entering your desired printer name.
ii.You can change the default profile by dropping the box and selecting your desired profile.
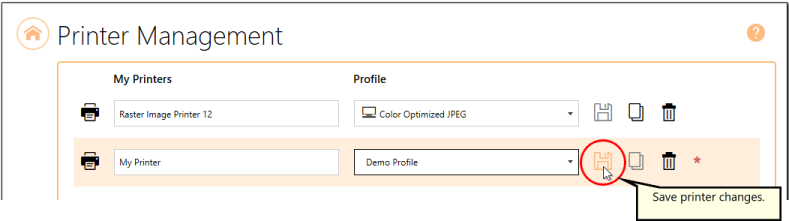
5.Select the Save icon to save changes.
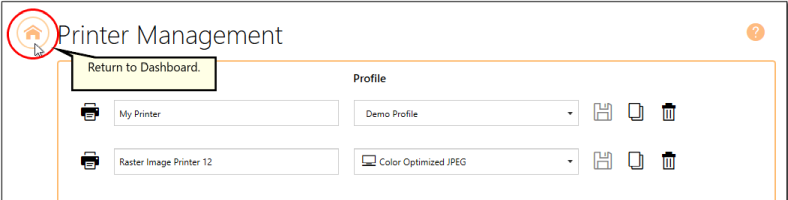
6.Select the Home icon to return to the Dashboard.