|

Creating an Enhanced Metafile (EMF) File
EMF files consist of a sequence of Windows® graphics functions and are intended to be portable between Windows® applications. They contain vector and bitmap components and are generally used to store line-art, illustrations and content created in drawing or presentation applications.
EMF files are a serialized file format. A separate EMF file will be created for each page in the project. The individual file names will be appended with a number corresponding to the project page number. Choosing EMF output from a two-page project file as MyEMF will create two files, MyEMF_0001.emf and MyEMF_0002.emf.
When creating EMF files from the pages in a PDF file opened directly in PDF Creator Plus, the PDF content is saved as an image inside the EMF file.
1.Open the file you want as an EMF file and print it to the PDF Creator Plus 8 printer. This will send the pages to PDF Creator Plus's PDF builder application which is used to preview the pages, add new pages and annotate the pages. You can also open an existing PDF Creator Plus project ( .pnp file) you have previously saved.
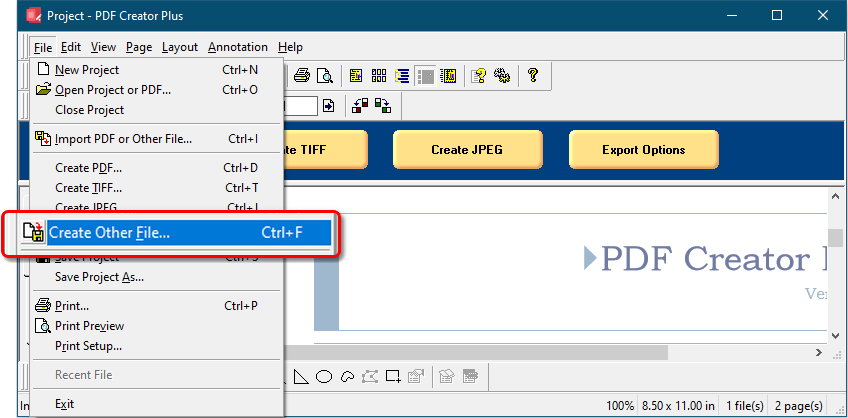
2.Select File – Create Other File … from the menu. You can also click the Create Other File  button on the Standard toolbar.
3.The Create File dialog will appear. By default, this dialog is set to create the type of file last created. The default is PDF upon installation. Use the Save as type combo box to choose Enhanced metafile (*.emf).
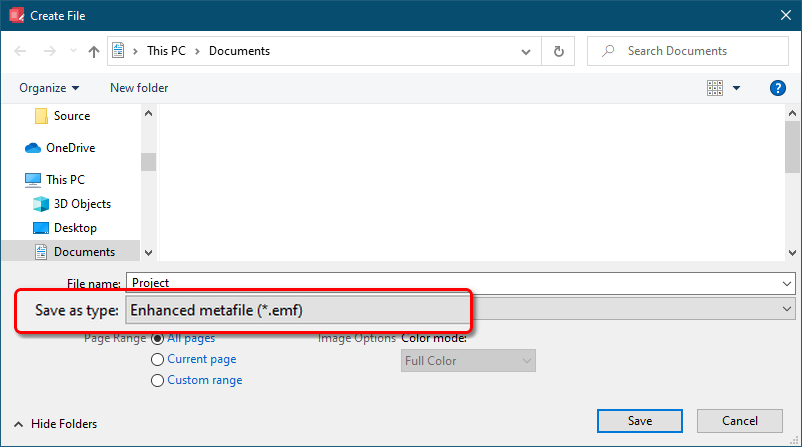
•Browse to the location where you wish to save the EMF files and enter the file name for your new EMF files.
•Make sure the Save as type is set to Enhanced metafile (*.emf).
•The Page Range options allow you to select a subset of pages that would be converted to EMF image files.
•The Color Mode options are disabled (grayed out), as they are not applicable to EMF files.
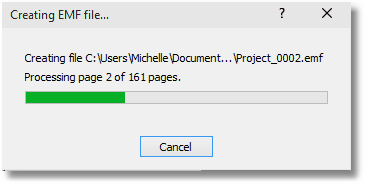
4.Press the Save button to create your EMF files. A progress dialog will appear as the files are being created. The progress dialog will close when all the files are created. The new files can now be opened in your favorite image viewer
Creating EMF from a Microsoft® Word Document
When creating EMF files from a Microsoft®Word document that uses OpenType fonts, you may need to turn off the use of ligatures.
Ligatures are special characters in a font that combine two or more letters into a single character known as a glyph. This is done to improve the appearance and readability of text. The use of ligatures also dictates how the font information is sent to us when your file is printed. Depending on your font, this could cause missing characters in your EMF file.
In the diagram below, the first column of each set of letter does not have ligatures turned on. You can see the space between the letters. The second column does have ligatures enabled and you can see under the Calibri font the f and the i, L, and f are nestled next to each other. Under the Aptos font, the second row also has ligatures turned on but in this font the single character, or ligature, for ff, fl and ff still has a space between the letters when drawn on the screen. Internally, however, it is a single character.
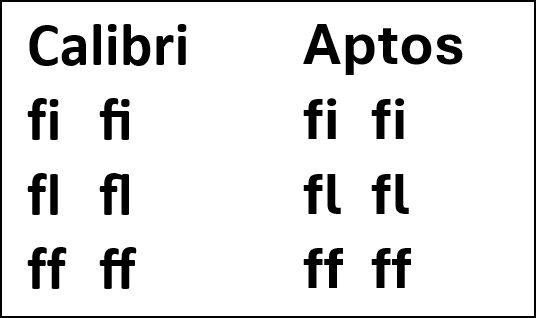
The Aptos font is an example of a font that causes missing characters in an EMF file when ligatures are on.
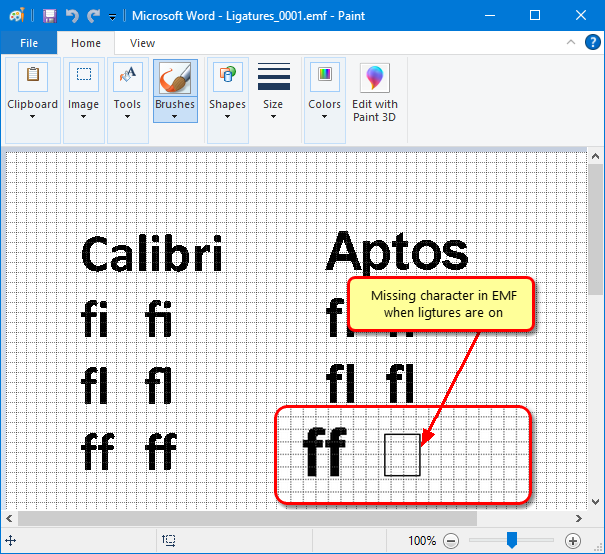
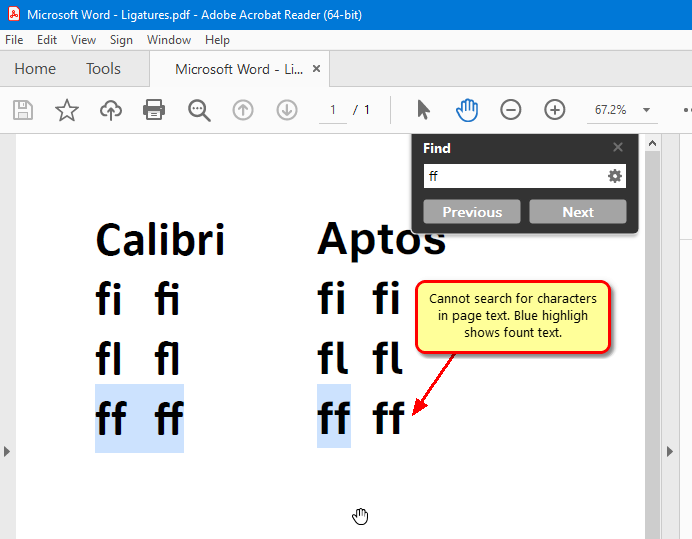
This is not as apparent when creating a PDF file unless you search for the matching text. The text appears on the screen but the underlying information to search for the actual characters is missing and if you search for it, it cannot be found.
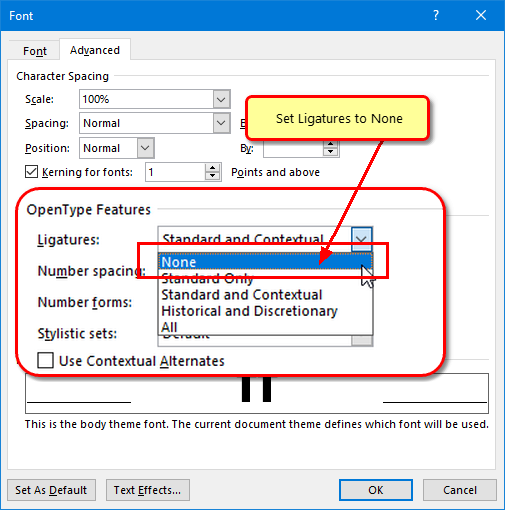
Turning Off Ligatures in Word
To turn off ligatures in your Microsoft®Word document, you need to first select all of the text in the document. Next, type Ctrl+D to bring up the Font dialog.
In the Advanced tab, scroll down to the OpenType Features section and for Ligatures select None.
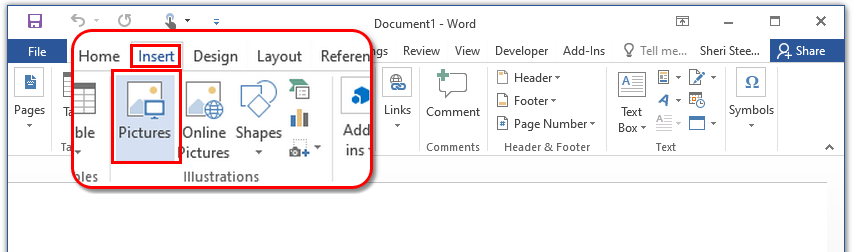
Inserting an EMF file into Word Document
EMF files are designed to be portable between applications and a common use for these files is to be inserted into other documents.
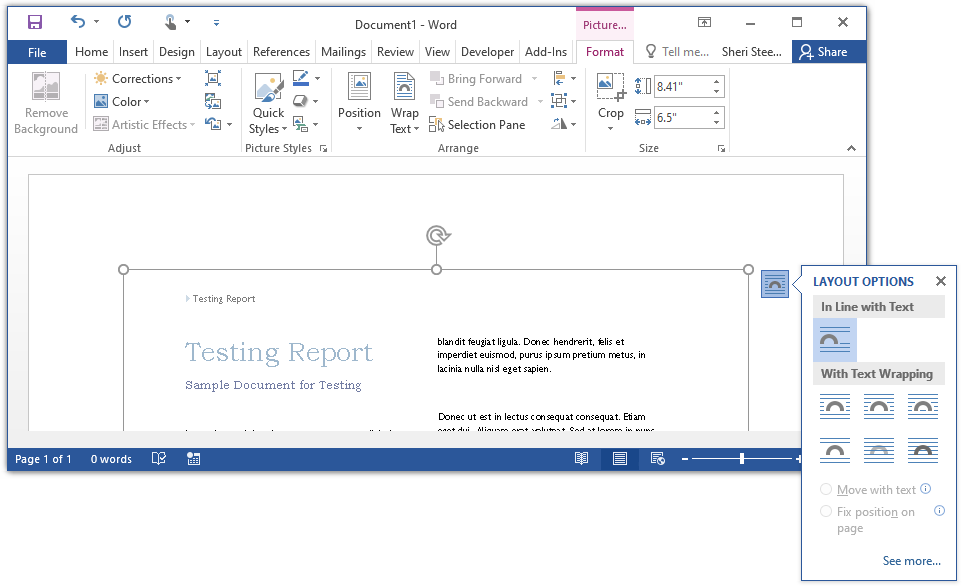
1.To insert a placeable Enhanced Metafile into a Word document, select the Insert tab then the Pictures from the Illustrations section.
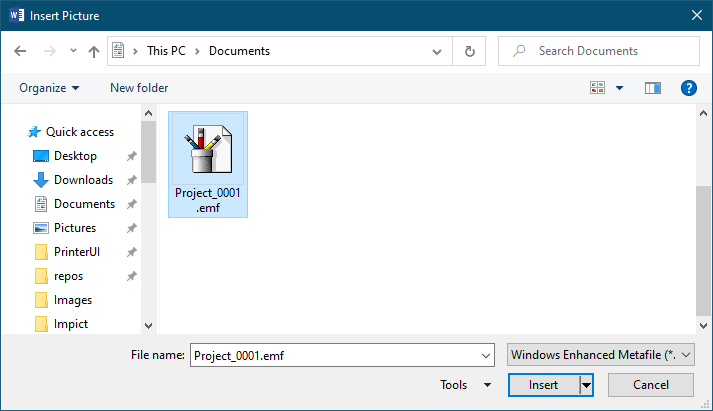
2.From the Insert Picture dialog that appears, browse to the location that contains the EMF file you want to insert. Select the EMF file and click the Insert button.
3.The metafile is added to the document. When you click on the image in the Word document, a black border will appear. With this border, you can move or resize the metafile. The Picture tab is highlighted with common actions for inserted pictures. A Layout Options menu is also shown with options for aligning the image with text in the document.