The steps below demonstrate how to use the Stamping tab to add page numbering to output files.

Step by Step Instructions
1.Launch the PDF Image Printer Dashboard.
2.Select "Edit & Create Profiles" to open Profile Manager.
3.Select "Add a profile" to create a personal profile, or create a copy of one of our system profiles.
4.Name the profile, add a description, and click Save.
5.On the Stamping tab, select Add a page numbering text stamp.
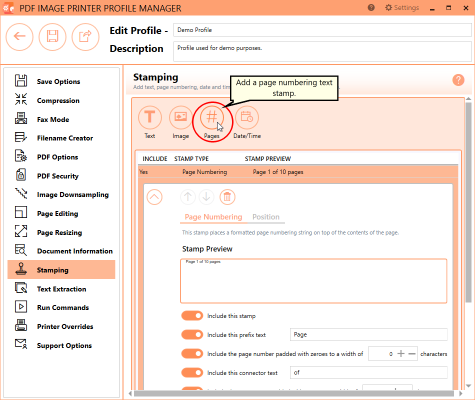
6.Use the settings toggles to customize your page numbering stamp:
•Enable/disable prefix text
•Enable/disable specific page number and increase/decrease the number of padding zeros
•Enable/disable connector text
•Enable/disable total page count and increase/decrease the number of padding zeros
•Enable/disable suffix text
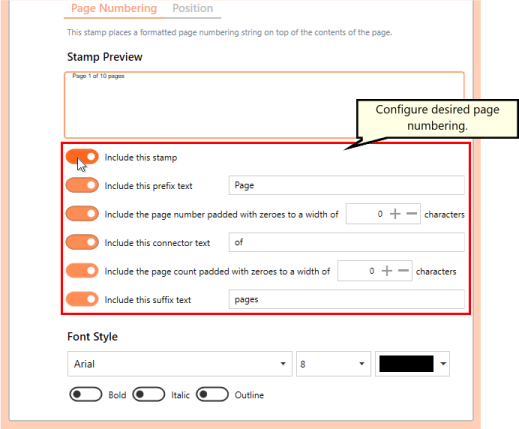
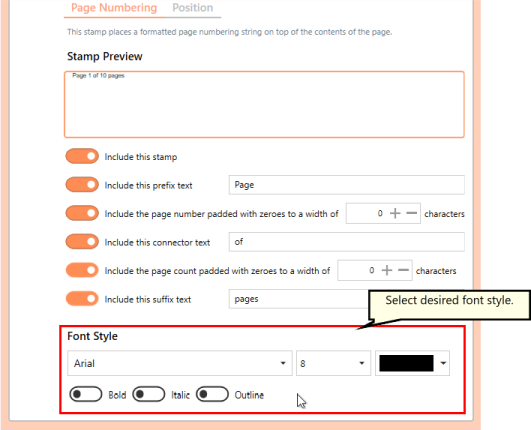
7.You can change the font type, font size, font color, and enable bold, italic or outline font styles.
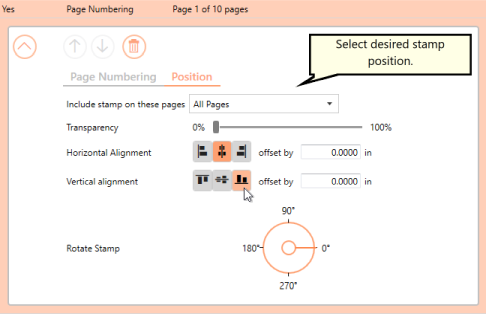
8.Under Position:
•you can choose which pages in the output file will be stamped,
•you can adjust the transparency of the stamp,
•you can change the horizontal and vertical alignment of the stamp,
•and you can rotate the stamp.
For this example, we will change the vertical alignment to bottom so that the page numbering stamp appear in the footer area.
9.Click Save-Back, and close Profile Manager.
If you plan to use these settings regularly, you may wish to make this personal profile the default profile used by PDF Image Printer.
i.Select the printer you wish to edit and use the Profile drop box to select your desired default profile.
ii.Select "Manage Printers" to open Printer Management.
iii.Select the Save icon to save changes.
iv.Select the Home icon to return to the Dashboard.
10.Close the Dashboard. Now when you print your document to PDF Image Printer, every page of the output file will be stamped with the page numbering stamp in the bottom center of the page.
If your page has standard 1 inch margins, this stamp will appear in the footer area, but the Stamping tool does not reserve space for the stamp. Therefore, if you have a page with no margins or very small margins, the stamp will be layered over the page content. If you have non-traditional margins and need to reserve space for a stamp in the footer space, please go to the Page Resizing tab and add borders to the page.