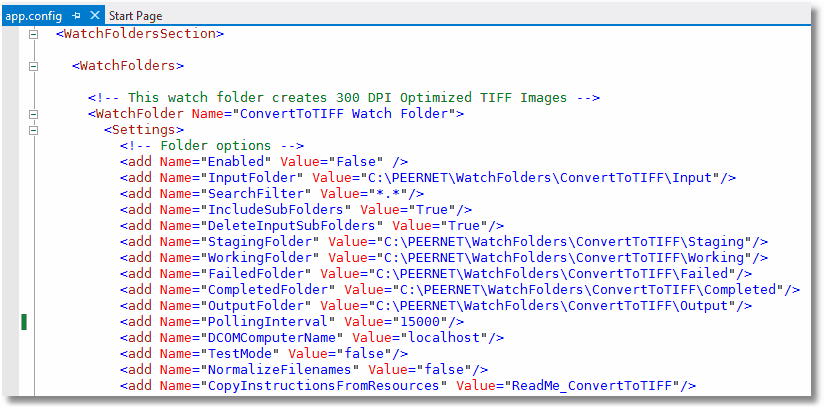
The Watch Folder Service application configuration file (an XML file) contains the custom configuration section <WatchFoldersSection>. This section contains the <WatchFolders> section at the top of the file and a global <Settings> section at the bottom.
The <WatchFolders> section at the top contains, to start, 6 individual <WatchFolder> sections, one for each sample conversion folder provided. You can modify these sample sections as needed to meet your requirements, or you can copy them and edit as needed to add your own Watch Folders.
Each <WatchFolder> section consists of a <Settings> collection of name-value pairs. These settings can be grouped into two sections: the folder settings and the output file settings.
The <Settings> section at the bottom of the file contains the file extension to converter mapping that is used by Watch Folder Service to determine what converter(s) to use for each file type. You can provide a single converter name, or a semi-colon separated list of converter names for each unique file extension. If you pass a list of names the first converter that is found and is running in Document Conversion Service will be used.
Changing the Watch Folder Service Configuration
A copy of the Watch Folder Service sample is installed as a Windows service when Document Conversion Service is installed.
To modify its configuration you need to change the service's application configuration file.
1.Open the Watch Folder Service configuration file by going to the DCS Dashboard - Watch Folder Settings -Edit Configuration. You can also open this file by going to Start - All Programs - PEERNET Document Conversion Service 3.0 - Watch Folder - Configure Watch Folder Settings.
2.This opens the configuration file in the DCS Editor where you can edit the current folders, or copy and paste to make new ones.
3.In the editor, scroll to find the <WatchFolder> section for the conversion folder that you need to change, or use the Find and Replace tool. If you are creating a new section, copy and paste one of the sample sections to start.
4.You will most likely need to change the paths specified for the InputFolder, Staging Folder, Working Folder, FailedFolder, Completed Folder and OutputFolder settings. Occasionally you may also need to configure the SearchFilter setting as well. See the folder settings section for more details.
a.You can enable or disable a conversion folder by setting the Enabled setting to true or false. When false, the folder is not monitored. The default is true if this setting is not provided.
b.The type of output file created is also controlled by the settings in this file. See the section on output file settings and the sample watch folder settings provided in the configuration file.
c.The file extension mapping is controlled by by the <Settings> section. See Changing the File Extension to Converter Mapping for details.
5.Save the edited file. The DCS Editor will validate the file when saving. Restart the service to apply your changes.
The Folder Settings
The folder settings describe the following:
•if the folder is enabled or disabled
•the input folder that is being watched, what files to pick up out of that folder, how often to look for new files in the folder, and whether or not to include any folders under the input folder in the search
•the staging and working folders to use when converting files
•the output folder to store the converted files
•the failed folder to store files that fail to convert
•the completed folder, an optional folder to store the original files that were converted
•other options that define how many files are picked up at once and if batches are run synchronously
•how files are stored in the completed and failed folders
 |
Code Sample - Folder Settings |
|---|---|
<WatchFolders>
<!-- This watch folder creates 300 DPI Optimized TIFF Images --> <WatchFolder Name="ConvertToTIFF Watch Folder"> <Settings>
<!-- Folder Options --> <add Name="Enabled" Value="True"/> <add Name="InputFolder" Value="C:\PEERNET\WatchFolders\ConvertToTIFF\Input"/> <add Name="SearchFilter" Value="*.*"/> <add Name="IncludeSubFolders" Value="True"/> <add Name="DeleteInputSubFolders" Value="True"/> <add Name="StagingFolder" Value="C:\PEERNET\WatchFolders\ConvertToTIFF\Staging"/> <add Name="WorkingFolder" Value="C:\PEERNET\WatchFolders\ConvertToTIFF\Working"/> <add Name="FailedFolder" Value="C:\PEERNET\WatchFolders\ConvertToTIFF\Failed"/> <add Name="CompletedFolder" Value="C:\PEERNET\WatchFolders\ConvertToTIFF\Completed"/> <add Name="OutputFolder" Value="C:\PEERNET\WatchFolders\ConvertToTIFF\Output"/> <add Name="PollingInterval" Value="15000"/> <add Name="DCOMComputerName" Value="localhost"/> <add Name="TestMode" Value="false"/> <add Name="NormalizeFilenames" Value="false"/> <add Name="CopyInstructionsFromResources" Value="ReadMe_ConvertToTIFF"/>
<!-- 0 means no limit --> <add Name="Polling.MaxFilesToProcessAtATime" Value="0"/> <add Name="Polling.SynchronousFilePickup" Value="false"/>
<add Name="UseTimeDateSubFoldersInCompletedFolder" Value="true"/> <add Name="UseTimeDateSubFoldersInFailedFolder" Value="true"/> <add Name="UseCompressedDateTimeFormat" Value="false" />
<!-- Clustered Processing --> <!-- This forces batch mode processing with synchronous wait and --> <!-- no date time stamp used in the Failed\Completed folders --> <add Name="ClusteredProcessing.Enabled" Value="false" /> <!-- Override this for clustering to customize pickup --> <!-- <add Name="ClusteredProcessing.MaxFilesToPickup" Value="6"/> -->
<!-- Run Command at End On Success --> <!-- Use " to put the command in quotes if there are spaces, and to enclose parameters.--> <add Name="RunAtEnd.Success.Enabled" Value="false" /> <add Name="RunAtEnd.Success.Command" Value="" /> <add Name="RunAtEnd.Success.Parameters" Value=""$(OutputFilePath)"" /> <add Name="RunAtEnd.Success.StartDirectory" Value="" /> <!-- One of Normal, Min, Max, Hidden (default) --> <add Name="RunAtEnd.Success.WindowState" Value="Hidden" /> <!-- Wait mode for the command, one of WaitForCompletion, WaitWithExitCode, DoNotWait (default)--> <add Name="RunAtEnd.Success.WaitMode" Value="DoNotWait" /> <!-- Default is 3 minutes --> <add Name="RunAtEnd.Success.WaitModeMaxTime" Value="180000" />
<!-- Run Command at End On Failure --> <!-- Use " to put the command in quotes if there are spaces, and to enclose parameters.--> <add Name="RunAtEnd.Fail.Enabled" Value="falsetrue" /> <add Name="RunAtEnd.Fail.Command" Value="" /> <add Name="RunAtEnd.Fail.Parameters" Value=""$(FailedFilePath)"" /> <add Name="RunAtEnd.Fail.StartDirectory" Value="" /> <!-- One of Normal, Min, Max, Hidden (default)--> <add Name="RunAtEnd.Fail.WindowState" Value="Hidden" /> <!-- Wait mode for the command, one of WaitForCompletion, WaitWithExitCode, DoNotWait (default)--> <add Name="RunAtEnd.Fail.WaitMode" Value="DoNotWait" /> <add Name="RunAtEnd.V.WaitModeMaxTime" Value="180000" />
... </Settings> </WatchFolder>
</WatchFolders> |
|
The Enabled setting is used to determine if this folder is to be watched. When set to False, this folder is not monitored. If this setting is not provided it defaults to True.
The InputFolder is polled on a customizable time interval looking for files or folders of files to convert. Files are chosen based on the SearchFilter setting. The default setting of "*.*" means all files will be picked up to be processed. You can specify what files to convert by changing this setting. Different file types are separated by the pipe (|) symbol. For example. to only pick up Word and PDF files from the folder, the SearchFilter can be set to "*.doc|*.docx|*.pdf".
If any files are dropped into the input folder that meet the criteria of what files you want to convert, these files, or the number of files allowed as explained below, are moved into a uniquely named folder (based on date and time) under the StagingFolder.
When a folder is dropped into the InputFolder, it is searched for files that match the criteria. If any matching files are found in the folder, the folder's structure is mirrored under a new folder in the StagingFolder and the files copied for conversion. During all subsequent steps of copying to the OutputFolder, FailedFolder or CompletedFolder the folder's structure is kept intact.
You can set a limit on how many files are picked up at a single time using the Polling.MaxFilesToProcessAtATime option. This is useful to when dealing with folders with a very large number of files as it allows you to automatically process the files in smaller groups. If you do need to process a large number of files in smaller batches, Polling.SynchronousFilePickup should also be set to true to allow the first group of files to finish converting before the next group of files is picked up. See Large Volume Batch Conversion with Watch Folder Service for a sample configuration.
Once under the StagingFolder, the files are passed to Document Conversion Service to be converted using the output format settings provided for that watch folder. Putting files into this temporary folder prevents file name collisions if another file of the same name is dropped into the folder by another user.
Converted files are first created in the WorkingFolder while they are being created. Once complete, they are copied into the OutputFolder.
If any file should fail to convert, a folder named using the same date and time stamped name as was created under the staging folder, is also created under the FailedFolder and the failed file is copied there.
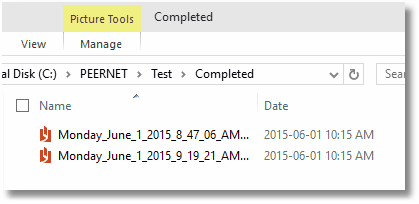
If the CompletedFolder is set, files that were successfully converted are placed into a new subfolder under that folder. This subfolder is named using the date and time the files were picked up from the InputFolder. Each time a new set of files is found to convert, a new subfolder will be created.
If you do not want your completed and failed files copied into subfolders under the CompletedFolder and FailedFolder, this behavior can be changed to copy the files directly into the folders provided without creating the date and time stamped subfolder.
You disable this by setting the UseTimeDateSubFoldersInCompletedFolder option to false. When disabled, the files are copied directly into the CompletedFolder. If a file of the same name already exist in the folder it will be overwritten.
If you do not want to keep a copy of the original source files, you can set the CompletedFolder to an empty string, but take note that this will delete any files that have been dropped into the InputFolder.
Any file that fails to convert is moved into a new subfolder under the FailedFolder. Like the CompletedFolder, the subfolder is named using the date and time the files were picked up from the InputFolder. This can be disabled by setting the UseTimeDateSubFoldersInFailedFolder option to false. When disabled, the files are copied directly into the FailedFolder, and any file of the same name that already exists in the folder it will be overwritten.
Preprocessing Outlook Message Attachments (DCS 3.0.009)
Attachments to Outlook Message files (*.msg) can be automatically extracted and converted along with the original message file. This setting is off by default. To enable it, remove the comment markers on the PreprocessArchiveFormatsFilter setting. See Processing Outlook Message Attachments for full details.
Clustered Processing (DCS 3.0.010)
Clustered processing is available using the ClusteredProcessing.Enabled setting. Clustered processing allows you to point more than one computer running Document Conversion Service and Watch Folder Service at the same folder of files and have both computers convert files from that location. See High Performance Clustering and Fail Over Conversion for more information.
Post Conversion Processing (DCS 3.0.010)
Each watch folder can optionally run a command at the end of the conversion process. Commands are run on each created file for successful conversions, and on the original source file in the case of a failed conversion. See Post-Conversion Processing for more information.
Unique Output Filenames and Flat Folder Structures(DCS 3.0.019)
Each watch folder can provide a unique file name for each output file created, as well as the ability to flattening the input folder structure when creating the files in the output folder. See Unique File Naming and Flat Folder Structures for more information.
All Watch Folder Service Settings
Key |
Value |
|---|---|
ClusteredProcessing.Enabled |
Set this to true to allow clustered processing on this Watch Folder. When this is true, other computers with Document Conversion Service and Watch Folder Service installed can be directed to convert from the same folder of files. |
ClusteredProcessing.MaxFilesToPickup |
When clustered processing is enabled, only a subset of the files in the InputFolder are picked up each time the folder is checked. This allows the other computers in the cluster to also pick up files to process. The number of files picked up defaults to the NumberOfDocumentsInParallel settings in the General settings section of the application configuration file, and can be overridden here. |
CompletedFolder |
This is optional. If included in the settings the source files and folders that are dropped into the InputFolder location are copied into this folder when the conversion is complete. If this setting is set to an empty string ("") or is not included is the settings the source files are deleted. |
CopyInstructionsFromResources |
PEERNET internal setting used to copy embedded text file containing instructions to the sample folders. |
DCOMComputerName |
When converting using a remote computer and DCOM, this setting is the name of the DCOM server where Document Conversion Service is running. See Setting up Client-Server Conversion for more information. |
DeleteInputSubFolders |
When this is true, any folders dropped into the InputFolder for processing will be deleted when all of the files in the folder and its subfolders are converted. When set to false, all of the files in the folder will be converted but the folder structure will remain in the InputFolder.
This setting is often used in conjunction with IncludeSubfolders.
When Polling.MaxFilesToProcessAtATime is configured to limit the number of files picked up, this option is automatically set to false. |
Enabled |
When this is true, the folder will be monitored. When set to false, this folder is not monitored. If this setting is not found, it defaults to true. |
FailedFolder |
If any file fails to convert, they are copied into a folder under this location. The folder name matches the name of the sub-folder created under the StagingFolder during processing. |
IncludeSubfolders |
If this value is true then any folders dropped into the InputFolder location will also be searched for files. |
InputFolder |
This is the folder that is watched for files (and folders if IncludeSubfolders is true) to convert. |
NormalizeFilenames |
When true, file names passed in will be checked for normalization and normalized when necessary. This means that the new output file name, if not specified, will be the normalized file name, which while it may look identical to the original name, is actually not the same.
This should be left as false unless you have problems converting files with foreign file name where some international characters are represented using diacritics. A diacritic is a glyph added to a letter; they are used to change the sound of the letter to which they are added. Some examples of a diacritic are the accent grave (‘) and acute (’) in the French language. |
OutputFolder |
The converted files are copied into this folder from the WorkingFolder when the conversion is done. This is done to prevent accidental pickup of partially created files. |
PollingInterval |
Specifies the maximum wait period that can elapse between checking the input folder for files. This interval is in milliseconds, 15000 would poll the folder every 15 seconds.
Each time a collection of files has completed conversion, the folder is immediately checked for files to convert to maintain throughput. If the folder is empty, the full polling interval will elapse before checking again. |
Polling.MaxFilesToProcessAtATime |
Allows the setting of a limit on the number of files that will be picked up from the InputFolder during any polling interval. When set to 0, no limit is imposed.
This option is useful when the InputFolder is targeting an existing folder with a very large number of files. It allows the files to be processed in batches or groups instead of copying the entire folder structure to the WorkingFolder. This reduces the required amount of disk space used when processing files.
When the number of files picked up is limited, the option DeleteInputSubFolders is automatically set to false. |
Polling.SynchronousFilePickup |
When set to true, the Watch folder will not pick up any files from the InputFolder until the current batch, or group, of files has completed processing.
Used in conjunction with Polling.MaxFilesToProcessAtATime to control the flow of files so that a very large group of files can be processed as many smaller batches without overloading the physical disk space of the computer. |
Polling.NetworkShareRefreshInterval |
Each time a collection of files has completed conversion, the folder is immediately checked for files to convert to maintain throughput. This default behavior may not give slower network shares enough time to refresh and propagate file and directory changes.
Use this value to set a wait period interval in milliseconds. This interval applies only when the InputFolder is a network share, not a local drive. It defaults to 0ms (no waiting) unless set. |
OutputFolder.MaintainInputFolderStructure |
When set to false, this flattens any input folder structures, storing all outputs in a single output folder. This may cause file overwrites due to file name collisions; use OutputFolder.PrependUniqueGUIDToFilename or to OutputFolder.AppendUniqueGUIDToFilename prevent this.
This settings also overrides the creation of the MSG extraction subdirectory processing MSG files using the PreprocessArchiveFormatsFilter setting.
Default is true, to maintain the directory structure. |
OutputFolder.PrependUniqueGUIDToFilename |
When set to true, a Globally Unique ID, or GUID, is added at the beginning of the file name and an optional separator string, OutputFolder.UniqueGUIDSeparatorCharacter, can be placed between the GUID and the filename. This setting can be used instead of or in addition to OutputFolder.AppendUniqueGUIDToFilename.
4c4636f7-e9c5-4c4c-97af-081a328ba7c5_ Filename.tif
There is also an option, OutputFolder.RemoveHyphensFromGUID, to remove the dashes from the GUID.
This settings defaults to false.
|
OutputFolder.AppendUniqueGUIDToFilename |
When set to true, a Globally Unique ID, or GUID, is added at the end of the file name before the extension and an optional separator string, OutputFolder.UniqueGUIDSeparatorCharacter, can be placed between the filename and the GUID. This settings can be used instead or or in addition to OutputFolder.PrependUniqueGUIDToFilename.
Filename_4c4636f7-e9c5-4c4c-97af-081a328ba7c5.tif
There is also an option, OutputFolder.RemoveHyphensFromGUID, to remove the dashes from the GUID.
This settings defaults to false. |
OutputFolder.RemoveHyphensFromGUID |
This setting defaults to false, meaning the hyphens, or dashes are included in the GUID in the file name. Set this to true to remove them. |
OutputFolder.UniqueGUIDSeparatorCharacter |
This sets the string that defines the separator character, or characters that will be placed between the GUID and the file name. It defaults to an underscore (-) character. Any invalid filename characters in this string will cause it to default back to a single underscore.
To not have a separator between the GUID and the filename, leave this string empty, or comment it out. |
PreprocessArchiveFormatsFilter |
This setting filters, by file extension, what archive formats will be preprocessed before converting. Currently the only valid extension is "*.msg" for Outlook Message archive files. This setting can be disabled by commenting it out, or passing an empty string. |
PreprocessArchive.IncludeExtensionInFolderName |
Control whether or not the .msg file extension is included in the name used to created the subfolder that will hold the message and attachments for processing. This is set to True by default and it is recommended to leave it set to prevent output file naming collisions. |
PreprocessArchive.MSG.IncludeInlineAttachments |
Message attachments can be inline (pasted into the email body) or attached as separate files. Images used in signatures are often inline attachments. Set this to false to not include inline attachments; note that this will also cause inline attached documents to not be procesed. Default is true. This setting is applied before the attachment filtering below. |
PreprocessArchive.MSG.AttachmentsIncludeFilter |
Allows you filter what attachments will be processed. When set to an empty string, all attachments are processed. To filter for specific file types, enter in the extensions for each type separated by the pipe (|) character, such as "*.doc|*.docx|*.pdf". |
PreprocessArchive.MSG.AttachmentsExcludeFilter |
Allows you filter what attachments will not be processed. This option is applied after checking the include filter above. When set to an empty string, all attachments are processed. To filter for specific file types, enter in the extensions for each type separated by the pipe (|) character, such as "*.doc|*.docx|*.pdf". |
RunAtEnd.Fail.Enabled |
Set this to true to run the specified command on the original file if the conversion fails. Default is false. |
RunAtEnd.Fail.Command |
The full path to the command to be executed without arguments. Default is an empty string, no command to run. |
RunAtEnd.Fail.Parameters |
The parameters for the command. Use the HTML code " to put the command in quotes if there are spaces, and to enclose parameters. The following variables are available to pass arguments to the command.
$(FailedFilePath) - this is the path to the original file in its failed location. $(SourceFileName) - this is the file name of the original file. |
RunAtEnd.Fail.StartDirectory |
The directory in which to run the command. Default is an empty string. |
RunAtEnd.Fail.WindowState |
The state of the command window when it is run.
Normal - display the window in its normal state. Min - display the window minimized to the taskbar Max - display the window maximized. Hidden - do not show the window. (Default) |
RunAtEnd.Fail.WaitMode |
Optionally wait for the command to complete before continuing. The default is to not wait.
If WaitForCompletion or WaitWithExitCode is chosen, the RunAtEnd.Fail.WaitModeMaxTime value is always used to stop the command if it has not returned after the set amount of time.
WaitForCompletion - wait for the command to complete before continuing. WaitWithExitCode - waits for the command to complete and emits the exit code in the log. DoNotWait - does not wait for the command to complete. (Default) |
RunAtEnd.Fail.WaitModeMaxTime |
The maximum amount of time to wait for the command being run to complete. Default is 3 minutes. |
RunAtEnd.Success.Enabled |
Set this to true to run the specified command on each of the created files if the conversion succeeds. Default is false. |
RunAtEnd.Success.Command |
The full path to the command to be executed without arguments. Default is an empty string, no command to run. |
RunAtEnd.Success.Parameters |
The parameters for the command. Use the HTML code " to put the command in quotes if there are spaces, and to enclose parameters. The following variables are available to pass arguments to the command.
$(OutputFilePath) - this is the path to the converted file. $(SourceFileName) - this is the file name of the original file. |
RunAtEnd.Success.StartDirectory |
The directory in which to run the command. Default is an empty string. |
RunAtEnd.Success.WindowState |
The state of the command window when it is run.
Normal - display the window in its normal state. Min - display the window minimized to the taskbar Max - display the window maximized. Hidden - do not show the window. (Default) |
RunAtEnd.Success.WaitMode |
Optionally wait for the command to complete before continuing. The default is to not wait.
If WaitForCompletion or WaitWithExitCode is chosen, the RunAtEnd.Success.WaitModeMaxTime value is always used to stop the command if it has not returned after the set amount of time.
WaitForCompletion - wait for the command to complete before continuing. WaitWithExitCode - waits for the command to complete and emits the exit code in the log. DoNotWait - does not wait for the command to complete. (Default) |
RunAtEnd.Success.WaitModeMaxTime |
The maximum amount of time to wait for the command being run to complete. Default is 3 minutes. |
SearchFilter |
A file extension based filter for file matching. By default it is set to *.* to match all files. A filter of *.pdf would only search for PDF documents. |
StagingFolder |
This folder is a holding location for the files during conversion. When the input folder is polled, each group of files is copied into a uniquely named sub-folder (based on date and time) under this folder. If IncludeSubfolders is true folders are also copied. |
TestMode |
This flag should be false or removed completely on a production system. Used for development purposes, this flag can be used to simulate load testing by copying the converted files back into the input folder. This value is ignored when clustered processing is enabled. |
UseTimeDateSubFoldersInCompletedFolder |
When set to true, each set of completed files are stored in a subfolder under the CompletedFolder. This subfolder is named using the date and time the files were picked up from the InputFolder.
When set to false the files are copied directly into the CompletedFolder. If a file of the same name already exist in the folder it will be overwritten.
This option is not used when the CompletedFolder is set to an empty string ("") or is not included is the settings. |
UseTimeDateSubFoldersInFailedFolder |
When set to true, any files that fail to convert are stored in a subfolder under the FailedFolder. This subfolder is named using the date and time the files were picked up from the InputFolder.
When set to false the files are copied directly into the FailedFolder. If a file of the same name already exist in the folder it will be overwritten. |
WorkingFolder |
The output files are first created in this folder before being copied to the OutputFolder. If the files were created directly in the OutputFolder and another program was monitoring that folder the files could be picked up before the file was created. This two-stage process eliminates that problem. |
The Output File Settings
The <WatchFolder> section is also responsible for the type of output that is created. Common settings that would appear here would be:
•what type of file to create (multipaged or serialized TIFF, PDF files, JPEG images)
•the resolution (DPI) of any images created
•create color or black and white files
•create fax mode TIFF images.
The settings are provided as a set of name-value pairs based on the settings outlined in Conversion Settings. In this sample application the conversion setting strings are stored in the configuration file for the application. These settings are read from the configuration file and then passed to the PNDocConvQueueServiceLib object through its COM interface. Having the conversion settings external to the program allows the settings to be changed without having to recompile.
The <WatchFolder> sample below creates multipaged, color-optimized TIFF files at 300 DPI with Group4 compression. See the sample WatchFolder sections provided in the configuration file for more examples of configurations of common output formats.
|
Code Sample - Output File Settings |
<!-- This watch folder creates 300 DPI Optimized TIFF Images --> <WatchFolder Name="ConvertToTIFF Watch Folder"> .... <add Name="Devmode settings;Resolution" Value="300"/>
<add Name="Save;Output File Format" Value="TIFF Multipaged"/> <!-- Replace the above with this to create serialized images. --> <!-- <add Name="Save;Output File Format" Value="TIFF Serialized"/> -->
<add Name="Save;Append" Value="0"/> <add Name="Save;Color reduction" Value="Optimal"/> <add Name="Save;Dithering method" Value="Halftone"/>
<!-- This creates file.ext.tif, change to 1 to create file.tif--> <add Name="Save;Remove filename extension" Value="0" />
<add Name="TIFF File Format;BW compression" Value="Group4"/> <add Name="TIFF File Format;Color compression" Value="LZW RGB"/> <add Name="TIFF File Format;Indexed compression" Value="LZW"/> <add Name="TIFF File Format;Greyscale compression" Value="LZW"/> <add Name="JPEG File Format;Color compression" Value="Medium Quality"/> <add Name="JPEG File Format;Greyscale compression" Value="High Quality"/> |
|
Changing the File Extension to Converter Mapping
The file extension of each file is used to determine what converter is used to convert that file. File extensions can be added, removed and changed as needed. When the converter requires a native application to be installed to do the conversion, that application must also be installed.
The mapping consists of the extension (the suffix of the file name past the last dot or period in file's name) and a semi-colon separated list of converter names. See What Files Can I Convert? for a list of converter names.
In some cases the file extension may only have one converter that can process that type of file, and in others, such as PDF, have more than one option. To convert a PDF file you can choose between our built-in Adobe PDF converter, Adobe Reader, GhostScript or Outside-In AX. The code sample below shows a small snippet of the file mapping in the configuration file.
If you want to by-pass certain file types, say for instance you are creating TIFF images and you want to skip converting any TIFF images that are dropped into the input folder, you can change the file extension mapping to have files with the .tif extension sent to the PEERNET Passthrough converter. See Skipping Files with the Passthrough Converter for more details.
The default configuration file for Watch Folder Service lists all of the file extensions to converter mappings in the Settings section at the bottom of the files. Any of these mappings can also be placed inside a WatchFolder section to customize the file extension mappings for that folder.
An example why you would need this would be two WatchFolder sections for PDF to TIFF conversion: one that uses the default Adobe PDF - Builtin converter, and another one that uses Adobe Reader to convert PDF to TIFF instead.
|
Code Sample - File Extension to Converter Mapping |
<WatchFoldersSection>
<WatchFolders> ... <WatchFolder Name="PDF to TIFF with PEERNET Adobe Builtin"> <Settings> <!-- Folder options --> <add Name="InputFolder" Value="C:\PEERNET\PDF_Builtin\Input"/> ... <add Name=".pdf" Value="Adobe PDF - Builtin;" /> </Settings> </WatchFolder>
<WatchFolder Name="PDF to TIFF with Adobe Reader"> <Settings> <!-- Folder options --> <add Name="InputFolder" Value="C:\PEERNET\PDF_AdobeReader\Input"/> ... <add Name=".pdf" Value="Adobe Acrobat Reader" /> </Settings> </WatchFolder>
</WatchFolders>
<Settings> <!-- File Extension to Converter Mapping --> <!-- These can be added to the Settings section for each WatchFolder --> <!-- to tailor each WatchFolder to use different converters for its --> <!-- documents. The individual settings take precedence over the --> <!-- global WatchFolderSection settings section --> <add Name=".doc" Value="Microsoft Word;Outside-In AX" /> <add Name=".docx" Value="Microsoft Word;Outside-In AX" />
<add Name=".xlsx" Value="Microsoft Excel;Outside-In AX" /> <add Name=".xls" Value="Microsoft Excel;Outside-In AX" />
<add Name=".pptx" Value="Microsoft PowerPoint;Outside-In AX" /> <add Name=".ppt" Value="Microsoft PowerPoint;Outside-In AX" />
<add Name=".pdf" Value="Adobe PDF - Builtin;Adobe Acrobat Reader;Ghostscript;Outside-In AX" />
... <add Name=".tif" Value="Image - Builtin;PEERNET Image Converter;Outside-In AX" /> <add Name=".tiff" Value="Image - Builtin;PEERNET Image Converter;Outside-In AX" /> <add Name=".bmp" Value="Image - Builtin;PEERNET Image Converter;Outside-In AX" /> <add Name=".jpg" Value="Image - Builtin;PEERNET Image Converter;Outside-In AX" /> <add Name=".jpeg" Value="Image - Builtin;PEERNET Image Converter;Outside-In AX" /> </Settings>
</WatchFoldersSection> |
|