Setting up automatic printing

Contents
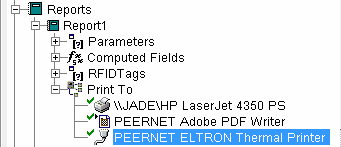
Before you can run your reports and labels you need to set up your printers as sub-items of the Print To item. For this example, we will be setting up printers for the report called Report1.
To add a printer, right-click the Print To item, and click Add Printer. Set the printer properties as desired, and then click OK. The printer will appear in the list as a sub-item to the Print To item.
In the example above, three printers have been added as sub-items. To remove a printer from this list, right-click the printer and click Delete Printer. You can also view the properties of a listed printer by right-clicking the printer and clicking Properties.
Added printers will appear with a green check mark to their left. This indicates the printer will be included at runtime. To disable this option for a listed printer, right-click the printer and click Disable Run. Instead of a green check mark, a red ![]() will appear to the left of the printer. You can enable the run option again by right-clicking the printer and clicking Enable Run.
will appear to the left of the printer. You can enable the run option again by right-clicking the printer and clicking Enable Run.
Now, to run your report, right-click the specific report (in the example above, Report1), and click Run. A Run dialog box will appear which allows you to select or deselect printers (using the check boxes, the All button, or the None button). Make your selections, then click OK. Your report will be printed to the selected printer(s). Click Cancel to exit this dialog box without printing.