Automatic printing and requests

Contents
You can add printer items for requests. Printer items will appear as sub-items under the Print To item of the specific request, and allow you to print your output to multiple printers when the request is run. Note that, unlike when using conversion items, you will not produce a list of the files contained in your converted output when using printer items.
Note that the Cached property of the request does not apply to printer items; output produced by printer items will always be placed in the location specified in the printer options dialog box.
To add a printer, right-click the Print To item, and click Add Printer. In the Add Print Request dialog box, select the printer you want to use for the print job, set the printer properties as desired, and then click OK. The printer will appear in the list as a sub-item to the Print To item.
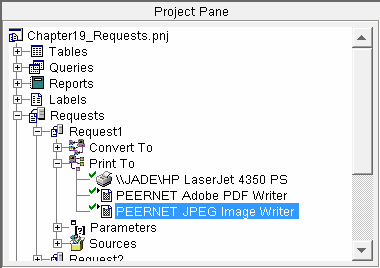
In the example above, three printers have been added as sub-items. To remove a printer from this list, right-click the printer and click Delete Printer. You can also view the properties of a listed printer by right-clicking the printer and clicking Properties.
Added printers will appear with a green checkmark to their left. This indicates the printer will be included when the request is run. To disable this option for a listed printer, right-click the printer and click Disable Run. Instead of a green checkmark, a red ![]() will appear to the left of the printer. You can enable the run option again by right-clicking the printer and clicking Enable Run.
will appear to the left of the printer. You can enable the run option again by right-clicking the printer and clicking Enable Run.
PEERNET Reports Designer comes with several, built-in printers that you can use to produce printed output (in addition to any printers you have installed on your system). To change the settings associated with a built-in printer, select the printer name from the drop-down list in the Print dialog box, and click the Options button. For specific information about the properties of each of these built-in printers, see Appendix B: PEERNET Reports Built-in Printers.