Accessing a Microsoft Access (MDB) database

Contents
A Microsoft Access database can be a single table containing information about a specific subject, or it can be a group of tables containing related information. An Access database can also contain queries, forms, reports, and macros.
Information on a collection of books is an example of a database that could be contained in a single table. A database of purchasing information for a store would most likely be implemented as several, inter-related tables, one for purchaser information, another for the orders, and another for the sales information. Using separate tables makes the database more efficient and reduces data-entry errors.
Microsoft Access also includes the ability to create queries on the tables in a database. Queries are used to examine and manipulate data. Only tables and queries, with the exception of parameterized queries, can be used (see the sample table and query below).
Password-protected tables can also be used. The password information can be set when the ODBC data source name connection is created, but there are some security issues with setting up a connection this way. The ODBC Data Source Manager stores information regarding the connection in the Windows Registry. Any password and login information given to the manager is stored in plain text values and can be read by anyone with access to the registry.
Access database limitations:
•Parameterized queries cannot be linked, even though they will be listed under the query tab on the Link Table dialog box.
•Queries from an Access database are treated as tables in PEERNET Reports Designer.
•Passwords provided to the ODBC Data Source Manager are stored as plain text values in the registry.
•PEERNET Reports Designer cannot use data fields containing OLE objects, used to store data such as Microsoft Word or Microsoft Excel documents, pictures, sounds, and other types of binary data created in other programs, although they will be displayed in the Datasheet View.
The following steps will guide you through setting up an ODBC Data Source link to a non-password protected Microsoft Access database file, and adding both a table and a query from that database as a table in PEERNET Reports Designer.
Note that the sample project Chapter06_ODBC_Access.pnj and the sample databases SampleData.mdb and SampleDataP.mdb are used in the following procedure. SampleDataP.mdb is a password-protected copy of SampleData.mdb. Both database files consist of one table and three queries. You can access this project by clicking File – Open Project in the application menu, then enabling the Open a sample project option.
Note that steps 1 - 3 are applicable only if you are running a 32-bit operating system. If you are running a 64-bit operating system (such as Windows Vista or Windows XP-64), you will need to access and run the 32-bit ODBC administration application, which is not available from the Control Panel. The 32-bit ODBC administration application is called odbcad32.exe and can be found in the C:\Windows\SysWOW64 directory.
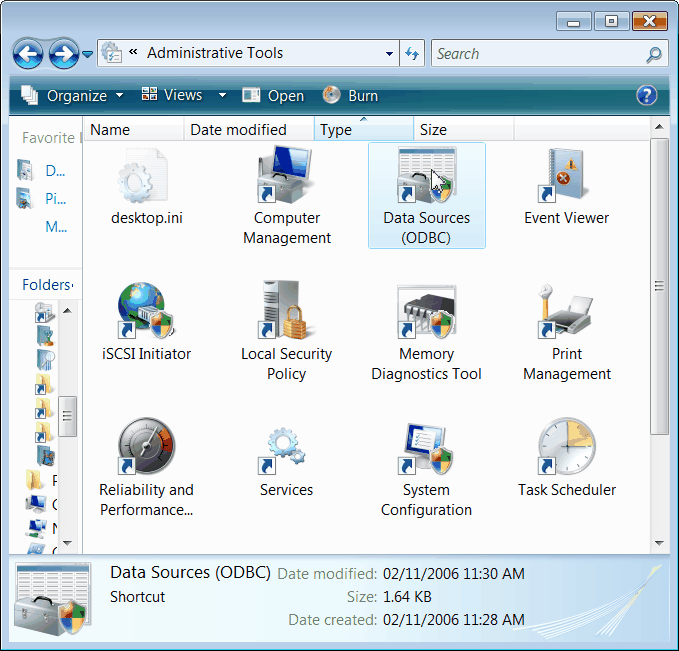
1.Click the Start menu – Settings – Control Panel to display the Control Panel window.
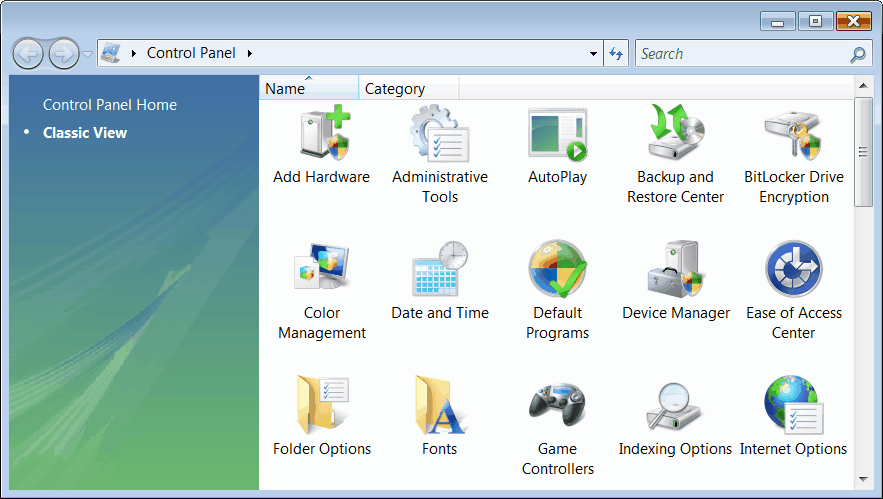
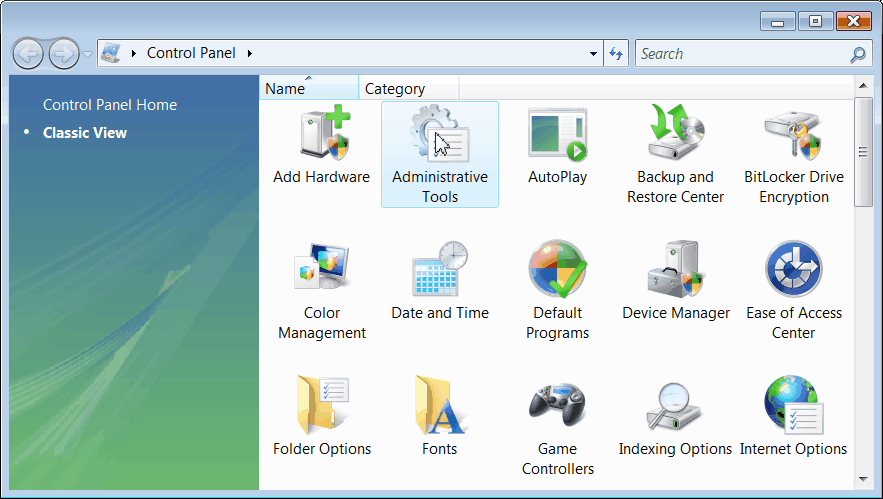
2.Double-click the Administrative Tools icon. This will display the Administrative Tools window.
If you are running a version of Microsoft Windows previous to Windows 2000, double-click the icon labeled ODBC Data Sources (32-bit), and skip to Step 4.
3.From the Administrative Tools window, double-click the Data Sources (ODBC) icon to display the ODBC Data Source Administrator application.
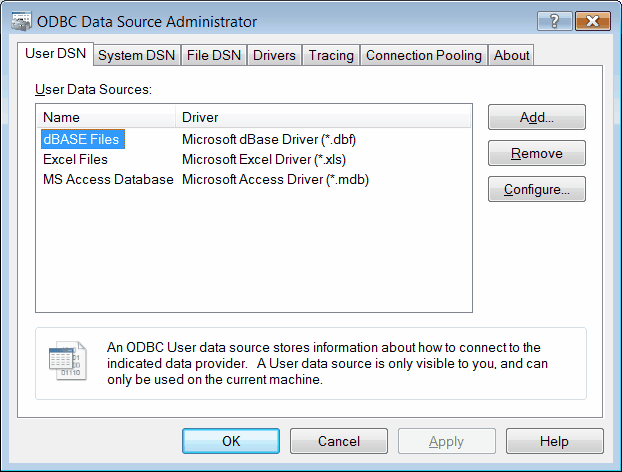
4.The ODBC Data Source Administrator opens. The ODBC Data Source Administrator manages the connections between database drivers and data sources. These connections are used to link to the database.
Database drivers are components that allow any application to communicate with the database using ODBC requests and return the requested information to the application. Each type of database will have its own driver.
Data sources are the actual database or files the drivers access. They are identified by a Data Source Name (DSN). There are two categories of data sources used here: User DSN and System DSN.
User DSN’s are data source connections that are local to the computer and can be accessed only by the user who created the connection.
System DSN’s are data source connections that are local to a computer, but not dedicated to a user. The system or any user with sufficient privileges can use a data source set up with a system DSN.
The ODBC Data Source Administrator is used to add, configure, and delete the connection, or links you create between the database drivers and the data sources.
Note that deleting a database-driver link does not delete the actual database file(s) on the computer.
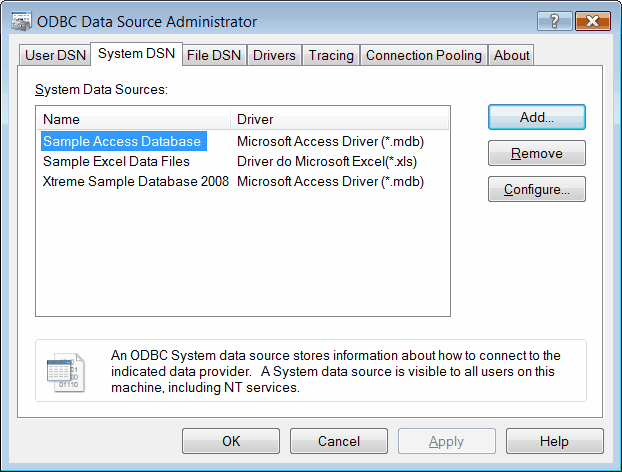
5.In the ODBC Data Source Administrator, click the System DSN tab. From here, click the Add button to display the Create New Data Source dialog box.
6.The Create New Data Source dialog box lists the available database drivers installed on the computer, as well as the version of the database driver. By default, the first driver in the list is already selected.
7.In the list of drivers, find the driver Microsoft Access Driver (*.mdb) in the list and select that driver.
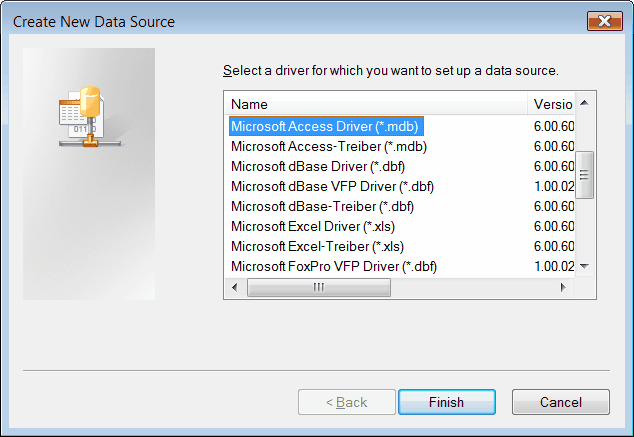
8.Click the Finish button to go to the ODBC Microsoft Access Setup dialog box.
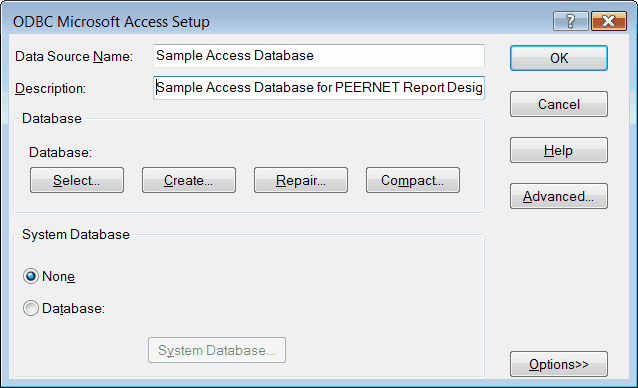
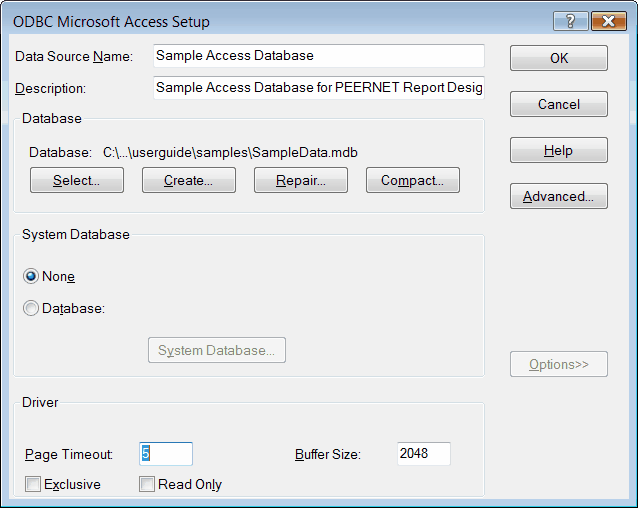
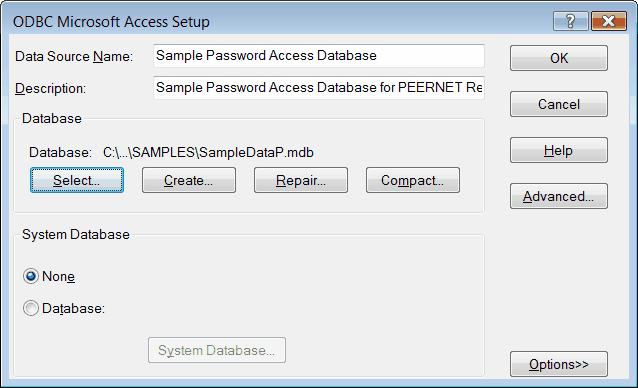
9.The ODBC Microsoft Access Setup dialog box specifies the name and description of this data source, as well as the Access database file to associate with this connection.
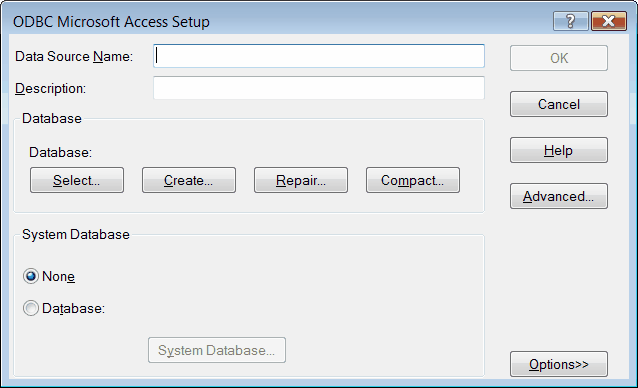
The Advanced button sets properties for the driver for this data source name, including the login and password to be used by the driver for this data source connection. See the section on setting up the driver to use a password-protected database for an example using this dialog box.
The Options button allows you to set the access level of the database to Exclusive or Read Only, as well as setting options on how long the driver keeps information in memory, and the size of the internal memory buffer. The default options of the driver are sufficient for use here, as it only needs to read the data when the table or query is linked initially, or re-linked by the user later to refresh for table changes.
Other database options, Create, Repair, and Compact, as well as the System Database section, are outside the scope of this User Guide. See the Microsoft Access User Guide and the ODBC Microsoft Access Setup Help for more information on these options.
10.Enter a name for your Data Source Name, as well as a description if desired. The description will allow you to easily remember what this data source represents. Note that the name of a data source connection cannot be longer than 32 characters. The description must be less than 130 characters.
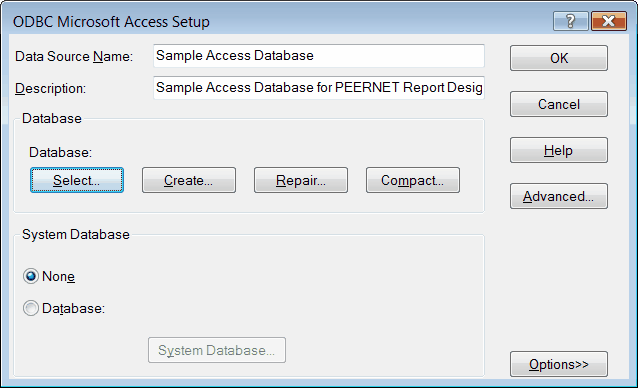
11.The next step is to tell the driver where to find the database. Click the Select button to go to the Select Database dialog box.
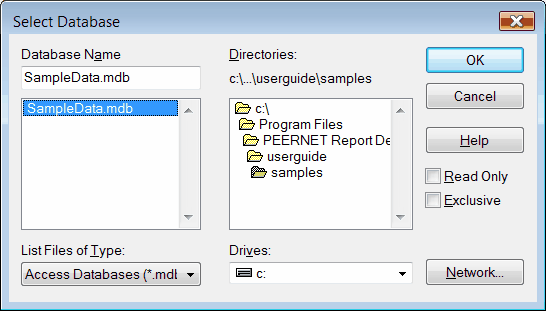
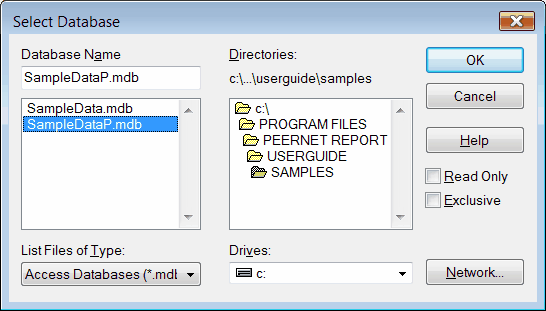
12.Using the Directories list box, browse to the directory that contains your Access database file. All files that the driver recognizes will be listed in the Database Name list box. Select the desired database file and click OK to select the directory.
In this example, the \userguide\samples folder under the installation directory is selected. The sample files, SampleData.mdb and SampleDataP.mdb, are listed in the Database Name list box. SampleData.mdb is selected as the desired database.
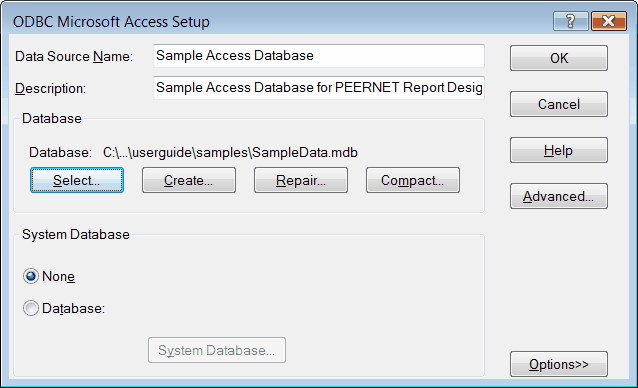
13.The ODBC Microsoft Access Setup dialog box now displays the database chosen in the previous step.
Here, the \userguide\samples\SampleData.mdb database is displayed as the selected database.
14.This is enough to set up a data source connection to an Access Database. Alternatively, you can use the Options button to further define the access level of the database.
To accept the default settings preset by the driver, skip ahead to Step 16.
To change the access level settings, click the Options button to expand the dialog box to show the access settings.
15.The expanded dialog box allows the Page Timeout, the Buffer Size, and Exclusive and Read Only access to be set. These options are described in Step 9. For more information, see the ODBC Help.
16.Click the OK button to accept the new data source and return to the ODBC Data Source Administrator dialog box.
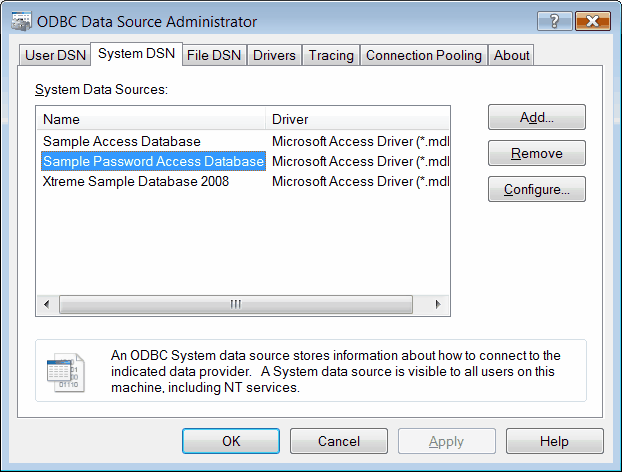
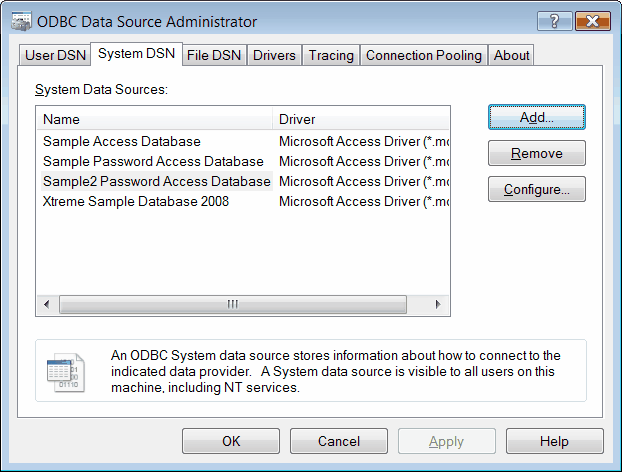
17.The data source just defined, Sample Access Database, is now listed as a System Data Source. Also shown is the driver this data source will use. The data source is now ready to be used. Click OK to close this dialog box.
18.Launch PEERNET Reports Designer and, using the dialog box that is displayed, open or create the project in which you want to use this data source.
Here, the sample project file Chapter06_ODBC_Access.pnj is opened.
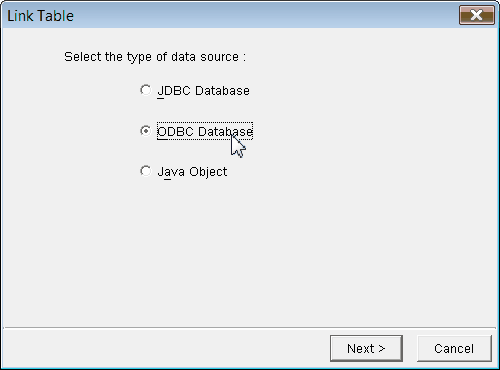
19.To add the newly created Access data source as a table in the project, double-click the Tables item to go to the Link Table dialog box.
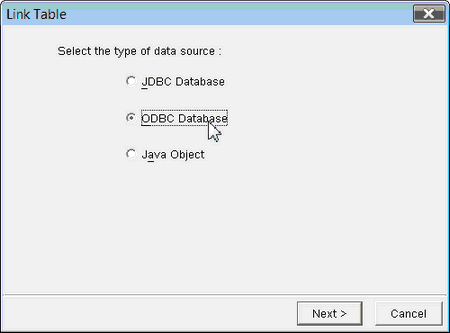
20.The first step of the Link Table wizard presents a choice of three types of data sources. Enable the ODBC Database option, and click Next.
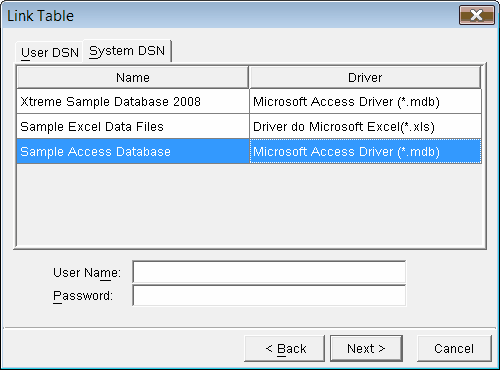
21.The next page lists all User and System DSN’s currently available. The MDB data source was added under System DSN. Click the System DSN tab to show the Access data source.
22.Select the Access data source that was added in the previous steps. The User Name and Password can be set here for any database that requires it. This is an alternative to setting the login information for the database in the data source connection through the ODBC Data Source Manager. Click Next to go to the next step in linking a table. The sample data source database does not require a User Name or a Password, so these fields are left blank.
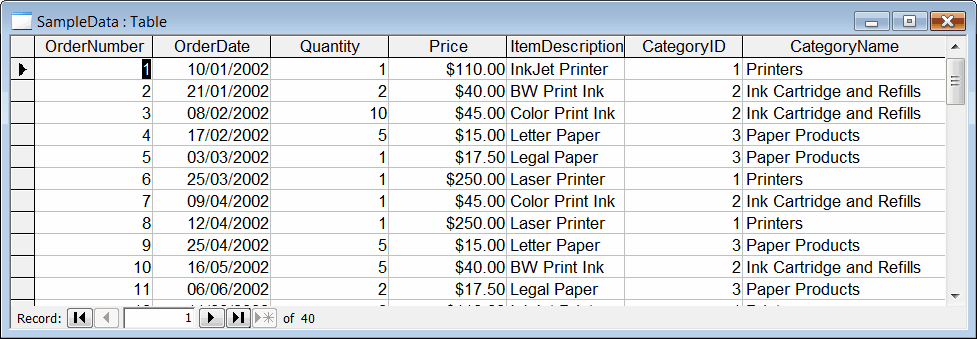
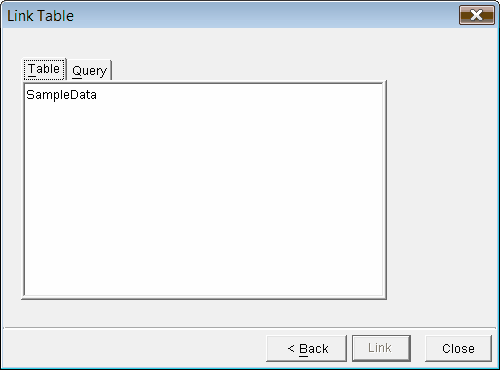
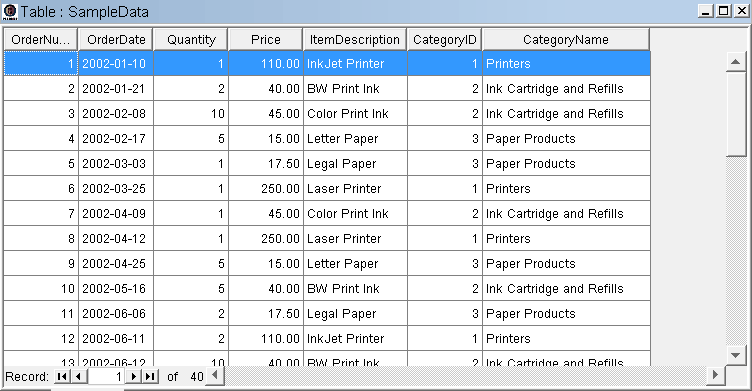
23.The tables contained in the database will be listed on the Tables tab. The sample database contains a single table, SampleData.
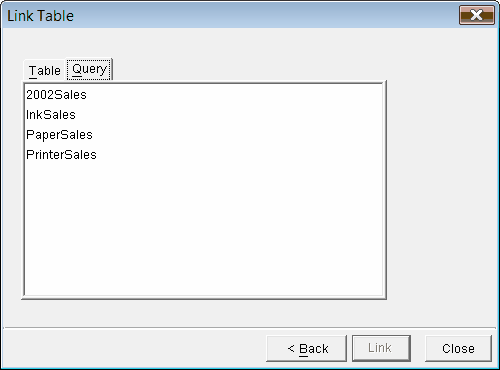
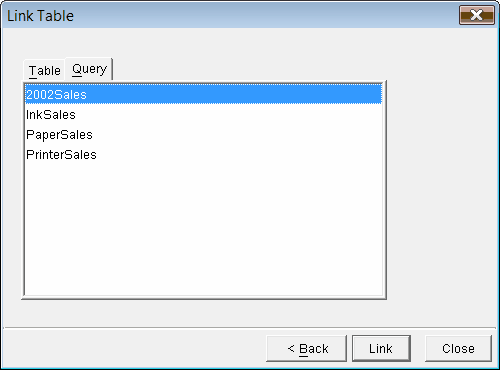
24.To see the queries, if any, contained in the database, click the Queries tab.
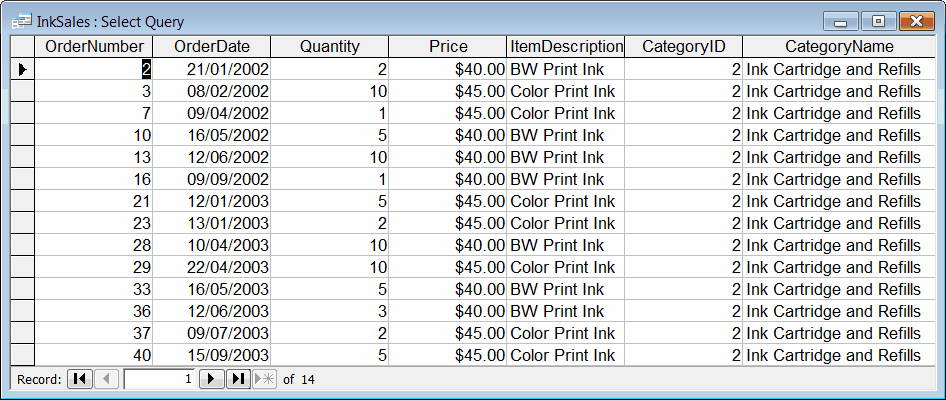
The sample database contains four queries, 2002Sales, InkSales, PaperSales, and PrinterSales.
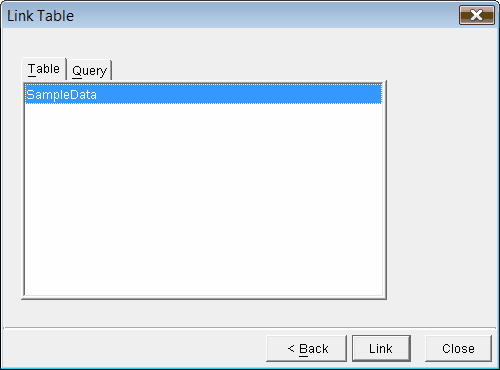
25.Return to the Tables tab and select a table to link to, and then click the Link button to add the table to the project.
26.Click the ![]() to expand the Tables item and view the newly added table in the list. Double-click this table to view its data.
to expand the Tables item and view the newly added table in the list. Double-click this table to view its data.
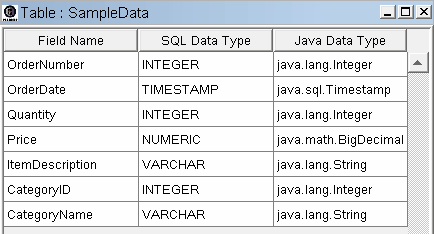
27.The Design View of the table lists the columns in the table, along with the data type of the data in each column.
28.The Datasheet View shows the actual data in this table.
29.To add a query, instead of a table, from a Microsoft Access database, repeat Steps 19 – 21 above, and then click the Queries tab to list the available queries. The sample database contains three queries, 2002Sales, InkSales, PaperSales, and PrinterSales.
30.Select the desired query, and then click the Link button to add that query to the project. In PEERNET Reports Designer, Access database queries are treated as tables, not as queries.
31.The query is added to the list of tables and should automatically be selected. Double-click the new table to view the query’s data.
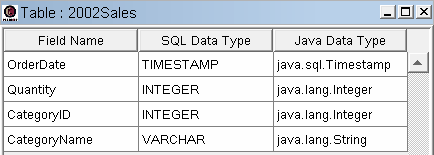
32.The Design View of the query shows the columns included in the query, along with the data type of the data in each column.
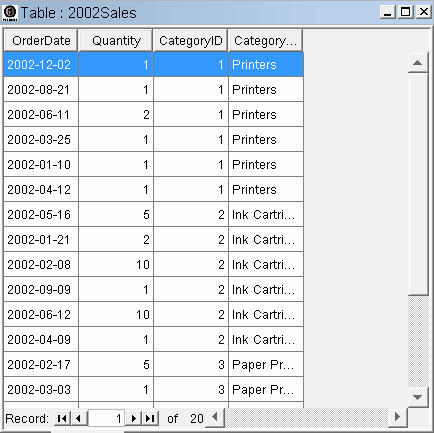
33.The Datasheet View shows the actual data in this data source.
Adding a Password Protected Access Database
There are two ways to access a password-protected Access database through PEERNET Reports Designer. The login and password can be passed to the driver through the Link Table dialog box, or the login and password information can be set in the data source connection when it is set up in the ODBC Data Source Manager.
Using the Login/Password through PEERNET Reports Designer
1.Repeat Steps 1-11 from Adding an Access Database above, specifying a different name for the new data source connection to the password-protected database.
2.Using the Directories list box, browse to the directory that contains your password-protected Access database file. All files that the driver recognizes will be listed in the Database Name list box. Select the desired database file and click OK to select the directory.
In this example, the \userguide\samples folder under the installation directory is selected. The sample files, SampleData.mdb and SampleDataP.mdb, are listed in the Database Name list box. SampleDataP.mdb is selected as the desired database.
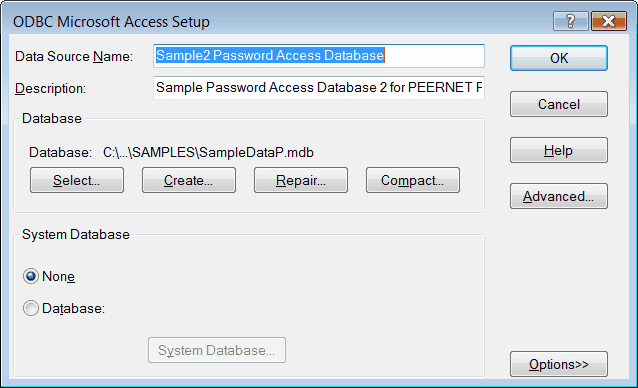
3.The ODBC Microsoft Access Setup dialog box now displays the database chosen in the previous step. Click on the OK button to return to the ODBC Data Source Administrator dialog box.
Here, the \userguide\samples\SampleDataP.mdb database is displayed as the chosen database and a different name for the data source connection is specified.
4.The data source just defined, Sample Password Access Database, is now listed as a System Data Source. Also shown is the driver this data source will use. The data source is now ready to be used. Click OK to close this dialog box.
5.Launch PEERNET Reports Designer and, using the dialog box that is displayed, open or create the project in which you want to use this data source.
Here, the sample project file Chapter06_ODBC_Access.pnj is opened.
6.To add the newly created Access data source as a table in the project, double-click the Tables item to go to the Link Table dialog box.
7.The first step of the Link Table wizard presents a choice of three types of data sources. Enable the ODBC Database option, and click Next.
8.The next page lists all User and System DSN’s currently available. The Access data source was added under System DSN. Click the System DSN tab to show the Access data source.
The example shows the Sample Access Database added in the previous steps.
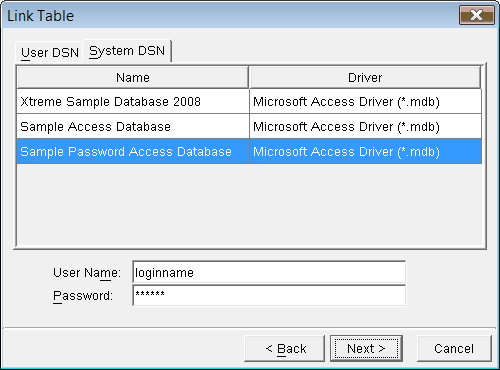
9.Select the Access data source that was added in the previous steps. The User Name and Password can be set here for any database that requires it. After specifying the User Name (also known as Login), and the password, click Next to go to the next step in linking a table. The sample password-protected database uses your Login name as the User Name and the password “sample”.
10.The tables contained in the database will be listed on the Tables tab. The sample password protected database contains the same table information as the unprotected sample database, a single table named SampleData.

11.To see the queries, if any, contained in the database, click the Queries tab. The sample password-protected database contains the same query information as the unprotected sample database, four queries named 2002Sales, InkSales, PaperSales, and PrinterSales.

12.Repeat Steps 23-32 from Adding an Access Database above to add tables and queries from the password-protected database into a project.
Using the Login/Password through the ODBC Data Source Manager
This method is not recommended if dealing with sensitive data that needs to be protected from unauthorized users. The ODBC Data Source Manager stores any login and password information as plain text entries in the registries, which can then be read by anyone with access to the registry.
1.Repeat Steps 1-13 from Adding an Access Database above, specifying a different name for the new data source connection to the password-protected database.
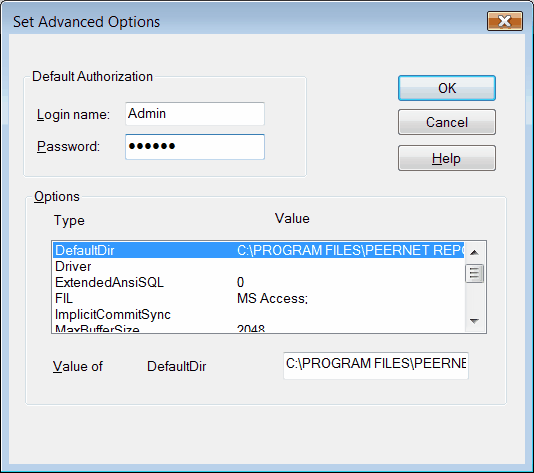
2.Click the Advanced button to display the Set Advanced Options dialog box.
3.The Set Advanced Options dialog box sets properties for the driver for this data source name, including the login and password to be used by the driver for any database set to use this data source connection.
This information is used both with password-protected databases, as well as any data source that uses a system, or workgroup database. See the ODBC Help or Microsoft Access Help on database security for more information.
To use the Set Advanced Options dialog box, you must first enter the login name and password for this driver. The default name is Admin, and the default Microsoft Access password for the Admin user is an empty string.
Any options changed in the Options section will be used by the Microsoft Access Driver when accessing any Access database associated with this data source connection. See the Help for this dialog box for an explanation of the options available to be changed.
The sample database is set to use the Login “Admin” and the password “sample”.
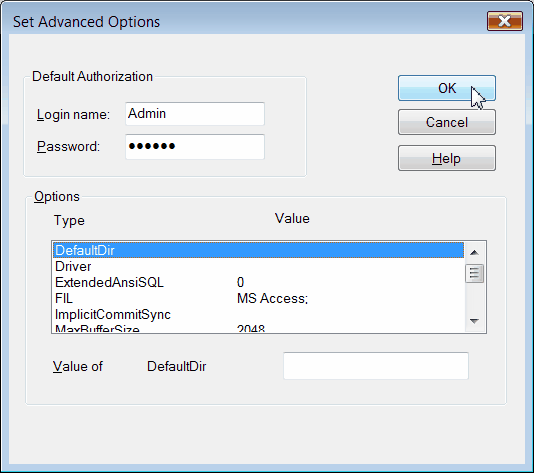
4.Click the OK button to select the advanced settings.
5.The data source just defined, Sample2 Password Access Database, is now listed as a System Data Source. Also shown is the driver this data source will use. The data source is now ready to be used.
6.The data source name Sample2 Password Access Database can now be linked, without specifying a password in the Link Table wizard. Follow Steps 17-23 from Adding an Access Database above to link the database.