If you have created a personal profile with your custom settings, you can simply export your personal profile so that it can be imported on another computer.
Step by Step Instructions
Export
1.Launch the Raster Image Printer Dashboard.
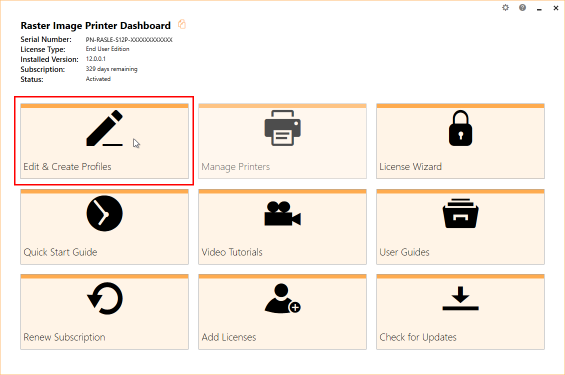
2.Select "Edit & Create Profiles" to open Profile Manager.
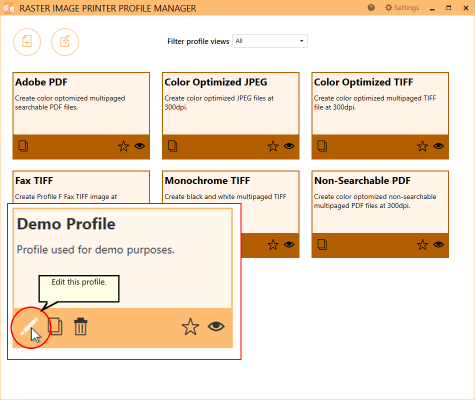
3.Select “Edit this profile” to open the personal profile that you want to save.
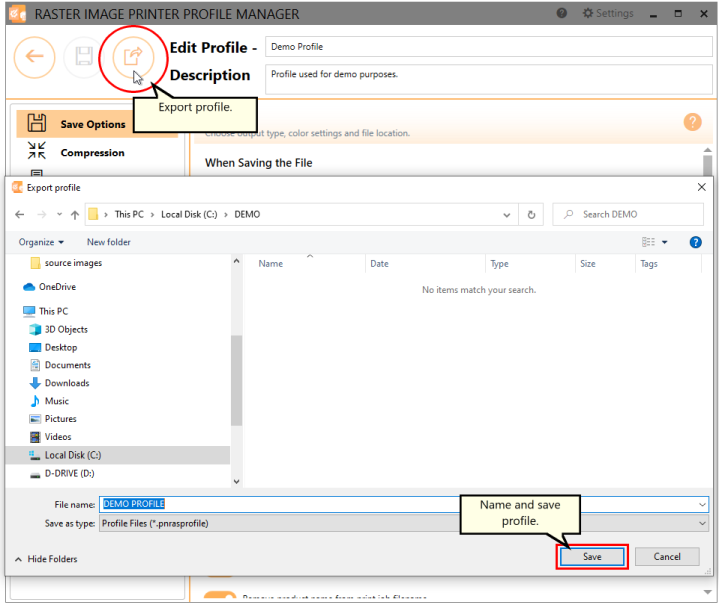
4.Select “Export profile”, and name and save the file.
Import
1.Install and activate Raster Image Printer on the new computer.
2.Launch the Raster Image Printer Dashboard.
3.Select "Edit & Create Profiles" to open Profile Manager.
4.Select “Import a Profile” and browse to the file that you want to restore.

5.Close Profile Manager.
If you plan to use these settings regularly, you may wish to make this imported profile the default profile used by Raster Image Printer.
i.Select the printer you wish to edit and use the Profile drop box to select your desired default profile.
ii.Select "Manage Printers" to open Printer Management.
iii.Select the Save icon to save changes.
iv.Select the Home icon to return to the Dashboard.
6.Close the Dashboard. Now when you print a document to Raster Image Printer, the custom settings in the restored personal profile will be applied to the created file.