Raster Image Printer 12 uses Profiles, which are a group of settings, to create the output file you want. Raster Image Printer comes with a few system profiles including: Color Optimized TIFF, Monochrome TIFF, Fax TIFF, Adobe PDF, Non-Searchable PDF, and Color Optimized JPEG.
You can also create your own personal Profile(s) with the settings you require.

Step by Step Instructions
1.Launch the Raster Image Printer Dashboard.
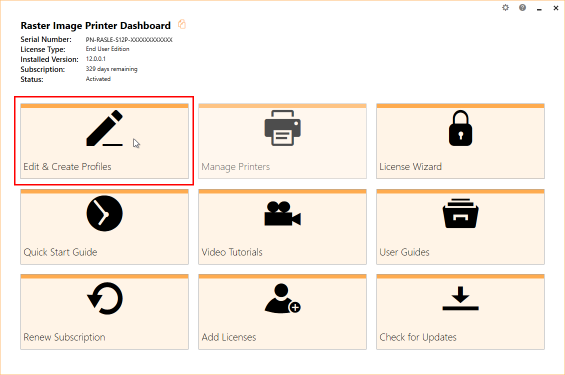
2.Select "Edit & Create Profiles" to open Profile Manager.
3.You can either create a copy of a system profile, if it has similar settings to what you require, by selecting "Create a copy of this profile", or create a personal profile by selecting "Add a profile".

4.Name the profile, add a description, and click Save.
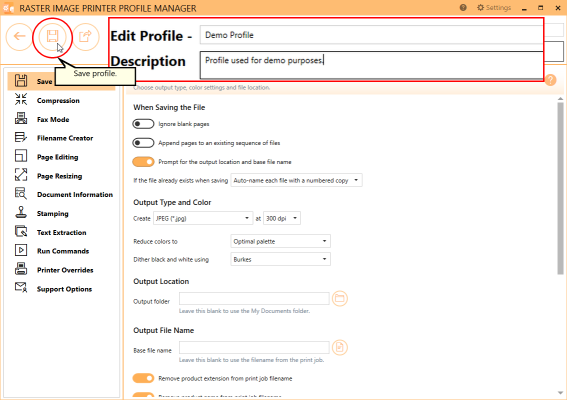
5.Go through the tabs and adjust the settings as desired. The subsequent topics in the Working with Raster Image Printer section provide detailed instructions on how to adjust the settings in your personal profile to create different types of images/files.
6.Click Save-Back, and close Profile Manager.
If you plan to use these settings regularly, you may wish to make this personal profile the default profile used by Raster Image Printer.
i.Select the printer you wish to edit and use the Profile drop box to select your desired default profile.
ii.Select "Manage Printers" to open Printer Management.
iii.Select the Save icon to save changes.
iv.Select the Home icon to return to the Dashboard.
7.Close the Dashboard. Now when you print your document to Raster Image Printer the settings saved in this profile will be applied to the output file.