Previewing the project allows you to see what the pages will look like before you print them. You can also change the Page Scaling options through Application Preferences to see how the page would look when printed using the different page scaling options.
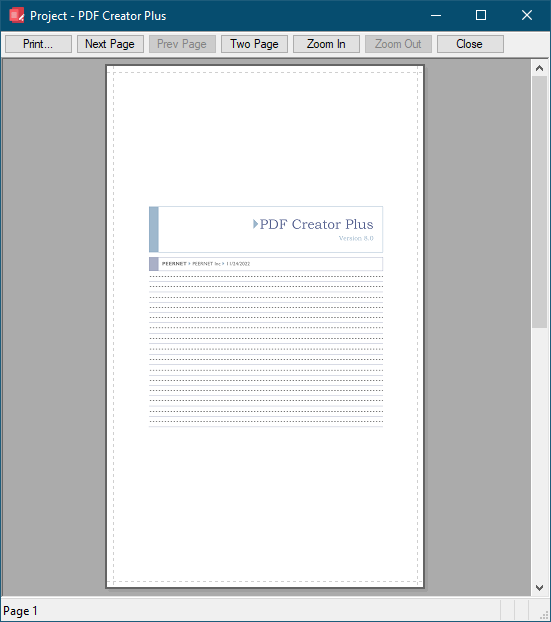
Preview the Project
1.Create a new PDF Creator Plus project or open an existing one.
2.From the File menu, select the Print Preview menu item. You can also click the Print Preview  button on the Standard toolbar.
3.The first page of your project is displayed as it would look if it was printed to the printer selected in Setting Printer Defaults.
Use Next Page and Prev Page to move between the pages of your document, if desired.
You can change the zoom level using the Zoom In button, or switch between a single page preview to booklet preview using the Two Page button. To go back to a single page use the One Page button.
Use the Close button to close the preview and return to the application.
Change the Page Scaling
The default printing option for Page Scaling is Fit to Paper. To preview changes to the page scaling options, change the page scaling defaults through the Printing Defaults tab in the Application Preferences dialog.
1.From the Edit menu, click the Application Preferences menu item. You can also click the Preferences  button on the Standard toolbar.
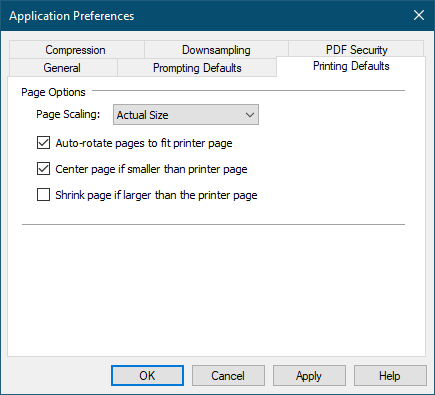
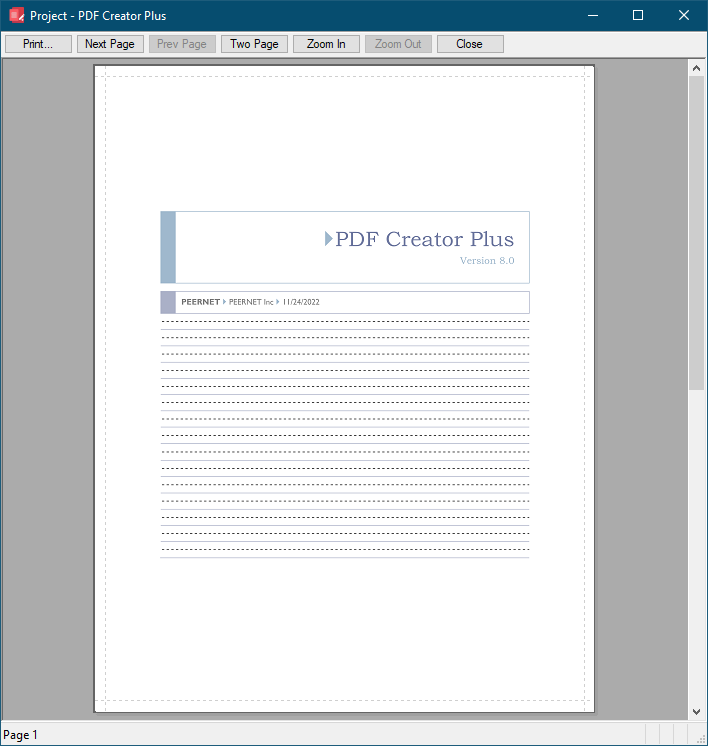
•Changes made on this tab will be seen when you preview or print the project. Here the page is set to be scaled Actual Size, with Auto-rotate and Center page turned on.
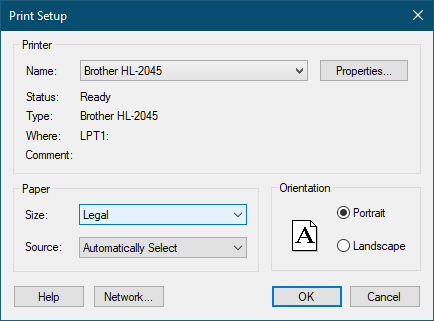
2.The page scaling option set in step 1 above is more readily seen if we also change the Paper Size to Legal in the Print Setup dialog as shown below.
3.Now in the print preview we see the original page has retained its actual size of Letter paper but now it is centered on Legal-sized paper.