The steps below demonstrate how to use the Run Commands tab to automatically send yourself an email after both a successful and failed print.
As an alternative to using the Run Commands, a built-in action for sending emails was added to PDF Image Printer in version 12.0.012. See the Email the Created File topic to learn how to send email using this feature. The built-in feature can use both Outlook or SMTP and provides options for zipping the attached files and controlling the email size.
Using the Built-In SMTP Email Utility
The included email utility, PNSMTPSend.exe, uses the SMTP protocol to create and send an email to the specified recipients. SMTP stands for Simple Mail Transfer Protocol, which is a protocol for sending e-mail messages. This option does not require an email client to be installed but it does require the following information from your SMTP or IT administrator.
•the SMTP host server and port that you use to send email
•credentials for authentication, if required by the SMTP server
•the email address of the sender
There are two parts to the settings for this utility - the SMTP settings in the utility configuration file, and command line arguments passed down via the Run Commands parameters in your conversion profiles.
The utility is located in the RunCommands folder in your PDF Image Printer install folder. This is usually C:\Program Files\PDF Image Printer 12\RunCommands\.
The configuration file, PNSMTPSend.exe.config, located in the same folder as the utility, defines and uses these SMTP protocol settings.
PNSMTPSend.exe Configuration Settings |
|
|---|---|
SMTPUserName |
The user email address that has permissions to send SMTP email on the server. This user name is used to create credentials when SMTPUseDefaultCredentials is set to true. |
SMTPPassword |
The password for the user email address. This password is used to create credentials when SMTPUseDefaultCredentials is set to true. |
SMTPServerName |
The mail server. |
SMTPPort |
The port used for SMTP transactions.on the SMTP host. The default value is 25. |
SMTPSendTimeout |
Set how long to try and send the email, in milliseconds. Default is 2 minutes, 120,000ms. |
SMTPUseDefaultCredentials |
Default is false to create credentials from SMTPUserName and SMTPPassword. Credentials are necessary if the server requires the client to authenticate before it will send email on the client's behalf. Set to true to use default credentials to send the email instead. |
SMTPUseSSL |
Set to true to Secure Sockets Layer (SSL) to encrypt the connection. |
SMTPSendMailDelay |
Sets a delay between sending emails to multiple recipients. |
SMTPToRecipients |
The email addresses to send the email to. Multiple emails can be separated with a comma (,) or a semi-colon (;). |
SMTPFromEmailAddress |
The from address for the email. |
The utility arguments allow custom subject line, message text and optionally attaching the created files.
PNSMTPSend.exe Command Line Arguments |
|
|---|---|
"subject:subject line" |
The text to put on the subject line of the email. If there are spaces in your subject, use quotes around the argument. |
"message:body text" |
The message body to include in the email. This is a simple text string. If there are spaces in your subject, use quotes around the argument. |
clean |
Optional Deletes any created output files at the end after sending the email. |
list |
Optional Lists the files in the email, but does not attach them to the message. Default behavior is to attach any files from the output files list as well as list them in the email body. |
<path to file list> |
Path to the list of files to attach to the email message. This must be the last argument on the command line. It is automatically passed as the last argument via the Run command. |
Sample Usage For Run Commands
Send an email message:
PNSMTPSend.exe "subject:Convert Success" "message:Files successfully converted." |
Send an email message on success but only list the file output location":
PNSMTPSend.exe "subject:Convert Success" "message:Files successfully converted." list |
Send an email message with attached files and delete the files when finished:
PNSMTPSend.exe "subject:Convert Success" "message:File Conversion Status " clean |
Send an email message but don't attach the files, good for failure notifications:
PNSMTPSend.exe "subject:Convert Failed" "message:There were errors with the conversion." list |
Step by Step Instructions
1.Launch the PDF Image Printer Dashboard.
2.Select "Edit & Create Profiles" to open Profile Manager.
3.Select "Add a profile" to create a personal profile, or create a copy of one of our system profiles.
4.Name the profile, add a description, and click Save.
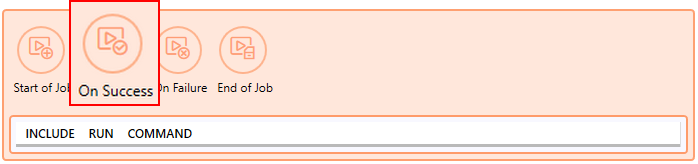
5.On the Run Commands tab, click the On Success button to add an On Success command.
6.The command will be added already enabled and the details expanded. Beside Run this command, enter the full path and file name of the command. In this case we will use our example C# command file called PNSMTPSend.exe.
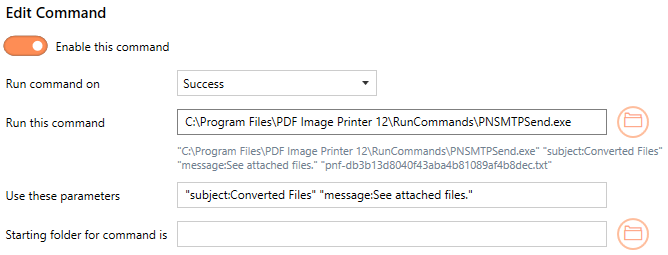
7.Beside setting the command to run, you also need to configure the PNSMTPSend.exe utility's configuration file with your SMTP email and server credentials. See Using the Built-In SMTP Email Utility at the top of this topic.
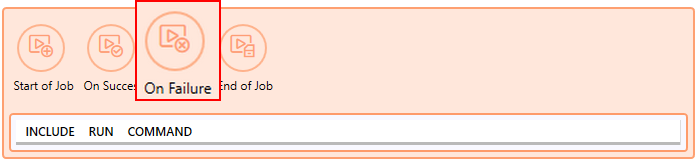
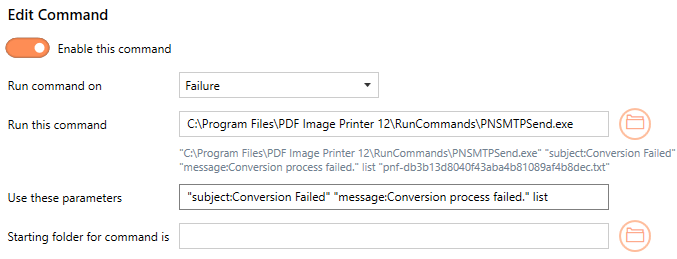
8.On the Run Commands tab, click the On Failure button to add an On Failure command.
9.Again, the command will be added already enabled and the details expanded. Beside Run this command, enter the full path and file name of the command. Again we will use our example C# command file called SendEmail.com which is located in the PDF Image Printer's setup folder.
10.On the Run Commands tab, under On Failure, enable Enable this command.
11.Click Save-Back, and close Profile Manager.
If you choose to enable run commands, you may also want to disable prompting by the Save As dialog each time you print.
i.To turn off prompting by the Save As dialog, disable Prompt for the output location and base file name.

If you plan to use these settings regularly, you may wish to make this personal profile the default profile used by PDF Image Printer.
i.Select the printer you wish to edit and use the Profile drop box to select your desired default profile.
ii.Select "Manage Printers" to open Printer Management.
iii.Select the Save icon to save changes.
iv.Select the Home icon to return to the Dashboard.
12.Close the Dashboard. Now when you print your document to PDF Image Printer, you will receive an email notifying you if the print is a success or failure.