The steps below demonstrate how to use the Stamping tab to add a text watermark to output files.

Step by Step Instructions
1.Launch the PDF Image Printer Dashboard.
2.Select "Edit & Create Profiles" to open Profile Manager.
3.Select "Add a profile" to create a personal profile, or create a copy of one of our system profiles.
4.Name the profile, add a description, and click Save.
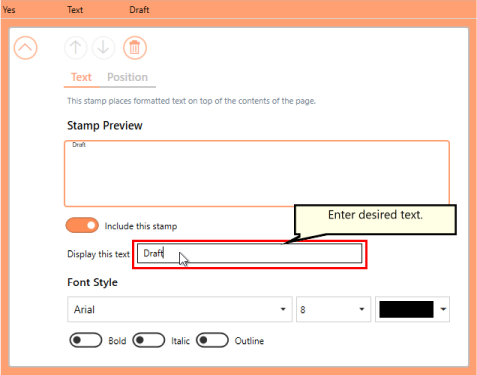
5.On the Stamping tab, select Add a text stamp.

6.Beside Display this text, enter your desired text. By default, the text that is entered is: "Draft".
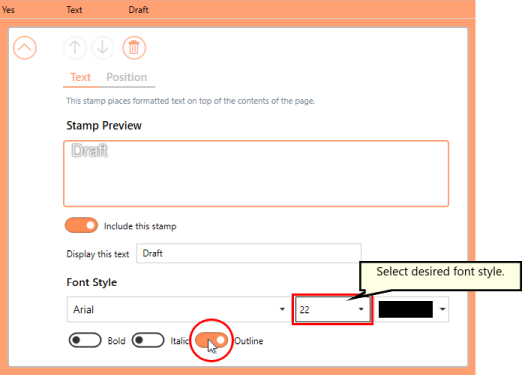
7.You can change the font type, font size, font color, and enable bold, italic or outline font styles. For this example, we will use font size 22 and enable outline.
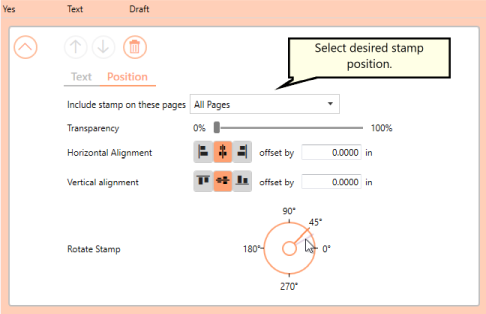
8.Under Position:
•you can choose which pages in the output file will be stamped,
•you can adjust the transparency of the stamp,
•you can change the horizontal and vertical alignment of the stamp,
•and you can rotate the stamp.
For this example, we will rotate the text stamp 45 degrees.
9.Click Save-Back, and close Profile Manager.
If you plan to use these settings regularly, you may wish to make this personal profile the default profile used by PDF Image Printer.
i.Select the printer you wish to edit and use the Profile drop box to select your desired default profile.
ii.Select "Manage Printers" to open Printer Management.
iii.Select the Save icon to save changes.
iv.Select the Home icon to return to the Dashboard.
10.Close the Dashboard. Now when you print your document to PDF Image Printer, every page of the output file will be stamped with the text watermark DRAFT diagonally across the center of the page.