Starting with Document Conversion Service 3.0.015, integrating conversion using a web service in Microsoft IIS has been simplified to make it easier to add file conversion into your web services. If you are running an earlier version of Document Conversion Service, see the section IIS and Previous Versions of Document Conversion Service below.
Local File Conversion with IIS
The addition of the Authenticated Users group to our local group Document Conversion Service Users automatically gives any IIS application pools access to all of the COM objects needed and to our default conversion folder C:\PEERNET. Adding access to other folders is as simple as adding full permissions for the Document Conversion Service Users group to that folder.
For situations where you only want certain users to be able to perform conversion, you can edit the members list of the Document Conversion Service Users group on the server and the client to remove the Authenticated Users group and add your desired users, or an existing group of users you may already have set up.
When calling the PEERNET.ConvertUtility methods or any of the command line utilities in a web service, the ConversionWorkingFolder argument must be specified and the Document Conversion Service Users group must have Full control or at least Modify permissions on that folder or the conversion will fail.
The sample code below is from a WCF service hosted on an IIS website.
public String ConvertToTIFF(String InputFile, String OutputFolder, String ConversionWorkingFolder)
if (!String.IsNullOrEmpty(ConversionWorkingFolder)) { convworkingFolder = ConversionWorkingFolder; InputFile, OutputFolder,Guid.NewGuid().ToString(), true, true, true, "TIFF 200dpi Monochrome", String.Empty,String.Empty,null, String.Empty, convworkingFolder, String.Empty); |
Conversion can be called from another application (the service consumer) as follows:
static void Main(string[] args) new ConverterService.ConverterServiceClient(); @"C:\PEERNET\", String.Empty); |
Remote Conversion with IIS
If you plan on running your IIS server and Document Conversion Service on separate computers and converting remotely (client-server conversion), a few extra steps are needed.
For remote conversion, the application pool that the web service is running under will need access to the shared folder DCSREMOTE on the remote machine running Document Conversion Service. The easiest way to do this is to have the web service use an application pool that is configured to use an identity (an account) that has access to the remote machine. This identity can be a local account with matching passwords that exists on both machines or, if the computers are on the domain, it can be a domain account.
This account also needs access to the input, or the location of the file being converted, as well as the output location where the file is being saved.
The sample code below is for remote conversion from a WCF service hosted on an IIS website.
public String ConvertToTIFFRemote(String InputFile, String OutputFolder, String RemoteDCOMName, String RemoteWorkingFolder) InputFile, OutputFolder, Guid.NewGuid().ToString(), String.Empty, String.Empty, null, RemoteDCOMName, RemoteWorkingFolder, String.Empty); |
Conversion can be called from another application (the service consumer) as follows:
static void Main(string[] args) new ConverterService.ConverterServiceClient();
String results = client.ConvertToTIFFRemote(@"C:\PEERNET\Bliss.bmp", @"C:\PEERNET\", @"DCS-CONV-SRV", @"\\DCS-CONV-SRV\DCSRemote"); |
IIS and Previous Versions of Document Conversion Service
These steps demonstrate the changes needed to allow previous versions of Document Conversion Service to be called from an IIS web service application.
To perform the conversion the user (or identity) that the web service runs as needs to be added to the Document Conversion Service Users local user group to have access to Document Conversion Service.
The user group Document Conversion Service Users is created when Document Conversion Service or the Document Conversion Service Client Redistributable is installed.
Identify the User
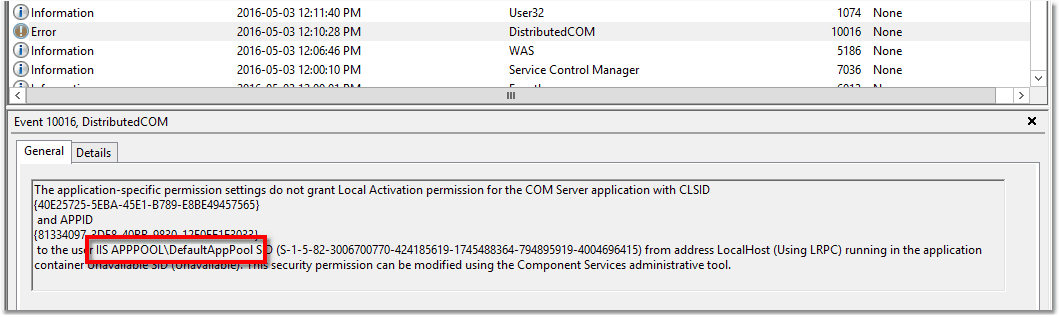
The first step to be done is to identify the user that IIS is using to run the web service. The default user is normally IIS APPPOOL\DefaultAppPool. If you are using a different user, you can find out this information by locating the DistributedCOM error in the System log of the Event Viewer.
Add the User to Document Conversion Service Users
Once you know the user, you will need to add this user to the Document Conversion Service Users group so that it will have the necessary permissions. Once you have done the following steps, you must restart your computer to have the changes take effect.
1.From the Control Panel, go to System and Security and then to Administrative Tools. From here, open the Computer Management console.
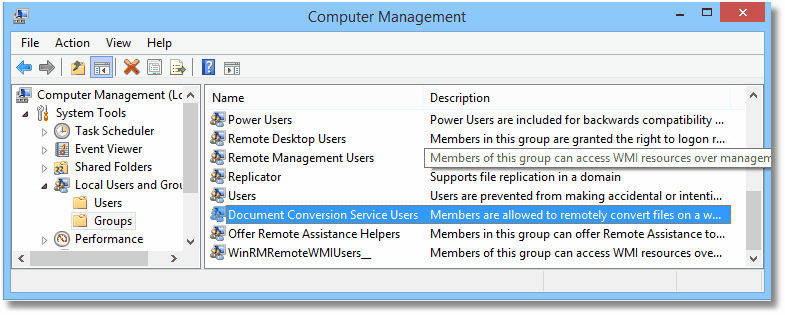
2.In the console, under Computer Management (local) - Local Users and Groups - Groups, locate and select the Document Conversion Service Users group.
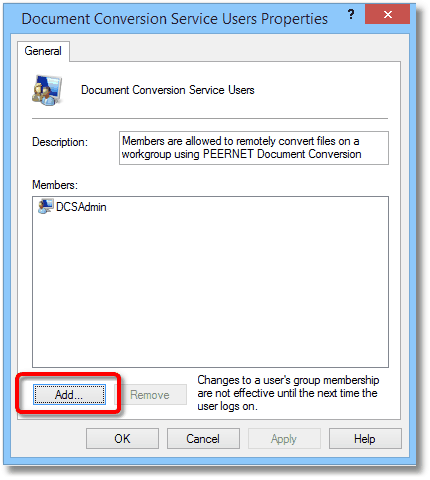
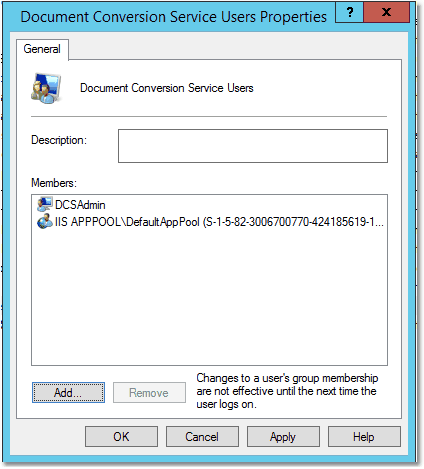
3.Double-click the group to open the Document Conversion Service Users Properties dialog, then click the Add button.
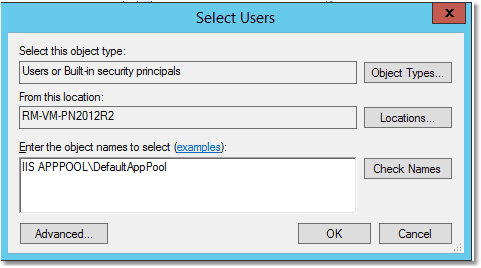
4.In the Select Users dialog change the From this location: to be the local computer (it normally defaults to the domain if you are on one) and add the desired user in the list at the bottom. Here we have added the default user IIS APPPOOL\DefaultAppPool; your actual user may be different. When done, press the OK button.
5.The Document Conversion Service Users Properties dialog should now look like the one below. Press the Apply button to save the changes.
6.This is the LAST AND MOST IMPORTANT STEP. You need to restart the computer to have the changes take effect. If you do not restart the computer you will still get the DistributedCOM error when trying to use Document Conversion Service from within the IIS environment.
Adding Document Conversion Service Users Permissions to Folders
When calling PEERNET.ConvertUtility methods or the command line conversion utilities from within a web service, the Document Conversion Service Users local group sometimes needs to be added to certain folders to give the conversion process the required permissions to access the folders.
One such scenario is if you are passing a custom folder for the ConversionWorkingFolder, this Document Conversion Service Users group needs Full Control, or at least Modify access on that folder. Not having this level of access will cause the conversion process to take upwards of an extra 90 seconds to complete as the utility attempts to clean up interim files and folders created as part of the conversion. Once access is granted, the cleanup is instant.
Other folders that may need permissions include the input and output folders, custom paths for results files and the SIL logging files.
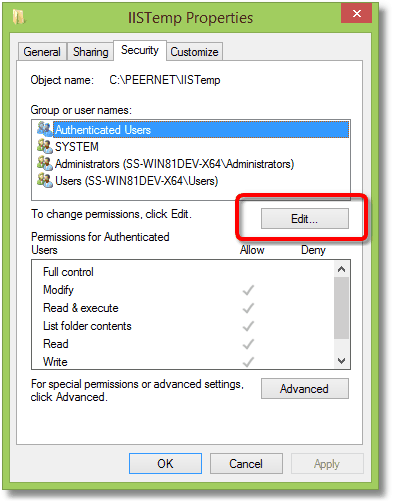
1.On the folder you want to use as the ConversionWorkingFolder, right-click and select Properties from the context menu.
2.On the Properties dialog box, select the Security tab and then the Edit... button to open the Permissions dialog.
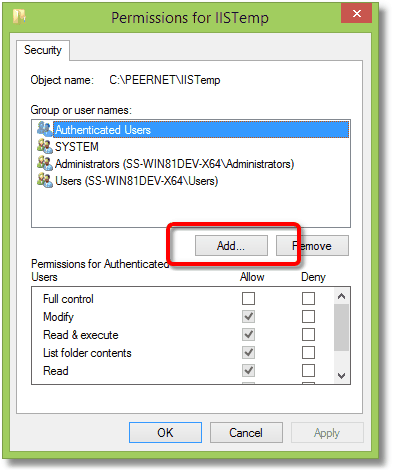
3.On the Permissions dialog, click the Add... button.
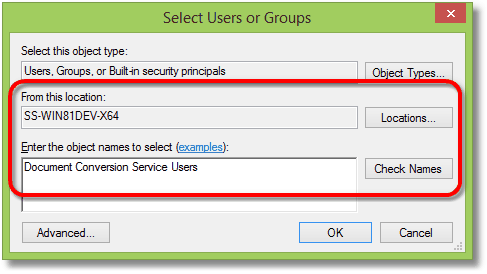
4.In the Select Users or Groups dialog change the From this location: to be the local computer (it normally defaults to the domain if you are on one). Then add the Document Conversion Service Users group in the list at the bottom. When done, press the OK button.
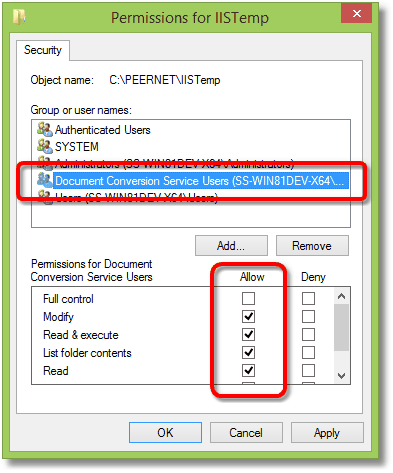
5.Back on the Permissions dialog, make sure the new group Document Conversion Service Users is selected. In the permissions section below under the Allow column, make sure there is a check mark in the Modify option. You can also check Full control to grant the group full access.
6.Click OK to apply the changes.