Using a Printer Profile for No Prompt PDF Creation

Contents
Instead of relying on the application's last used settings for prompt-free printing, you can also configure the printer to use a profile instead. The steps below will configure Convert to PDF to launch hidden and automatically start creating the PDF file using the application settings saved in a printer profile. When the file is created the application will then close.
1. Print any document
•Print any document to the Convert to PDF 4.0 printer to launch the Convert to PDF application to configure the settings.
2. Set File Save Location
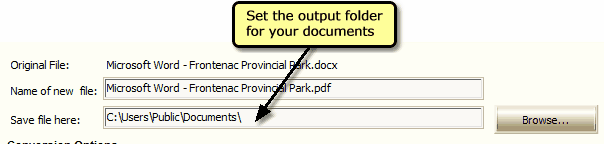
•In the edit field next to Save file here, set the output folder in which to save the PDF files. The name of the file will be automatically generated from the print job when the file is created.
3. Turn off Prompting
In order to print without prompting, we need to turn off anything in the application that would cause a prompt.
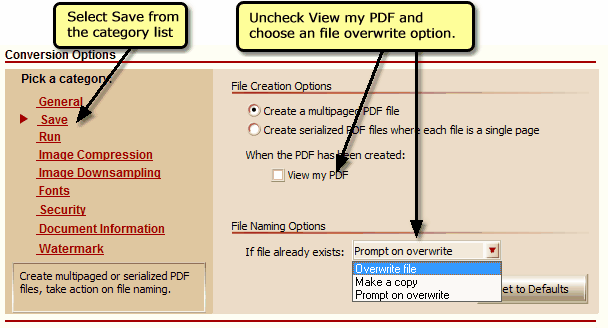
•Select Save from the category list on the left hand side.
•In the File Creation Options section, uncheck the View my PDF option.
•In the File Naming Options section, select either Overwrite file or Make as copy as the action to take when the PDF file you are trying to create already exists.
4. Set Other PDF Settings
Change any other settings in the different categories to create the type of PDF you want.
5. Create the Profile
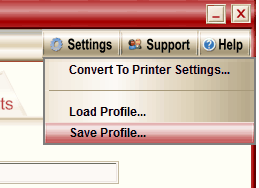
•Click the Settings button in the upper right corner of the application and choose Save Profile… to store your settings to disk.
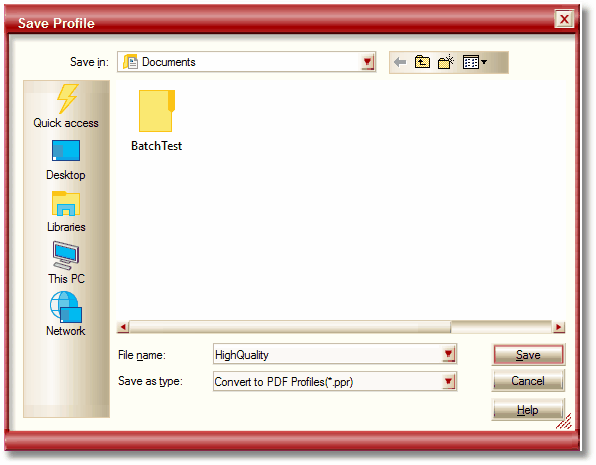
•In the Save Profile dialog, choose a location and name for your printer profile.
6. Set Automatic Conversion Options in the Printer
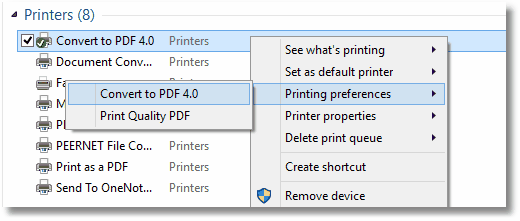
•Go to your Printers folder. See Locating the Printers Folder for information on how to access the Printers folder for your version of Windows.
•Right-click the Convert to PDF 4.0 printer in the folder and select Printing Preferences from the context menu.
|
Note: If you are running Windows 7 or later and have multiple copies of the Convert to PDF printer you will only see one of your Convert to PDF printers. Right-clicking the printer will show a context menu with each option containing a submenu listing each copy of the printer.
|
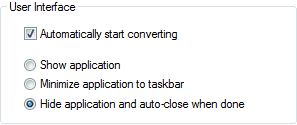
•In the User Interface section, enable the Automatically start converting option, then select Hide application and auto-close when done.
•In the Printer Profile section enable printer profiles by checking to the Use this profile checkbox and use the Browse... button to find and select the desired profile.
