Creating and managing labels

Contents
You can create a label using either the Design View method, or the Label Wizard method.
Using the Design View method allows you to create either a basic, blank label, on which you can later manually add design components, or a label with default data taken from a selected table.
Using the Label Wizard method allows you to pre-select and sort data from your project table(s) to use on your new label, which is then automatically added to your label when the label is created.
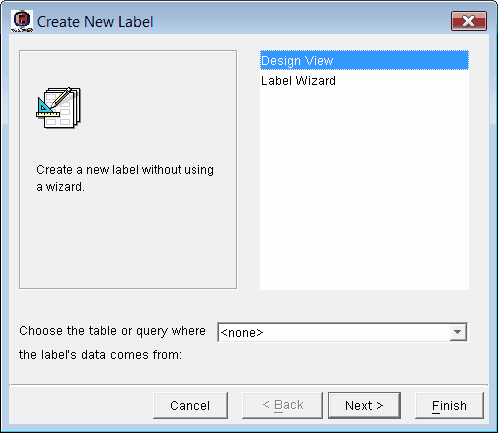
To create a label in your project file using Design View
1.Double-click the Labels item.
2.Select Design View from the text field.
3.Select the table or query which contains the desired source data from the drop-down list. Note that if you select a table or query here, all of its fields will be defaulted onto your label. If you do not select a table or query here, a blank label will be created instead.
4.Click Next.
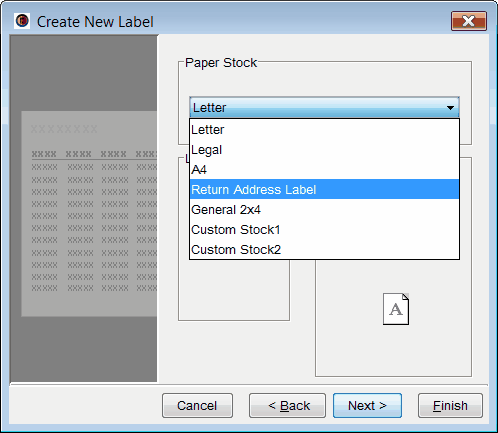
5.Select the stock you want to use from the Paper Stock drop-down list. Here we have selected Return Address Label as our stock.
6.If applicable, select a Layout option (data in columns or data in a table).
7.Select an Orientation option (portrait or landscape).
8.Click Next.
9.Type a name for your new label in the text field.
10.If you want to preview the label before it’s created, select the Preview option. If you want the label to be created immediately, select one of the View options; the View option you select will become the view in which you first see the label.
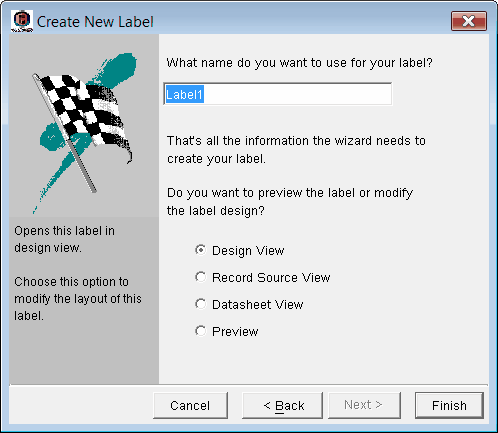
11.Click Finish.
Your new label will be added as a sub-item to the Labels item, using the name you just typed.
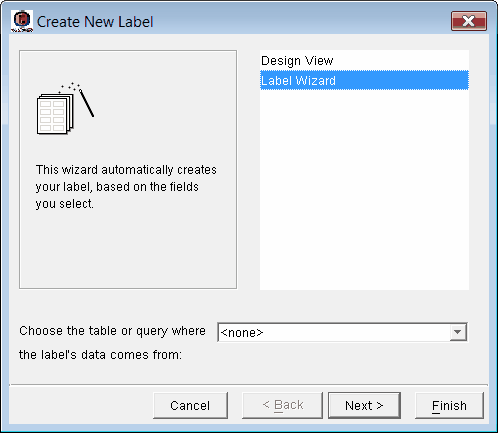
To create a label in your project file using Label Wizard
1.Double-click the Labels item.
2.Select Label Wizard from the text field.
3.Select the table which contains the desired source data from the drop-down list.
4.Click Next.
5.Select the source of the desired data from the Tables/Queries drop-down list. Note that you can repeat steps 5 and 6 to select data from other sources.
6.Select the fields you want to place on the label using the > button. Note that you can also use the >> button to select all fields, the < button to remove a field, and the << button to remove all fields.
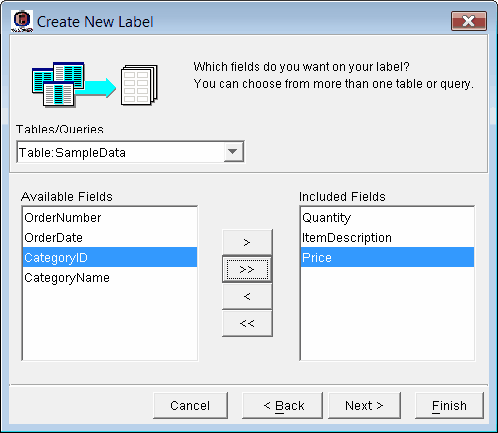
7.Click Next.
8.Using the drop-down lists, select your desired sort order(s). Each drop-down list includes the name of all the fields you selected for display on the previous wizard screen. You can choose to sort fields in either ascending or descending sort order.
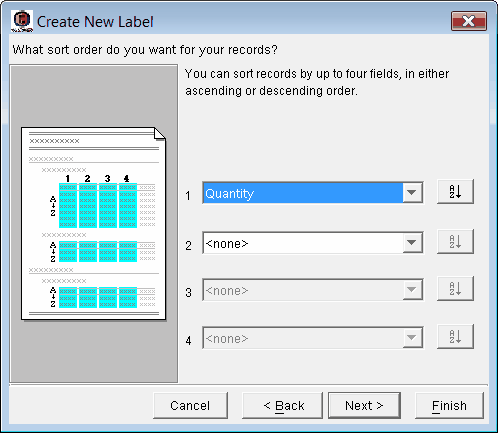
9.Click Next.
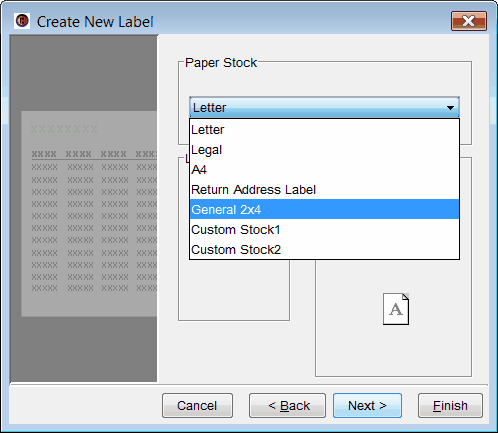
10.Select the stock you want to use from the Paper Stock drop-down list. Here we have selected General 2x4 as our stock.
11.Select a Layout option (data in columns or data in a table).
12.Select an Orientation option (portrait or landscape).
13.Click Next.
14.Type a name for your new label in the text field.
15.If you want to preview the label before it’s created, select the Preview option. If you want the label to be created immediately, select one of the View options; the View option you select will become the view in which you first see the label.

16.Click Finish.
Your new label will be added as a sub-item to the Labels item, using the name you just typed. As well, the fields you selected for display will be automatically placed in the label’s Detail section.

To view the properties of a label
1.Click the ![]() to expand the Labels item.
to expand the Labels item.
2.Click a label. The label’s properties will appear in the Properties Pane.
To edit the properties of a label
1.Click the ![]() to expand the Labels item.
to expand the Labels item.
2.Right-click the label you want to edit, and click Edit Label.
3.Adjust the label’s properties as required.
To rename a label
1.Click the ![]() to expand the Labels item.
to expand the Labels item.
2.Right-click the label you want to rename, and click Rename Label.
3.Type a new name for the label in the edit field.
To duplicate a label
1.Click the ![]() to expand the Labels item.
to expand the Labels item.
2.Right-click the label you want to duplicate, and click Duplicate Label. A copy of the label appears in the list.
To delete a label from your project file
1.Click the ![]() to expand the Labels item.
to expand the Labels item.
2.Right-click the label you want to delete, and click Delete Label.
3.In the Delete Confirmation dialog box, click Yes.