1.Click the View – Toolbars - Customize menu item.
2.From the Toolbars tab on this dialog, you can hide and display the toolbars, turn tooltips on or off and create new or delete existing toolbars.
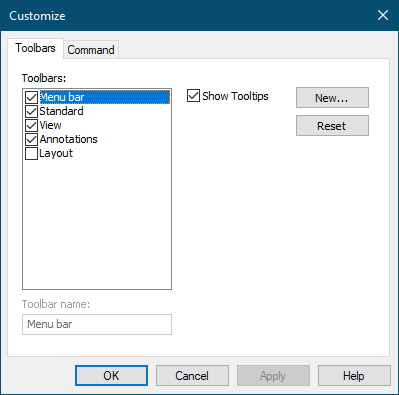
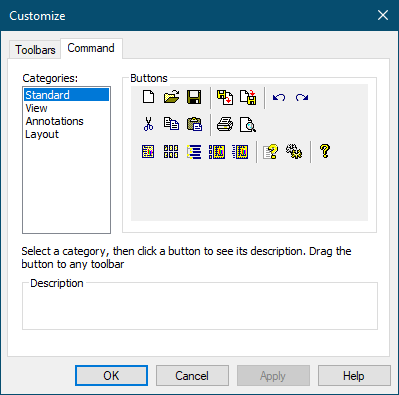
3.From the Command tab, you can drag buttons onto toolbars.
4.When this dialog is open, you can:
•customize toolbars by dragging buttons to new locations on other toolbars
•remove a button from a toolbar by clicking and dragging it off the toolbar
•add buttons back using the Command tab to access the individual toolbar buttons
•reset the toolbar to its original state by clicking the Reset button
Hiding and showing a toolbar
1.Click the View – Toolbars - desired toolbar menu item.
- or -
1.Click View – Toolbars – Customize.
2.Enable the checkbox beside the toolbar.
Creating a new toolbar
1.Click View – Toolbars – Customize.
2.Select New…
3.Enter a name for the toolbar.
4.Left - click and drag buttons from the existing toolbars onto your new toolbar, or use the Command tab to build your toolbar.
Moving toolbar buttons
1.Click View – Toolbars – Customize.
2.Left - click and drag the toolbar button to the desired location.
Removing toolbar buttons
1.Click View – Toolbars – Customize.
2.Left - click and drag the toolbar button off the toolbar.
Adding toolbar buttons
1.Click View – Toolbars – Customize.
2.Click the Command tab.
3.Select the Category that has the desired button. Left - click and drag the button from the Buttons section onto the toolbar.