
Convert Word to TIFF
Easily convert Word to TIFF with just a few clicks of the mouse!
As simple as printing, both our TIFF Image Printer and Raster Image Printer work with any Windows® application so you can quickly convert Word to TIFF in seconds.
Why Convert Word to TIFF?
There are several reasons to convert Word to TIFF images. One is to be able to share the file easily. Another is to protect the information in your Word files. TIFF images are very difficult to alter and can be viewed by virtually anyone. TIFF is a common format for faxing, and is often used in document imaging, document archiving and eDiscovery software.
How to Convert Word to TIFF
Below, we are converting a Word document to TIFF using the TIFF Image Printer. If you have the Raster Image Printer, your desktop icon will be a different color but the steps are the same.
You will see the TIFF Image Printer dashboard icon on your desktop after installing TIFF Image Printer on your computer. It does not need to be open to create TIFF images, but is the first place to go after installing if you need to find help or activate your license.
The dashboard is a central place to access printer settings, creating and editing custom printer profiles, video tutorial and help resources as well as license activation and information.

Open and Print Your Word Document
After installing and licensing, the first step is to open your document in Microsoft® Word.
Once open, the next step is to print the file. This can be a print icon or through File-Print from the application menu.
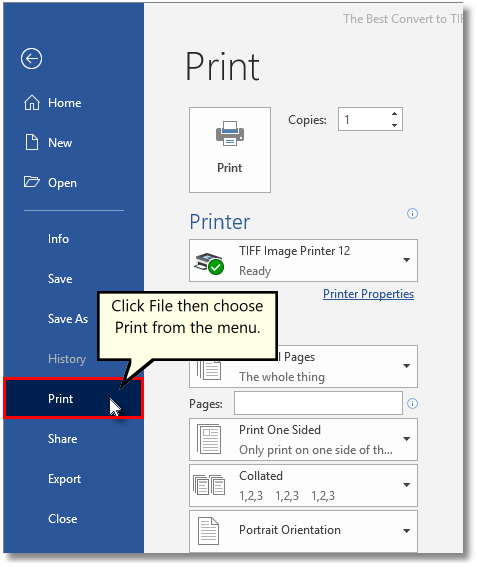
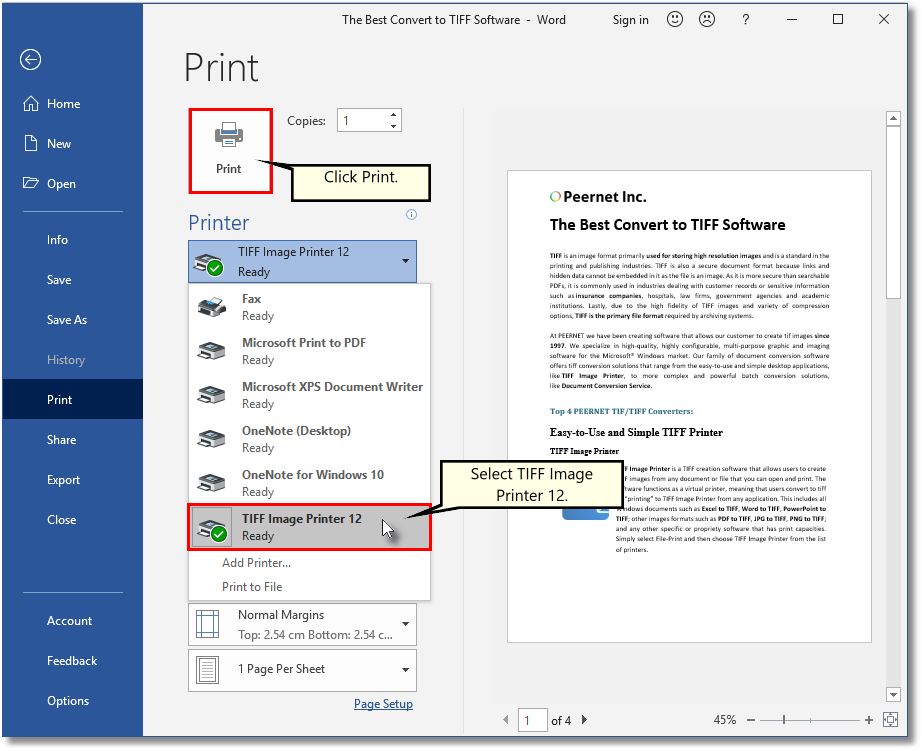
Microsoft Word will go to the Print view. From here, choose TIFF Image Printer 12 or Raster Image Printer 12 from the list of printers. Click the the Print button to send the file to our printer to convert it from Word to TIFF.
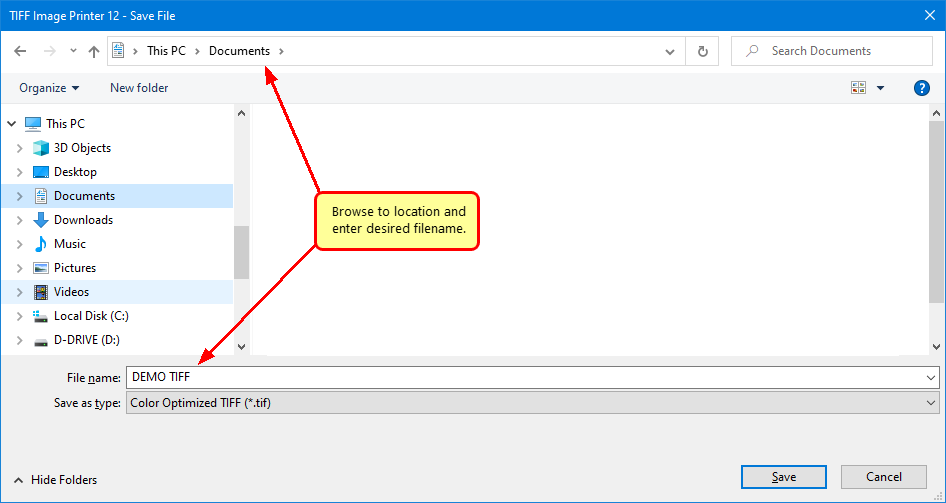
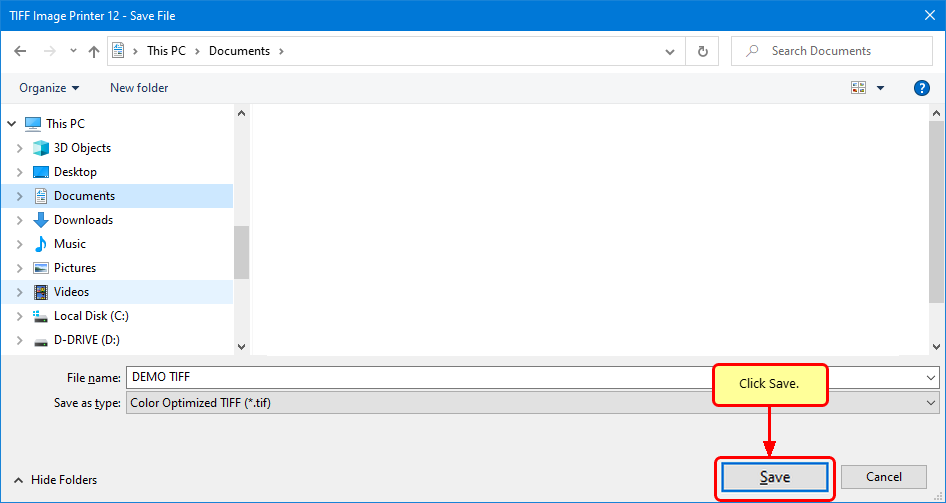
Setting Name and Location for Your TIFF Image
A Save File prompt appears so you can choose where to save your new TIFF image. The default location is your Documents folder.
The Filename field will show a name for your TIFF image using the original document name when possible. Enter a different name for your PDF file here if you want.
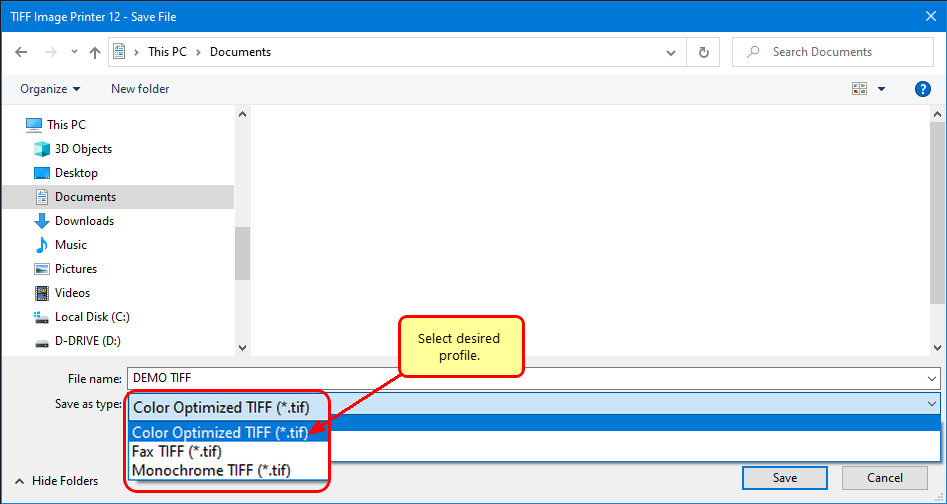
Choosing the Format of Your TIFF Image
Next, in the Save as type drop box, select the printer profile that you want to use to create your TIFF Image. For basic TIFF conversion we recommend starting with the Color Optimized TIFF profile if you are not sure.
A printer profile is a collection of settings controlling the image output created by the printer. TIFF Image Printer and Raster Image Printer both include several profiles for creating common TIFF formats, such as color, black and white, and faxable. To create custom profiles, see the the Profile Manager available from the Image Printer Dashboard
Creating Your TIFF Image
The last step is to click Save to create your TIFF image.
As easy as that and you have a TIFF image from your Microsoft® Word document.
Want to try it out? We offer a free trial for you to do just that. Plus the PEERNET Team is here to answer any questions during your trial.
Download the TIFF Image Printer trial to try it yourself if you are only looking for TIFF images. If you think you may need to create JPEG, PDF, and other image types as well as TIFF images, have a look at the Raster Image Printer trial.

