The Drop Files Converter desktop application is a simple utility that provides an area in which to drag and drop files, and if enabled, folders, to be converted. The type of file to be created and where it is stored can be customized. It includes advanced options to allow remote conversions and the ability to run a command on each newly created file when the conversion has completed.
This utility is provided as part of Document Conversion Service.
Running the Drop Files Converter Application
 |
Before you begin... |
Before running the application, follow the steps in Starting and Stopping the Service to start the Document Conversion Service. If the service is not started, a message stating "Waiting for service" will display when you try to convert documents. |
|
Open the application by going to the DCS Dashboard - Desktop Conversion - Convert Files and Folders.
You can also open the application by going to Start - All Programs - PEERNET Document Conversion Service 3.0 – Drop Files Converter.
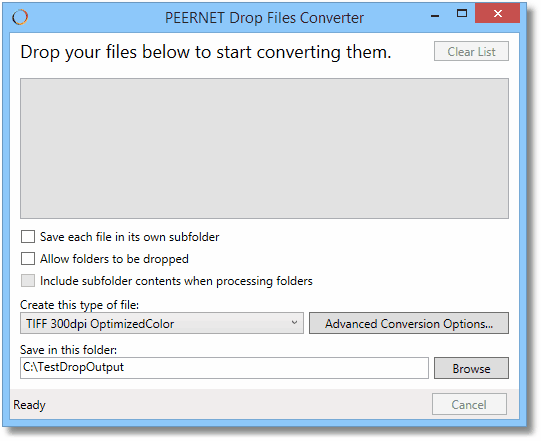
File and folders can be converted by dragging and dropping them onto the light gray drop area. This area changes to a darker gray color to reflect that a file or folder can be dropped.
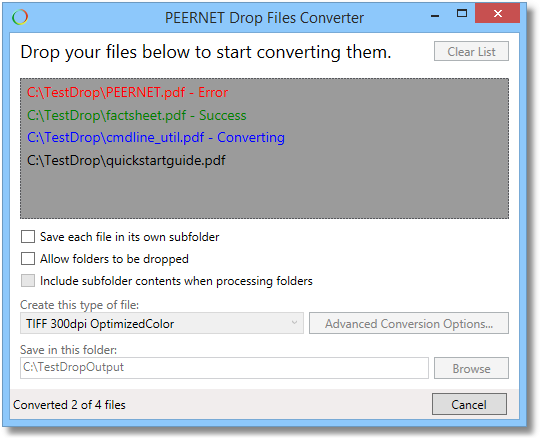
Once a file or a collection of files is dropped, the drop area stays dark gray and the conversion will start immediately and no more files can be dropped until the current collection has been converted. Conversion options are disabled and the Cancel button enabled. The Cancel button lets you stop converting a group of files, but cannot cancel the currently running conversion. The cancel action will take place after the currently converting file is finished.
As files are processed, information about their state is displayed in the drop area, and their color changed to reflect their status.
When the collection of files has been converted, the list of files can be cleared using the Clear List button in the upper right.
By default folders and subfolders are not processed, this option can be enabled if needed. Optionally, each file can be created in its own subfolder under the output folder.

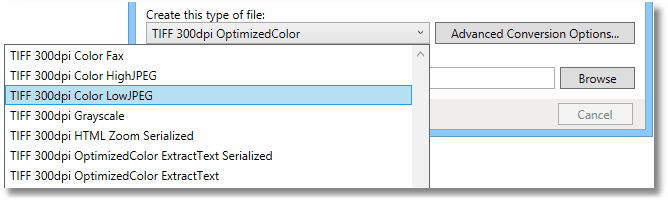
The type of output created is based on the conversion profile chosen. A selection of common conversion profiles are included with the Document Conversion Service install. See Creating and Customizing Profiles for more information about the contents of the profiles, a list of profiles included with Document Conversion Service, and how to create your own.
The application uses the file extension of the source file to determine what converter to use to convert the file. The default file extension to converter mapping provided through the PEERNET.ConvertUtility.dll is used. As with profiles, this file extension mapping can be customized, but rarely needs to be. See the section File Extension to Converter Mapping for details.
Advanced Conversion Options
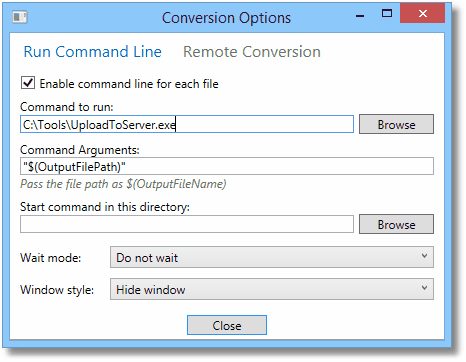
The application includes some advanced options for running a command on each successfully converted file as well as allowing remote conversion. You can switch between these options by clicking on the text at the top of the window.
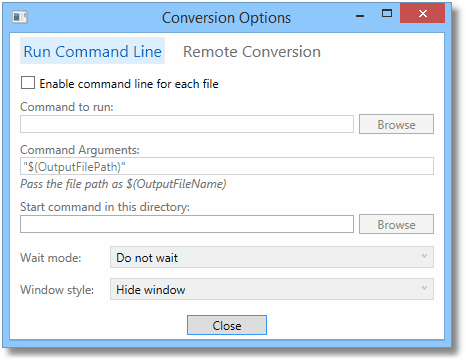
Run Command Line
When enabled, the command line will only run for successfully converted files. A command is normally another executable, batch file or other command line program. Type in your command or use Browse button to select it.
To pass the path of the created file into your command, use the macro name $(OutputFilePath). If needed, command arguments should be enclosed with quotation marks, especially if they have spaces in them.
When running a command there are options guiding whether or not to wait for the command to complete before moving onto the next file, and controlling how the command window is displayed, if at all.
Wait Mode |
Wait for command to complete before continuing - wait for the command to complete before continuing on to the next file. Wait for command to complete and return error code - waits for the command to complete before continuing on to the next file and shows the exit code in the file status. Do not wait - does not wait for the command to complete. (Default) |
Window Style |
Normal - display the window in its normal state. Min - display the window minimized to the taskbar Max - display the window maximized. Hidden - do not show the window. (Default) |
The default settings for this are to hide the command window and to not wait for the command to complete. When first adding a command, it can be helpful to display the window and wait for the command to complete to ensure that it is working as expected and that arguments are being passed correctly. Once this has been determined, it can be set back to hidden and to not wait.
If the command line settings have been enabled, the file status in the drop area will change to reflect that a command is being run as part of the conversion process.
Remote Conversion
You can also use this sample program to test remote document conversion where Document Conversion Service is installed on a different computer. See the steps in Setting up Client-Server Conversion to learn more about setting Document Conversion Service up in this environment.
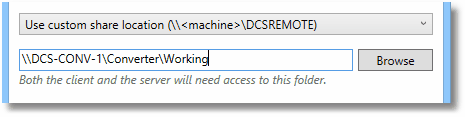
For remote conversion, you will need to know the name of the server where Document Conversion Service is installed and running, and a temporary conversion folder that is accessible to both the client and the server is required. A network shared folder named DCSREMOTE is automatically created on the server as part of the Document Conversion Service installation and can be used as this temporary conversion folder, or a custom remote folder chosen as needed.
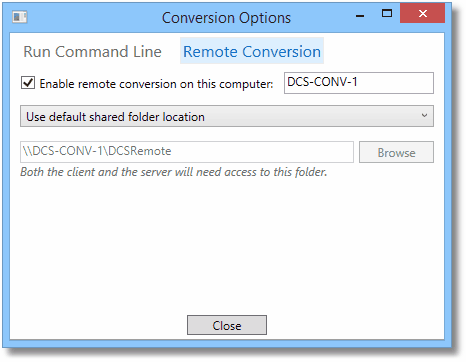
If you do need to use a custom share folder, select the second option from the drop down list and provide the path to the folder.